*** Please stop by the new home page for new and updated content. ***
|
*** Please stop by the new home page for new and updated content. *** |
|
|
How I Save My iTunes Jan. 06, 2005 Tools needed (all free): MP3 Tag Studio (I use registered version) a program to convert music files to a different formats. There are many, I use dBpower Amp Music Converter (Free version available, I use the registered Power Pack + MP3 encoder)
Since this story broke I've seen numerous people complain about the restrictions placed on the files for iTunes. I thought I would share my method of backing up my own iTunes to another (non-restricted) file format (pick your own reason for doing this). There is nothing new or earth-shattering here for geeks but it's something your non-geek friends might like to see. While there are various ways to do this (and I'm sure some audiophiles will have a cow), this works well for me. I use this method often (usually every 10 songs purchased or so) so as not to make the task a huge one. Even if you don't use the exact method I describe I hope it gives you an idea on how to do this yourself. I wrote this very quickly so strap yourself in! Before we get started, download and install the above tools.
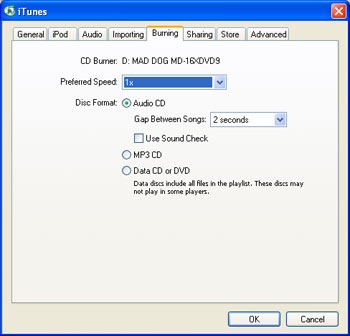
Burn It To CD After I purchase a few songs I burn them as a regular music CD. First (as with all music CD's), you should lower the CD burning speed as low as you can go (4X or lower if you can). In iTunes go to the toolbar at the top and choose Edit > Preferences > choose the Burning tab > and change the Preferred Speed as low as you desire > While your here, ensure Audio CD is selected under Disc Format > click OK to exit.
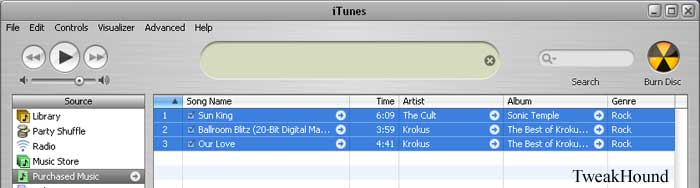
Next open your Purchased Music section (or whichever section the files you want to burn are in), select all songs (or as many as will fit on a CD) and click Burn Disc.
Convert It (this section is for dBpower Amp, skip this to use your own conversion program)
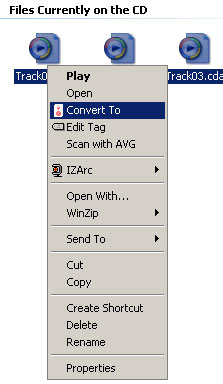
Once finished open My Computer, right-click on the drive with your music CD and choose explore...
Right-click on those highlighted files and choose Convert To...
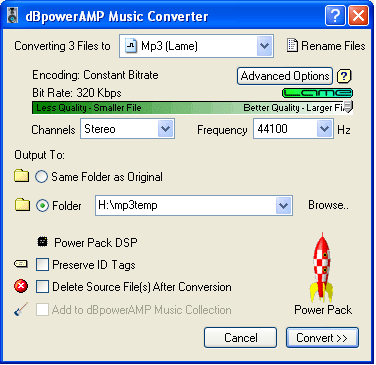
Make a new folder called mp3temp any place you like. Choose your settings, and place to save files (mine are below)and click the Convert button...
Rename The Files The files will be named "track1.mp3" etc. Right-click on each one and choose Rename. Change each name to the appropriate title. Ensure you DO NOT change the name of the extension, in this case .mp3. The naming convention you use is up to you. I use caps for the band (because I like the way it looks when displayed) and a " - " with no spaces to separate the name and song title. For instance:
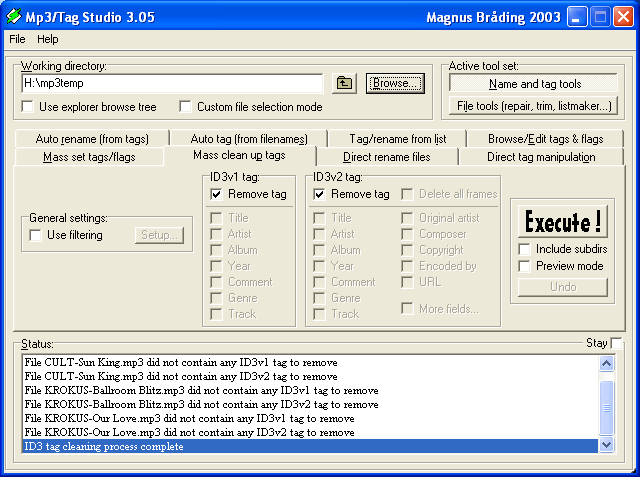
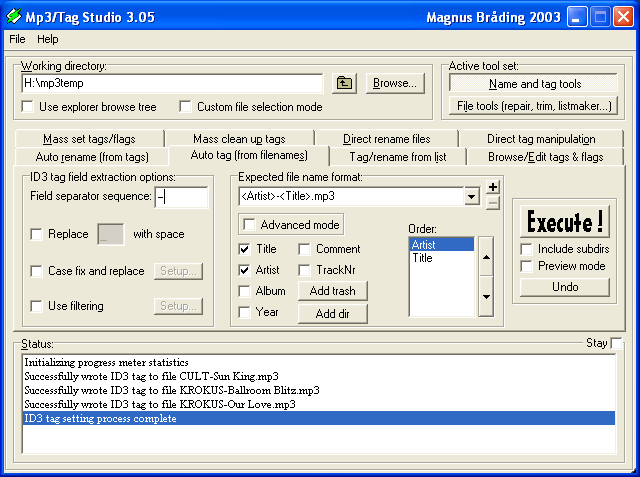
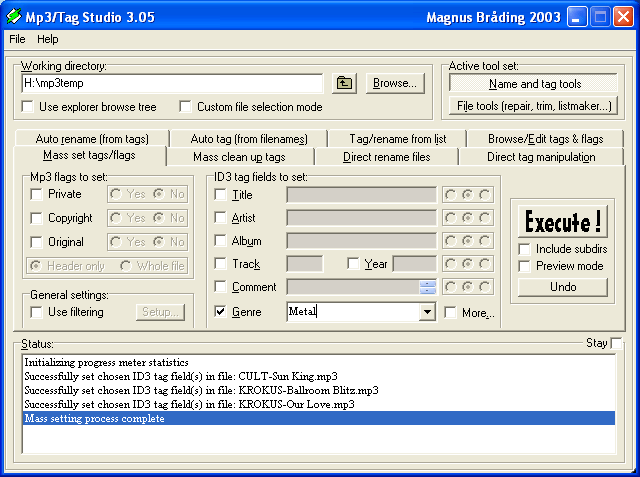
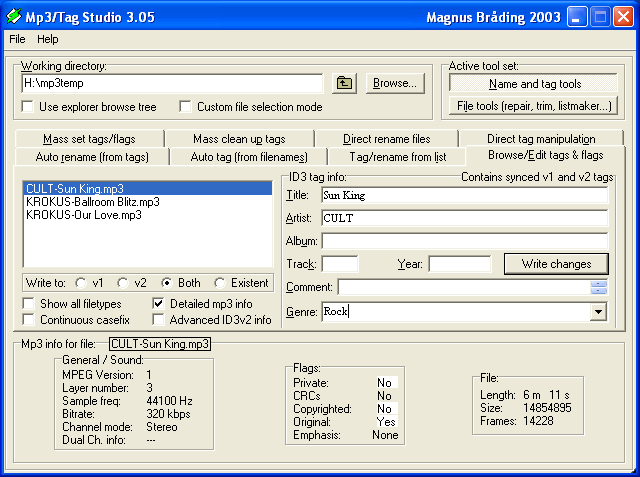
Tag It MP3 files have "tags". These allow information to be stored about the song (album title, genre, etc.). You can add as much or as little info as you like. Me, I stick with just the file name and genre ( I make up my own) but you may want more. Open MP3 Tag Studio. You can set the various options to your preference. Below is what I do. I'll let the pictures do the talking: Clean up any tags that may be there
Set the basics
Add something else
If everything else is the same for each file
If things are different for each file
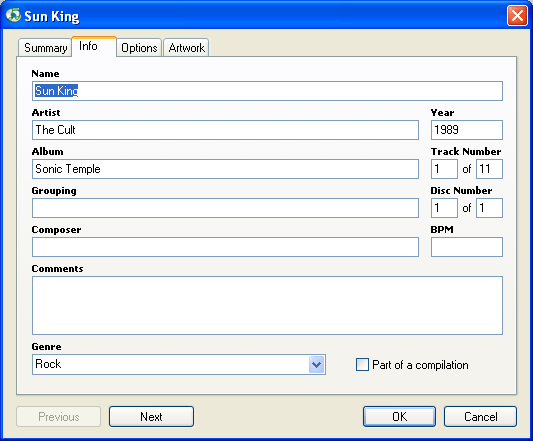
You may want to set options beyond the basic artist/title/genre. To find that info, open iTunes and go back to Purchased Music section (or whichever section the files used are in). Right-click on the file and choose Get Info. A screen will pop up, click the info tab:
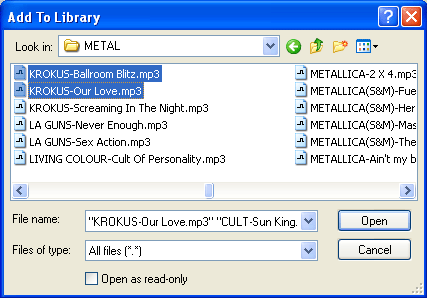
Adding these files to your iTunes (optional) I don't use the Apple file format for any of my iTunes or iPod, everything is unrestricted MP3's (for a variety of reasons). So, I need to add these files to iTunes so that it can update my iPod. First transfer the files from where you were working (mp3temp etc.) to the folder where you store your music (copy and paste). Next add these to iTunes. At the top of the iTunes toolbar, go to Files > Add File to Library > navigate to the folder where you saved the files, highlight them ( hold Ctrl key + left click for multiple files) > click the Open button.
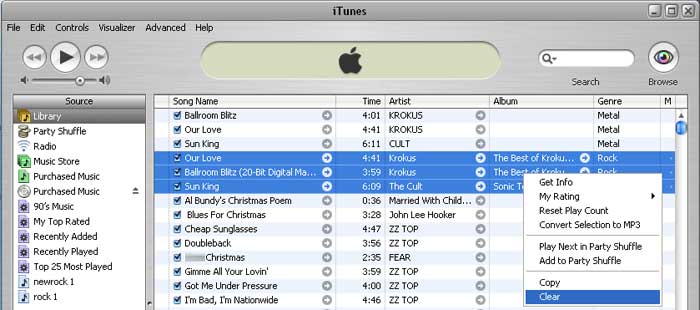
If you are like me and do not want the purchased files you've just converted in your library (added by default), find these files in your library, right-click on them and select Clear.
You're done!!!
Questions, comments, rants, flames? (aside from the fact you don't like my music) Contact me at " etc " at this domain.
|
|
|
TweakHound - Optimize Your Computing Experience!
|