 Cataloging Your Music Collection
Trying to get that music collection in order? This guide is for you.
There are many reasons to catalog your music collection such as:
1 – Proof of ownership for insurance.
2 – Figuring out who borrowed a CD or Album and didn’t return it.
3 – Organization.
Cataloging Your Music Collection – MP3’s
Part 1 – Getting those tracks organized.
Software needed: Mp3tag (freeware). Filetypes supported: AAC, APE, FLAC, MP3, MP4, OGG, WMA, and others.
Optional software: I also use another program called dBpoweramp (not free).
***Before you begin, BACKUP your music. If you make a mistake in these steps you can make a file unidentifiable by file name or tag.
***You’ve been warned.
Most digital music uses tags to store information about a file. These can include a wealth of information. For those unfamiliar with tags see this wiki article.
In a nutshell, tags contain information about the song. Some of this information is useful, some not so much. Tags can show things you may not want, i.e. where a file came from or song rating. Those of you you get your music from, umm… “unofficial” sources can have really messed up tags.
Below is an example of some of the information that can be stored in a tag:
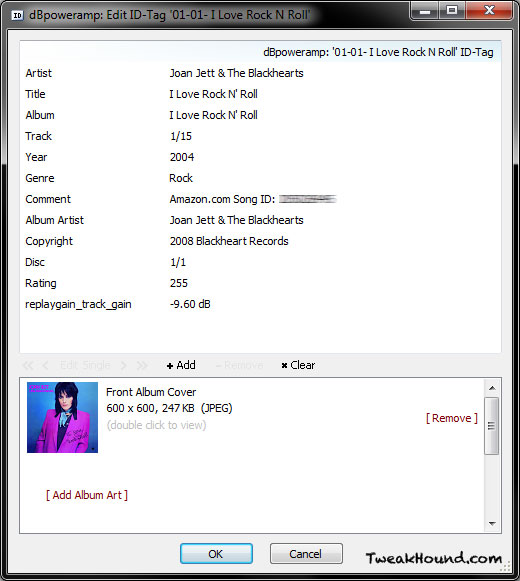
*note – From what I understand the replaygain_track_gain tag above is part of the LAME header and can’t be removed.
Part 1a – Cleaning your tags.
Each section of a tag is called a field.
See this page for a list of fields: Tag field mappings
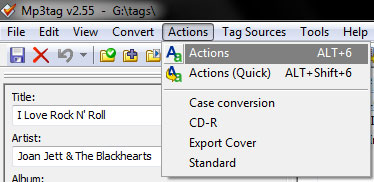
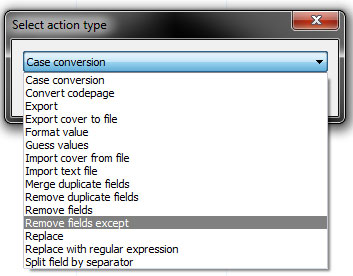
I like to remove all fields except the ones I desire. To do this I use a Mp3tag feature called Actions.
We need to create a new action.
Open Mp3tag, highlight the file or files you wish to work on. Go to Actions > Actions.
(See: Mp3tag – Remove fields except)
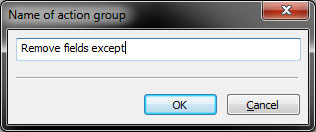
Create a new Action group

I called it Remove fields except
Add an Action to this group
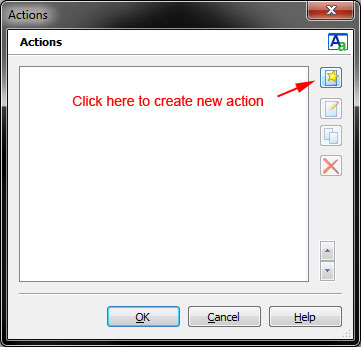
Choose Remove fields except
Enter the fields (semicolon-separated) that you wish to KEEP.
I use ALBUM;ALBUMARTIST;ARTIST;BITRATE;FILETYPE;GENRE;PICTURE;TITLE;TRACK;YEAR
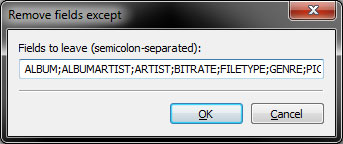
Click OK to exit out of everything. You can now use this action whenever you desire.
Part 1B – Renaming Files
Wherever you get your digital music from most likely the way the files are named are often not ideal.
My personal preference is to use the format Artist – Title, i.e. Beach Boys – California Girls.mp3
The first step in getting those files names straight is making sure the tags are right.
We are going to use the free program Mp3tag for this. After downloading the program, install and open it.
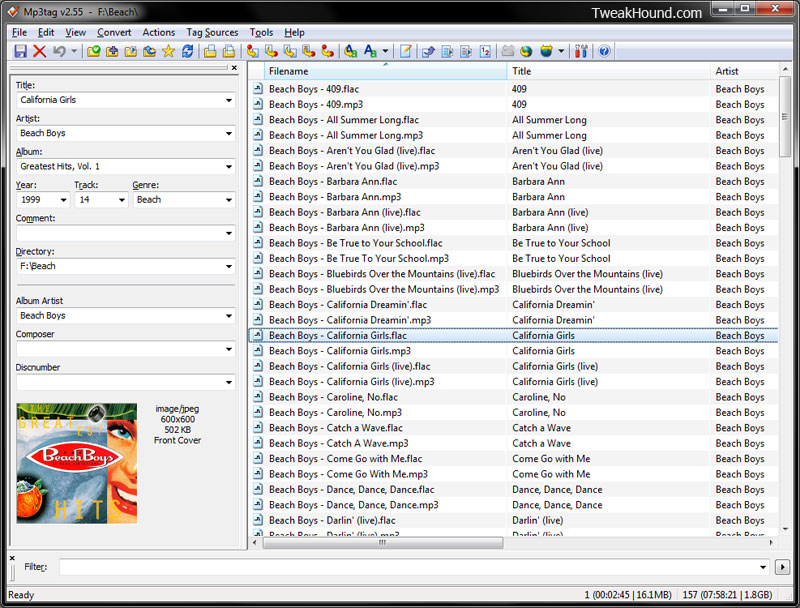
Go to File > Change directory and navigate to the folder where your music files are stored.
Now hopefully your tags aren’t too messed up. For each file, check that the Artist and Title fields are as you desire.
Next we are going to use the Mp3tag process Convert.
(More info: How to rename files based on tags)
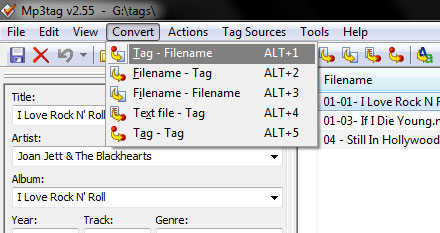
Select a file or files. Go to Convert > Tag – Filename.
In the following box you will choose which tags to use to create the filename.
The information you will enter is the name of a field in the tag.
See this page for a list of fields: Tag field mappings (note – in the box we are using, each field name should be surrounded by a % sign)
Since I want the file to be Artist – Title I use the fields %artist% – %title%
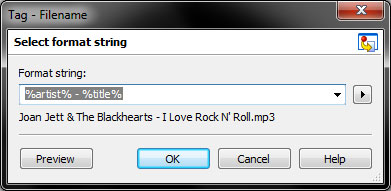
Hit the Preview button if you desire or you are unsure of the changes. Click OK to rename the file.
Now doesn’t that look better?

See Also: Finding Good Album Art
– – – – – – – – – –
Cataloging Your Music Collection – CD’s
There are a number of programs that will help you catalog your CD program, both free and not.
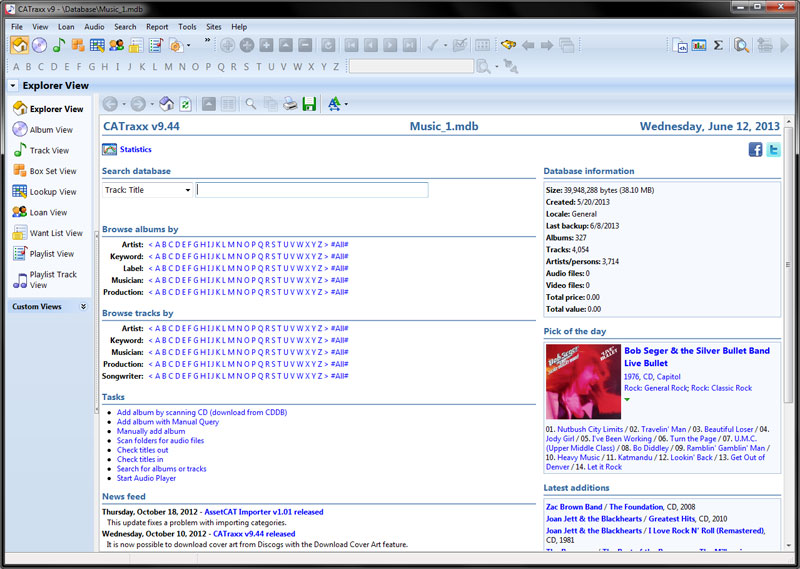
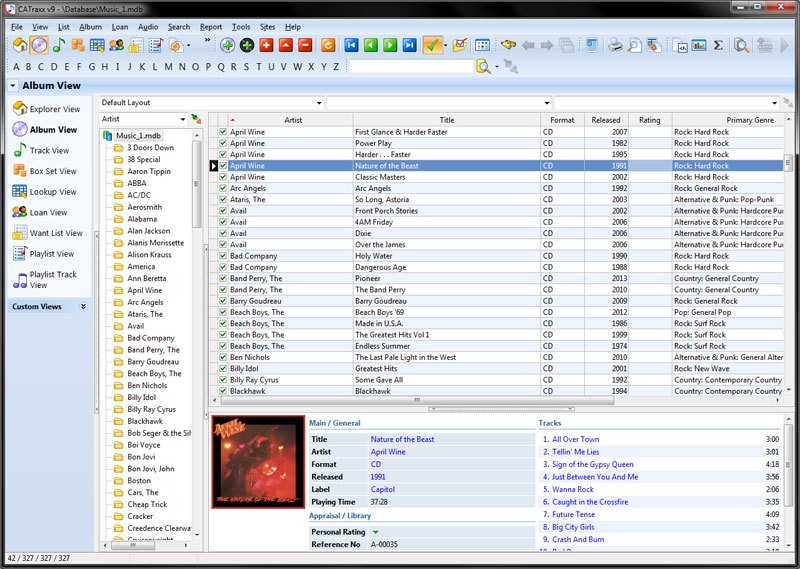
I use a program called Catraxx. This is a pay-for program that has a free 30-day trial. However the author has closed his store and I can’t get an answer as to when it will reopen.
I use Catraxx because I wanted a way to integrate my Vinyl collection as well as be able to print out reports in a variety of formats.
Many of these programs have a feature called a Loan Manager (or similar) that you may find of use.
Alternatives Free:
Data Crow – Requires Java.
Alternatives Non-Free:
Collectorz Music Collector
You don’t need a guide for this. Basically all the programs work like:
1 -Insert CD
2 – Program queries online databases, finds your CD, downloads info.
3 – Allows you to edit that info.
4 – Saves it.
* One thing to watch for. In most of these programs there is a field called Memo or Notes. These fields are often filled with garbage. You may wish to edit these or add Notes of your own.
Below are some screenshots from Catraxx:
– – – – – – – – – –
Cataloging Your Music Collection – Vinyl LP’s
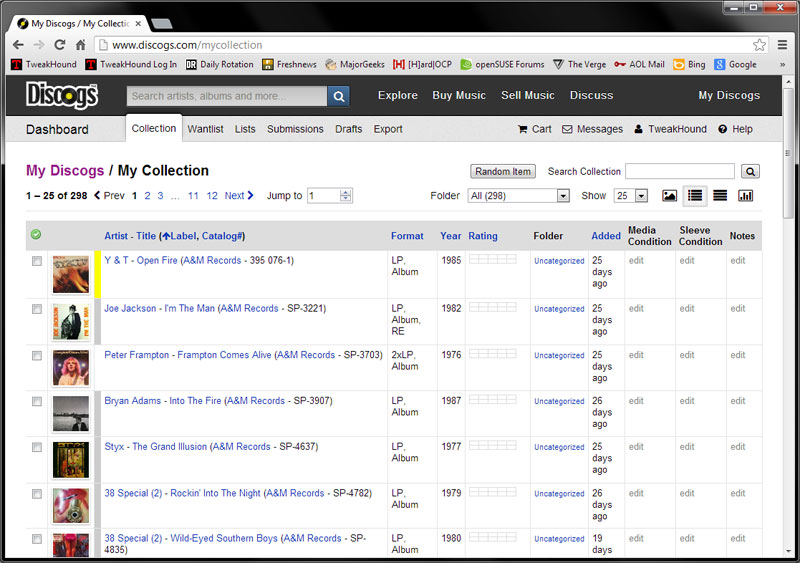
Discogs is the defacto site for cataloging your Vinyl. While other programs may query the Discogs database, using Discogs directly is faster and easier than every one of them.
How Discogs works:
1 – Sign up.
2 – Start a collection.
3 – Find your specific album (by artist, album, cat#). This is done most efficiently by using the catalog number on the side of the album cover and/or the LP itself.
4 – Add that album to your collection.
Collections can be exported and shared with others.
My collection is here: https://www.discogs.com/user/TweakHound/collection
As I had mentioned in the CD section above, I use Catraxx to organize my collections. I can import my Discogs vinyl collection into Catraxx. To do this you’ll need the Catraxx importer addon. I can merge it with my CD collection if desired. I can also export it from Catraxx into a variety of formats for reporting.
Discogs My Collection Window:
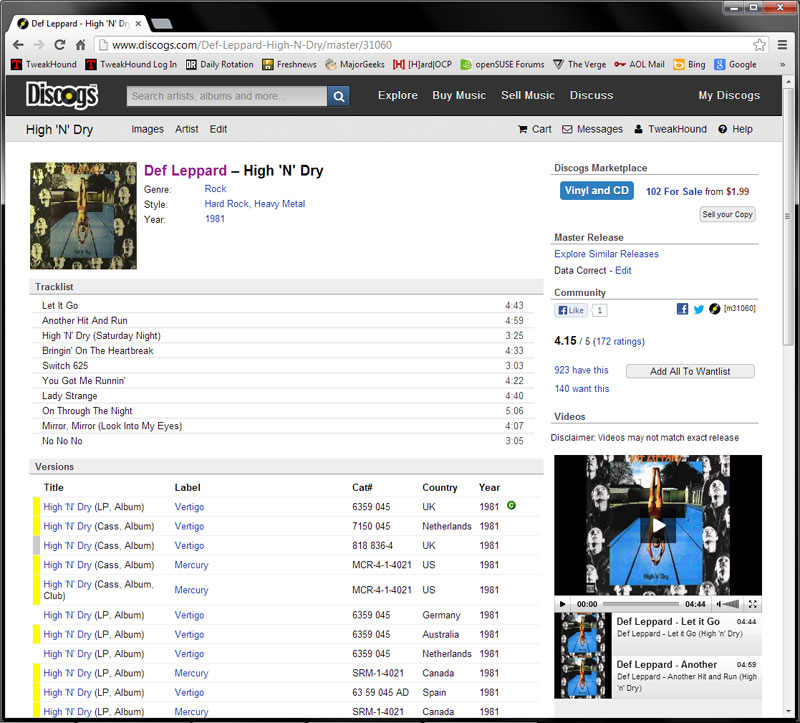
Discogs, searched for Artist (Def Leppard), the Album (High ‘N’ Dry):
– – – – – – – – – –
Saving And Printing Your Music Collection
All cataloging programs allow you to save/backup your database. You should do this in a variety of methods and places. If you are saving this information for insurance purposes then you should upload it to your online accounts (dropbox, skydrive, etc.) in case the worst happens.
MP3’s
For my mp3 collection I use Mp3tag to export my collection to csv and html though other formats are available.
To do this open Mp3tag and go to File > Export.
For HTML there are a variety of templates available. See: Mp3tag – Export Configuration Archive
I created my own template (If you want it just send me a note). You can view my collection starting here: https://www.tweakhound.com/music/mp3/index.html
MediaMonkey – If you are a MediaMonkey user you can also export your collection. Go to File > Create Reports. More templates are here: MediaMonkey/Addons/Reports
iTunes – For you unfortunate folks using iTunes. You can export your collection via File > Library > Export Library. You can print it via File > Print.
CD’s and Vinyl
Catraxx
Catraxx automatically backs up your database. In addition you can export your database to a variety of files types via File > Export. The export to HTML feature is rather nice and allows you to choose what to export. You can view my collections here:
CD’s – https://tweakhound.com/music/cd/index.html
Vinyl – https://tweakhound.com/music/vinyl/index.html
– – – – – – – – – –
Conclusion
This concludes my journey into organizing and cataloging my music collection. I hope you find the information here useful.
If you’ve got any tips please post them.
Links:
My Digital Music Collection By Genre: Beach, Country, Metal, New Rock, Oldies, Other, Rock, Southern Edge
Converting Vinyl Records To Digital Music – A Non-Audiophiles Guide
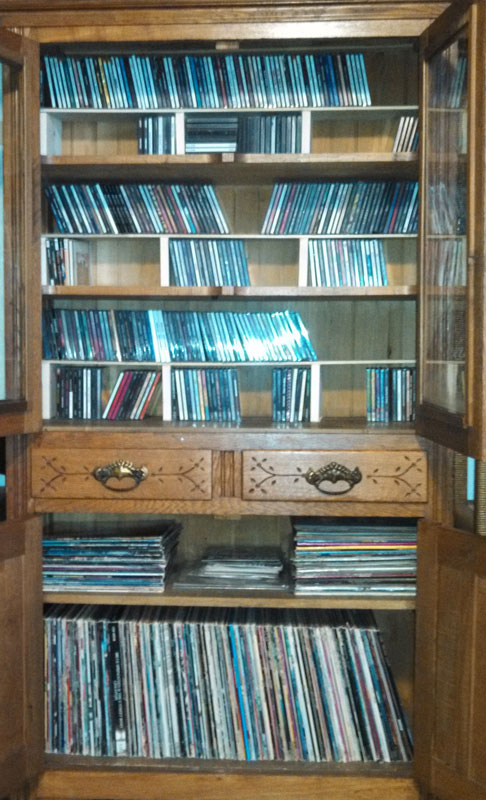
If you are cataloging for insurance purposes, be sure to include a picture of the physical media you have:
-END-