
This is how I dual-boot my Windows 10 rig with openSUSE Leap.
This article is virtually unchanged from: Dual Boot openSUSE 13.2 and Windows 8.1 UEFI
Notes:
– BACKUP your computer with a disk image before attempting this!
– Please do not contact me with questions on this topic.
That’s what the openSUSE forums are for.
– For how I dual-boot with a standard BIOS (legacy) see here: Dual-Boot openSUSE 12.3 And Windows (article is NOT compatible with BTRFS)
Interesting Links
openSUSE:UEFI
BCD System Store Settings for UEFI
Dual booting with Windows 8, not as painful as expected.
Preparation
1 – Full disk image backup using Acronis True Image.
2 – Make or leave unpartitioned space on OS drive for openSUSE. (If you can’t do this without a tutorial, well…..)
3 – Make UEFI boot usb flash drive with Rufus.
Installation
Pardon the odd screenshots. I used Vmware player for this article.
I should note that I am not a believer in using multiple partitions for my Linux installs.
Boot up, go through setup until you get to the partitioning section.
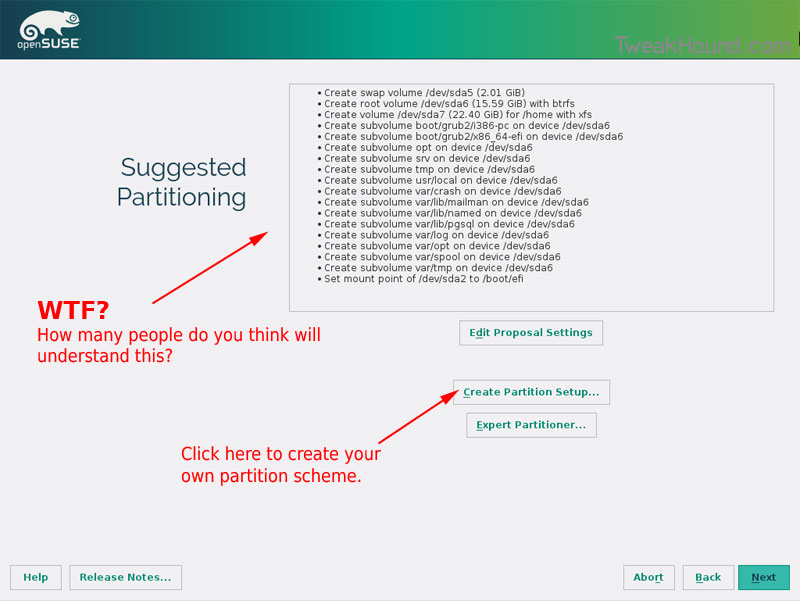
I do not use BTRFS and I always use Create Partition Setup…
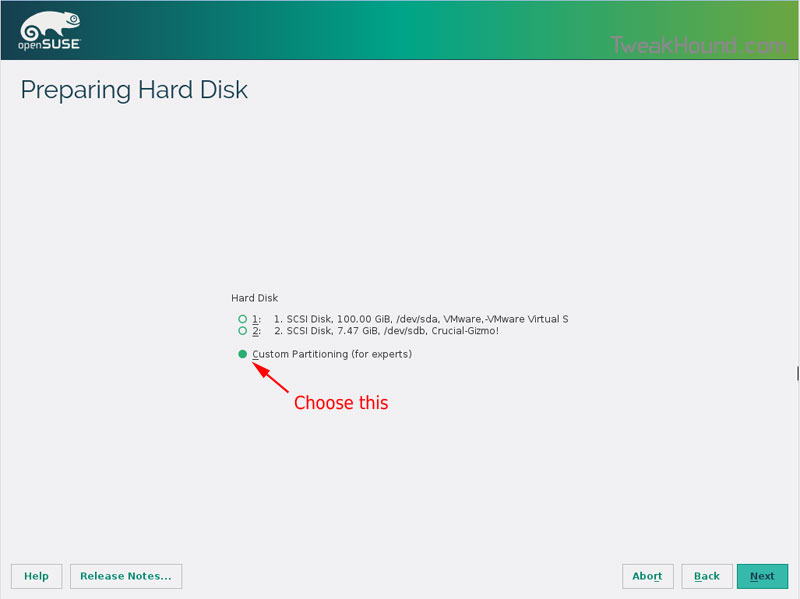
Choose Custom Partitioning (for experts) and click Next
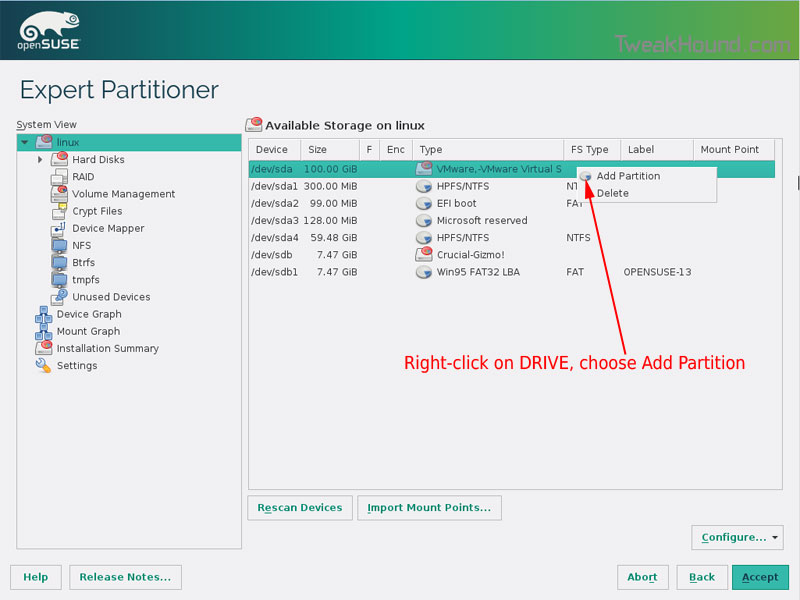
Right-click on the DRIVE where you want to install openSUSE and choose Add Partition
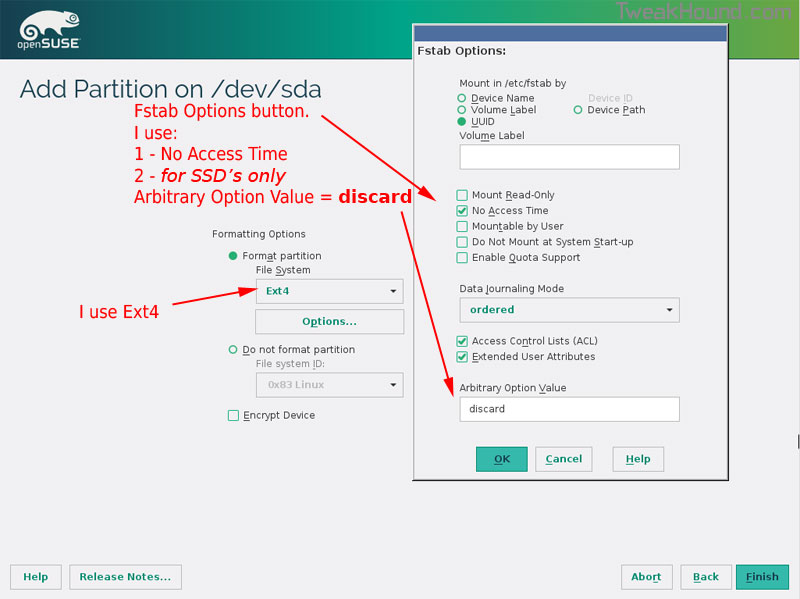
Make a swap partition, 2-4GB is fine.
Below are the options I use. Ext4 for file system, noatime, discard* (=trim)
*note – I am not using discard at the moment because it was causing errors on my Samsung 850 Pro SSD.
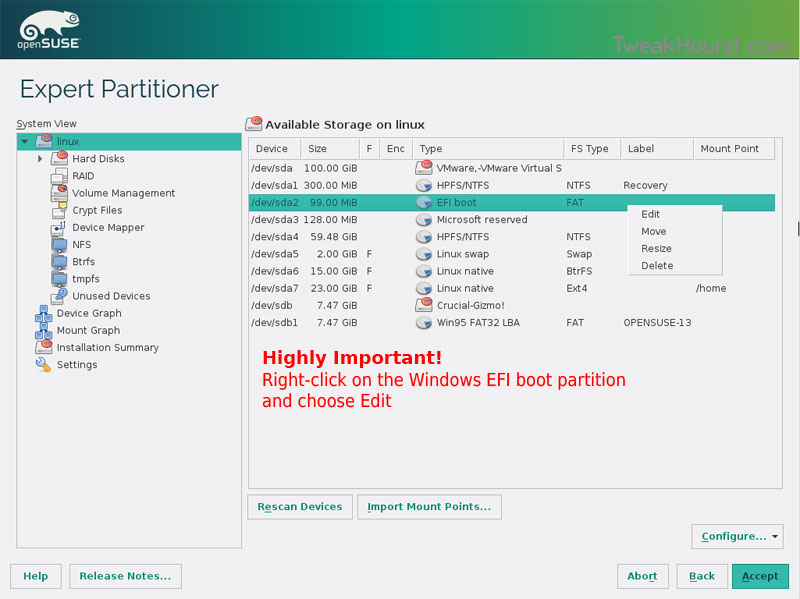
This next step is critical as your system will not boot without it.
Right-click on the Windows EFI boot partition and choose Edit
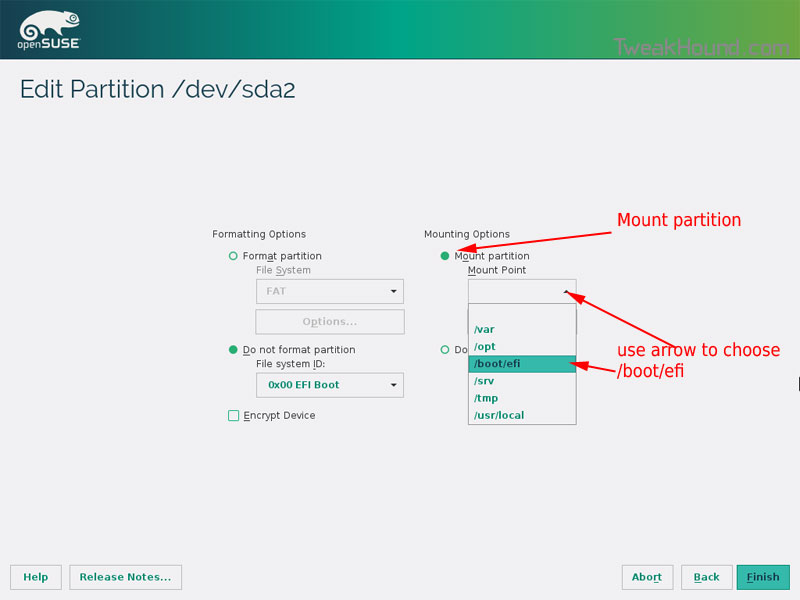
Choose Mount partition
Choose /boot/efi
Click Finish
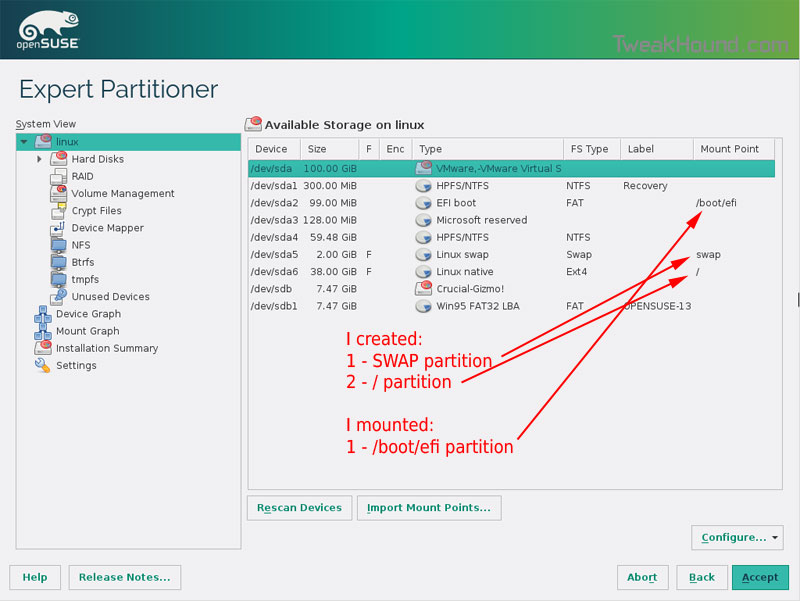
Done? click Accept
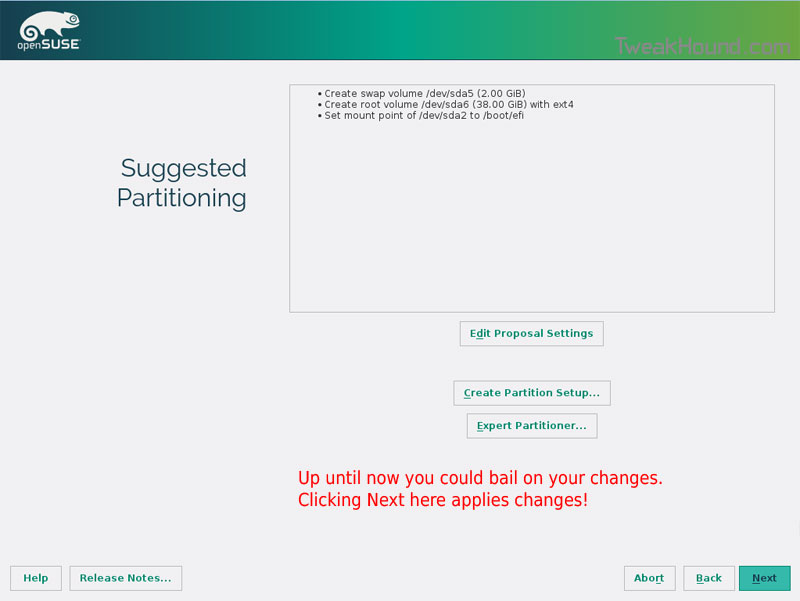
Last chance to bail…
Click Next
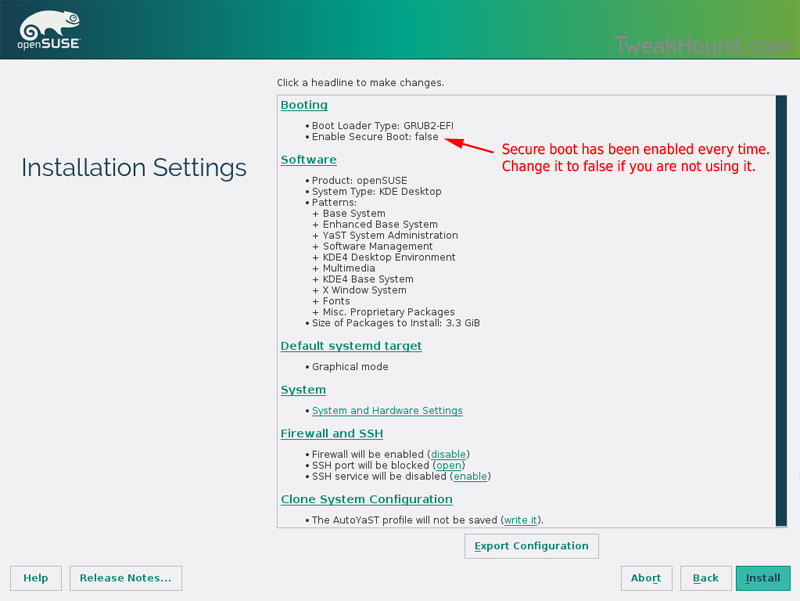
I don’t use Secure Boot. It can be disabled here:
Boot Screen:

Everything should run just peachy until you boot into Windows again.
Windows will usually try and make its bootloader default again which means openSUSE isn’t an option.
While in Windows, open an Elevated Command Prompt and copy/paste this command (source):
bcdedit /set {bootmgr} path \EFI\opensuse\shim.efi
That’s it!
are you serious with this post dude?
Hi Eric !
Thanks a lot for your article concerning Dual Boot.
Following your guidelines, everything has worked fine on my notebook (ACER Aspire V13 / Windows 8.1), but
I did not get the grub boot menu when running a restart (openSuSE Laep 42.1)!!!
I’ve got the grub prompt, instead.
Please see also : https://en.opensuse.org/openSUSE:UEFI
By default, the firmware will search /EFI/BOOT/bootx64.efi as the
extension that will load and execute in order to load the operative system.
In Windows machines, the correct extension is in
/EFI/Microsoft/Boot/BCD.efi, and for openSUSE is /EFI/opensuse/grubx64.efi
or shim.efi if we have secure boot enabled) .
For you have decided not to use “secure boot” the right command, you have
to run on Windows CLI is
bcdedit /set {bootmgr} path \EFI\opensuse\grbx64.efi
And that has worked as expected !
The system now starts with the grub boot menu.
Kind regards
Horst-Werner
this is a great artice, i used this as a guide, although I did some things slightly different… difference of hardware I used the bios options to point to the grub boot menu… thanks for taking the time to create these articles, very helpful indeed..!
i cannot add partition on my primary harddisk.