 Windows 8 disk cleanup introduced a new cleanup option called Windows Update Cleanup.
Yesterdays Windows updates included an update to add this option to Windows 7.
This cleanup option can regain you significant disk space in Windows 7 and Windows 8 will benefit as updates pile up.
This article will show you how to use this option in both Windows 7 and 8.
Windows 7
As I said earlier, a new update was released yesterday to add the Windows Update Cleanup to Windows 7.
In her article on the subject, Mary Jo Foley provided a link to a MS Blog with valuable info that is the source of some of the info in this post:
Ask Premier Field Engineering (PFE) Platforms Blog:
Breaking News! Reduce the size of the WinSxS Directory and Free up Disk Space with a New Update for Windows 7 SP1 Clients
This article has tons of good info and is a must read for any GEEK.
Step 1:
First you’ll need to download the update via Windows update.
Look for: Update for Windows 7 (KB2852386) or Update for Windows 7 for x64-based Systems (KB2852386)
OR
Download the update manually:
Update for Windows 7 (KB2852386)
Update for Windows 7 for x64-based Systems (KB2852386)
Knowledge Base Article:
Update is available that enables you to delete outdated Windows updates by using a new option in the Disk Cleanup wizard in Windows 7 SP1
Step 2: Start Disk Cleanup
Some important notes from the PFE Blog:
– If nothing is found for Windows Update Cleanup to perform, it will not show up as an option.
– After performing this cleanup, you may not be able to uninstall any of the updates currently applied. However, if you need to rollback to a previous version, you can still manually apply the previous version of the update.
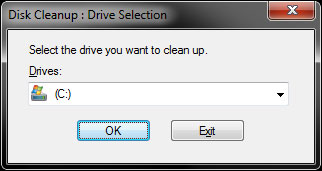
Next fire up Disk Cleanup:
If you have UAC enabled – Start > All Programs > Accessories > System Tools > right-click on Disk Cleanup and choose Run as administrator .
OR
If you have UAC disabled – Start > All Programs > Accessories > System Tools > Disk Cleanup .
or
If you have UAC disabled – press the Windows + R keys and type cleanmgr .
Click OK.
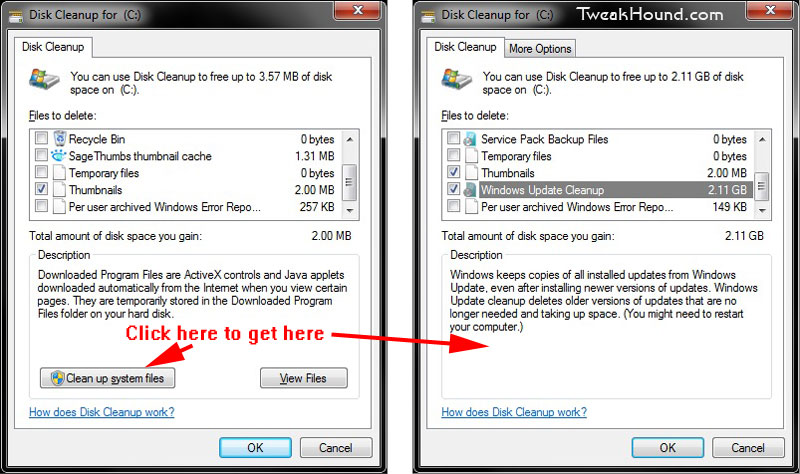
If you have UAC enabled:
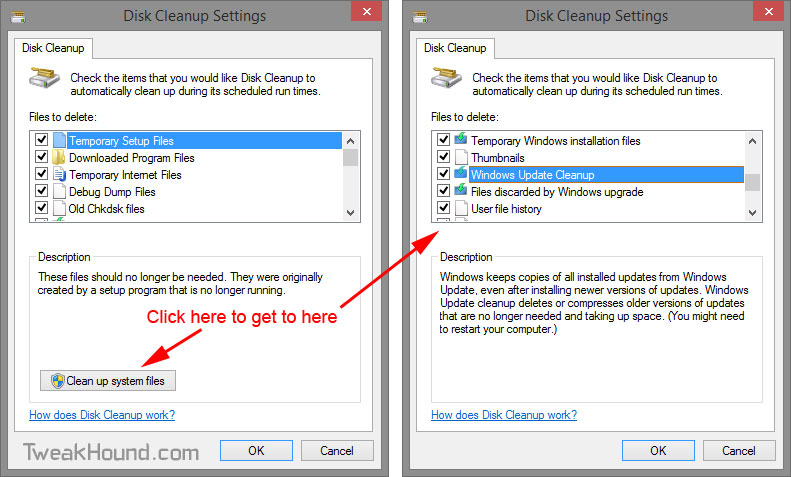
You have to click the Clean up system files button to get to the Windows Update Cleanup option (this basically runs cleanup as admin).
Check the box next to Windows Update Cleanup > click OK > after cleanup, Reboot .
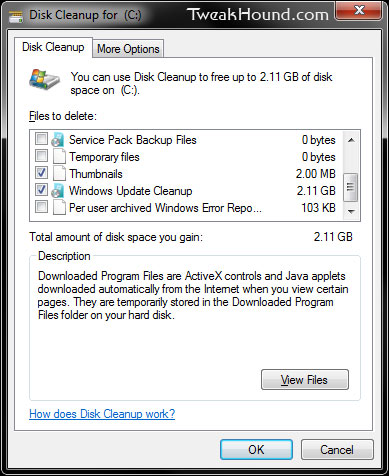
If you have UAC disabled you are already running disk cleanup as admin.
Check the box next to Windows Update Cleanup > click OK > after cleanup, Reboot .
Windows 8
The Windows Update Cleanup option is already part of Windows 8.
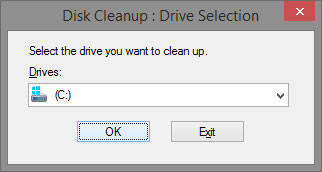
Start Disk Cleanup:
Press the Windows + R keys > type cleanmgr . (You can also run this command as admin from an elevated command prompt.)
OR
Type cleanmgr (or disk cleanup) in the Search Charm box.
Click OK.
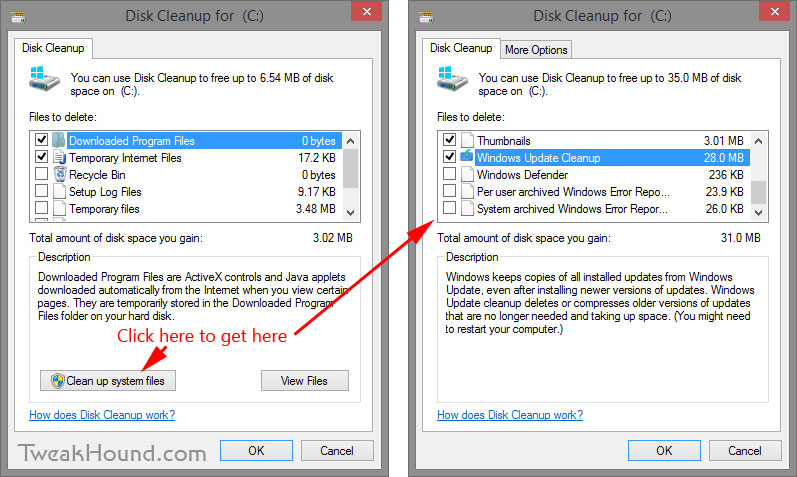
Click the Clean up system files button > check the Windows Update Cleanup box >
click OK > after cleanup, Reboot.
note – If you run disk cleanup as admin the Windows Update Cleanup option will show on first screen.
Adding Windows Update Cleanup To Advanced Cleanup
Regular readers here have known about advanced disk cleanup for many years from my tweak guides.
You can add the Windows Update Cleanup to it.
Windows 7
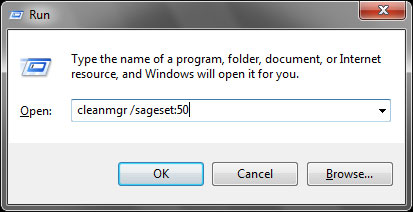
Press the Windows + R keys > type cleanmgr /sageset:50 .
(note – the number can be any number from 0 to 65535. I use 50 because it is easy to remember.)
Click OK.
If you have UAC enabled then check all the options you desire in the first screen >
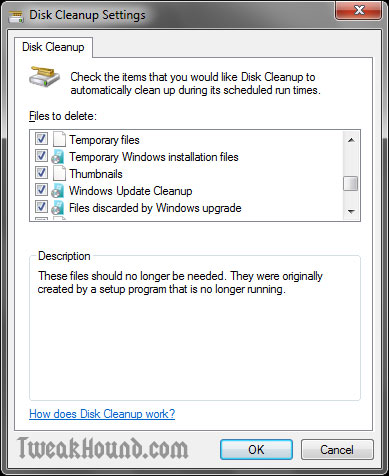
next click the Clean up system files button > check the Windows Update Cleanup box plus any others you desire >
click OK .
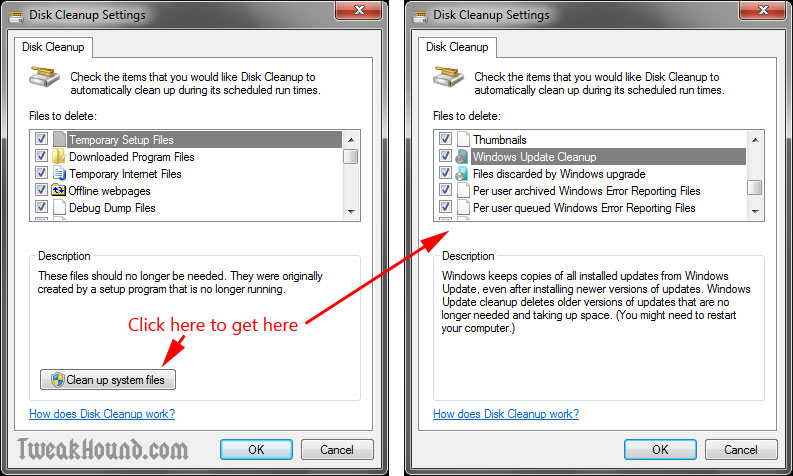
If you have UAC disabled then check the Windows Update Cleanup box plus any others you desire > click OK .
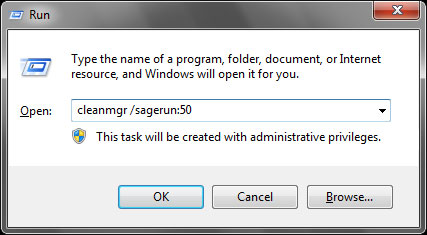
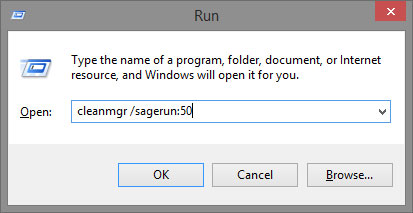
Press the Windows + R keys > type cleanmgr /sagerun:50 .
*note – it is sagerun, not sageset as before.
Click OK > after cleanup, Reboot.
Windows 8
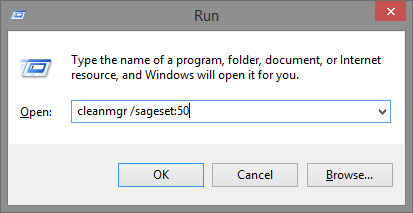
Press the Windows + R keys > type cleanmgr /sageset:50 . (This can also be run from an elevated command prompt)
(note – the number can be any number from 0 to 65535. I use 50 because it is easy to remember.)
Click OK.
Check all the options you desire in the first screen > next click the Clean up system files button >
check the Windows Update Cleanup box plus any others you desire > click OK .
***WARNING – DO NOT check the box next to Windows ESD installation files, “You will need these files to Reset or Refresh your PC“.
Press the Windows + R keys > type cleanmgr /sagerun:50 .
*note – it is sagerun, not sageset as before.
Click OK > after cleanup, Reboot.
FAQ’s
The Windows Update Cleanup option isn’t there.
1 – You did not click the Clean up system files button.
2 – There is nothing to clean up.
The Clean up system files button isn’t there.
You are running disk cleanup as admin either by option or by the fact that you have UAC disabled.
-END-
Have You Found This Guide Useful?
Please help me keep helping you!