 This article will show you how to network openSUSE 12.3 with Windows XP, Windows Vista, Windows 7, and Windows 8.
It is assumed that you are using the openSUSE default desktop, KDE4 (you’ll need Samba client/server installed).
Any Windows machines should NOT be using the HomeGroup option but instead use the advanced sharing option.
How to share Windows files is not covered. If you can’t do that, well, Linux may be out of your league 😉
This article applies to workgroups only, not domains.
To make it easier on you this is a one page article, heavy on the screenshots.
It is specifically created for the average user and thus relies on the GUI configuration options when possible.
It is my hope you find this article useful.
For new Linux users. Windows networking on Linux is handled via Samba.
Samba is software that can be run on a platform other than Microsoft Windows, for example, UNIX, Linux, IBM System 390, OpenVMS, and other operating systems. Samba uses the TCP/IP protocol that is installed on the host server. When correctly configured, it allows that host to interact with a Microsoft Windows client or server as if it is a Windows file and print server.
– – – – – – – – – – – –
Notes for Geeks
Changes in Samba SWAT
Recently the Samba Web Administration Tool (SWAT) has had a few security issues as it is no longer being maintained. This has prompted a proposal to remove SWAT from Samba entirely. See: Samba developers considering removing SWAT .
How this affects openSUSE
As of this writing I have seen no official statement on the matter. However openSUSE forum moderator jdmcdaniel3 discovered that the openSUSE developers pulled SWAT from openSUSE 12.3.
How this affects this guide
Previous versions of this guide used SWAT in the tutorial. Obviously this is no longer the case.
SWAT Replacement
AFAIK there is no GUI replacement for SWAT.
For knowledgeable users options are:
1 – either manually editing the /etc/samba/smb.conf file
2 – YaST > Network Services > Samba Server > Identity > Advanced Settings button
– – – – – – – – – – – –
On with the guide…
Step 1 – Configure Samba
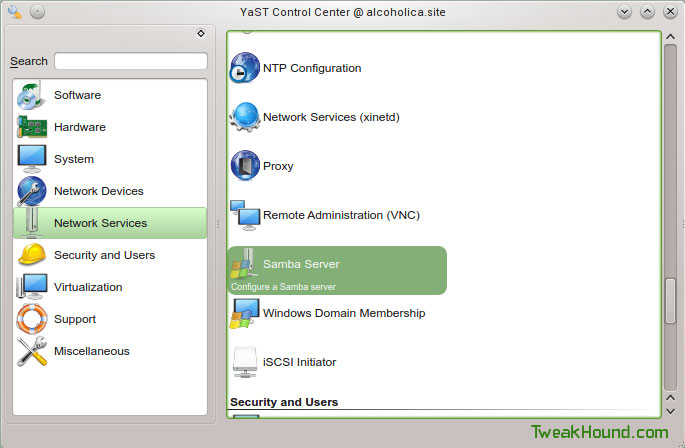
Open YaST > Network Services > Samba Server
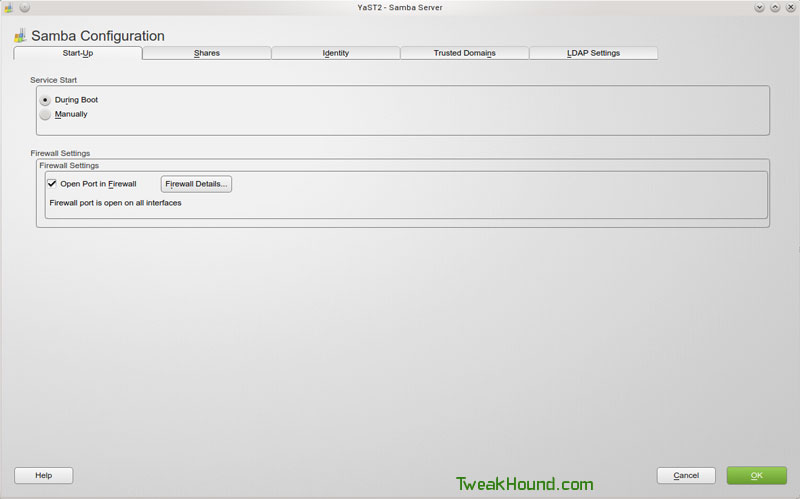
Start-Up tab: ensure During Boot is enabled, check the box next to Open Port in Firewall
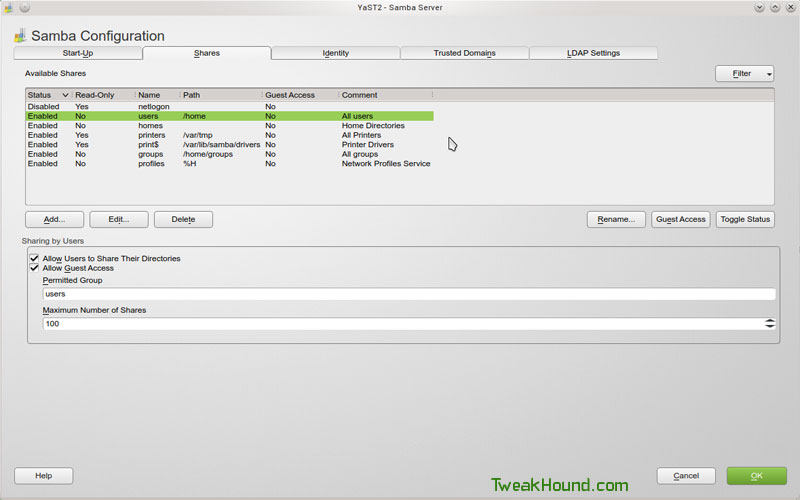
Shares tab: check the box next to Allow Users to Share Their Directories, optional is to check box next to Allow Guest Access
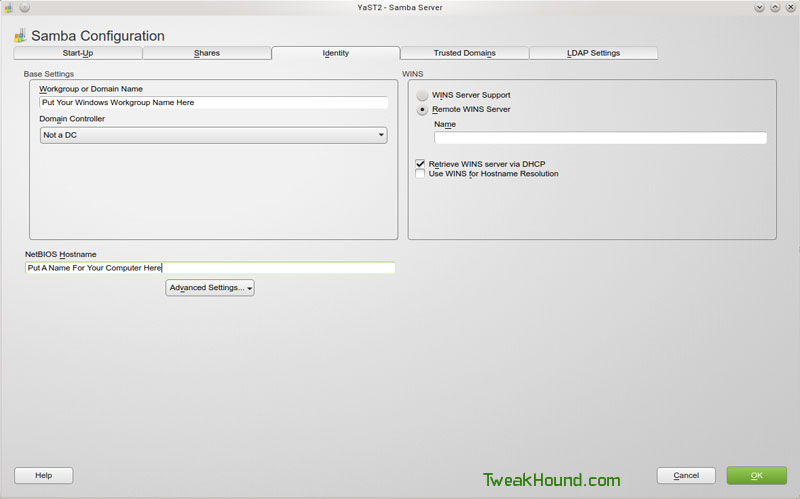
Identity tab: Enter your Workgroup name (the actual workgroup name from your Windows machine) and the name of your computer.
Click the OK button.
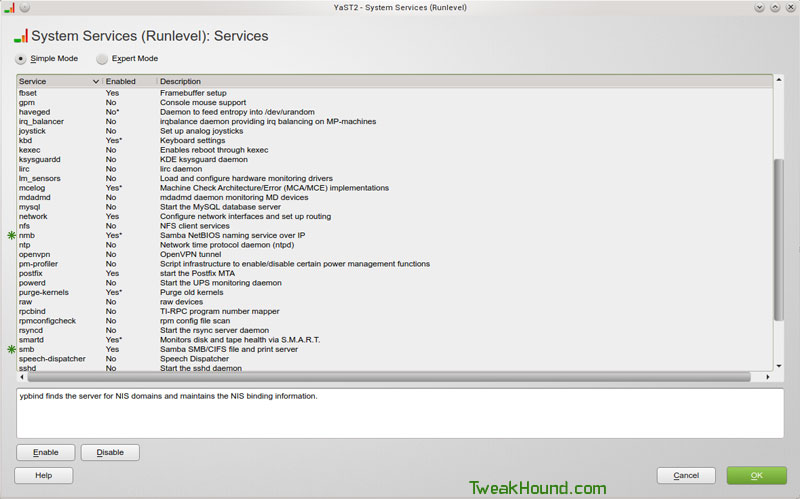
Step 2 – Configure Services
Go to YaST > System > System Services (Runlevel)

Highlight nmb and click the Enable button. Repeat for smb. Click the OK button.
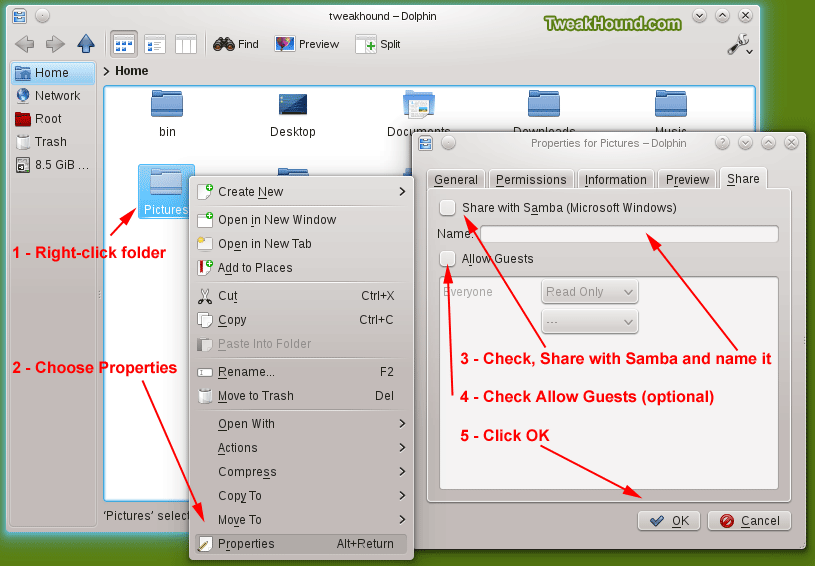
Part 3 – Share Directory
Open Dolphin. Pick a folder you wish to share, right-click on it and choose Properties.
In the resulting window click the Share tab.
Check the box Share with Samba (Microsoft Windows).
The Allow Guests box is optional but can make things easier (may be a security risk).
Click OK to save the changes.
Step 4 – Add Users
Browsing and accessing files in both directions requires a user with Samba permissions.
This user needs to already exist. You can use your account if desired (if not then it’s best to add them through YaST).
To add a Samba user:
Open a terminal and su to root.
type the following smbpasswd -a username and hit enter (where username is the name of the user you wish to add).
type and then confirm password.
Step 5 – Letting the network do its thing.
Now we are going to shut down every machine on the network. If you have a home server, a machine with a shared printer, or a machine that is usually on more than most then boot that one up first.
Let it get fully booted up then one-by-one start the other machines on the network, letting them fully boot up before booting the next one.
This method allows the network to sort of ‘reset” itself.
Once complete you should be able to browse to all network shares through Konqueror or Dolphin.
Look for the Network icons. You’ll be going to Network > Samba shares (or SMB shares) > your workgroup.
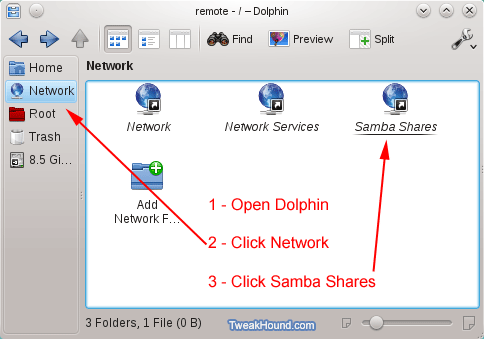
You can also type in the name of the workgroup or machine in the address bar:
smb://windowsworkgroupname
or
smb://machinename
Notes
Cool Tool – S.A.C.T. – Samba Automated Configuration Tool
Samba configuration file location: /etc/samba/smb.conf
-END-