 You can create multiple menus on your taskbar in Windows 8.
In fact you could create enough so that you would not miss the old Windows 7 start menu.
Built-In Toolbars
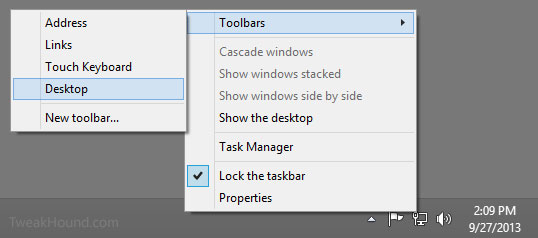
First let’s use one of the built-in menus.
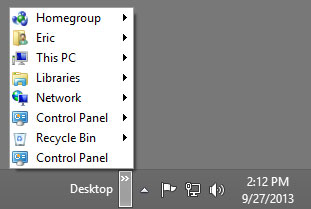
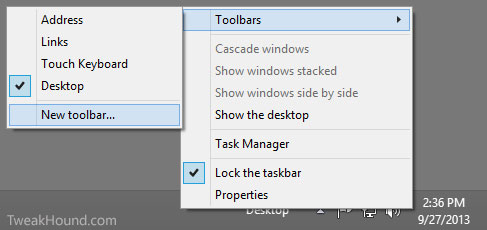
Right-click on an empty area of the taskbar > Choose Toolbars > Desktop
Pretty cool huh?
You can experiment with the remaining built-in toolbars to find if they are useful to you.
– – – – – – – – – –
Create You Own Toolbar
Programs
First let’s try creating a Programs menu.
Unfortunately Windows has 2 menu locations: 1 for you and 1 for every users (even if you are the only user).
So, lets start in your menu. Go to C:\Users\USERNAME\AppData\Roaming\Microsoft\Windows\Start Menu\Programs
We are going to copy all the folders from there to another folder. But first…
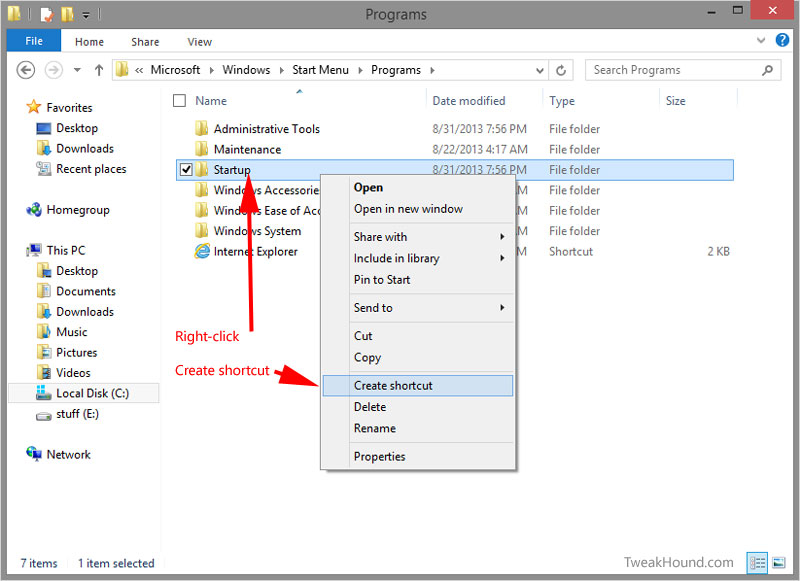
There is a folder there we are going to make a shortcut to.
It is the Startup folder and its contents are/can be dynamic and we don’t want a static copy.
Right-click on the Startup folder and choose Create shortcut.
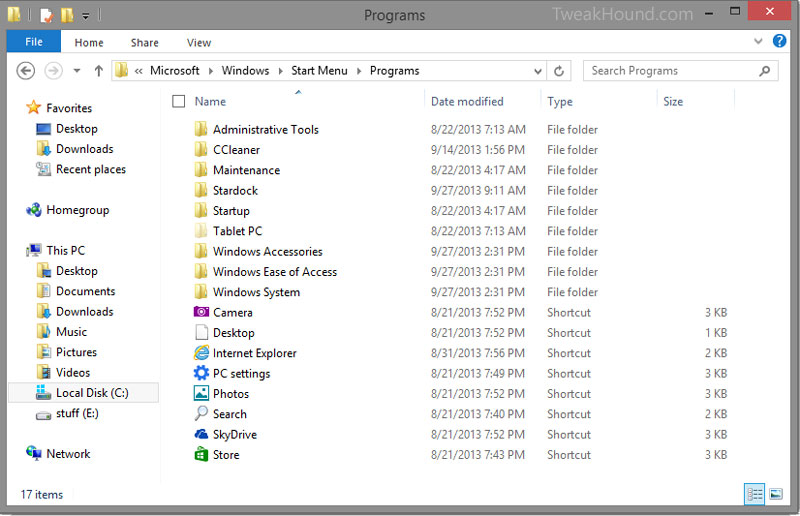
Now copy all the folders except the 2 Startup folders to:
C:\ProgramData\Microsoft\Windows\Start Menu\Programs
Cut and Paste the Startup shortcut you created to that folder too.
(Press the Continue button in the warning pop-up window.)
Right-click on an empty area of the taskbar > Choose Toolbars > New Toolbar…
*TIP – When you install a program, make sure you install it for “all users” to get the program shortcut to appear in this toolbar.
– – – – – – – – – –
This PC
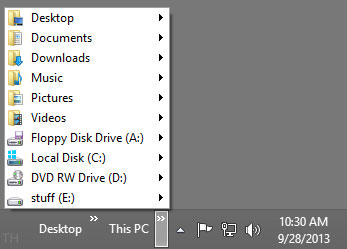
How about a This PC toolbar. (New to Windows 8.1, This PC was formerly My Computer)
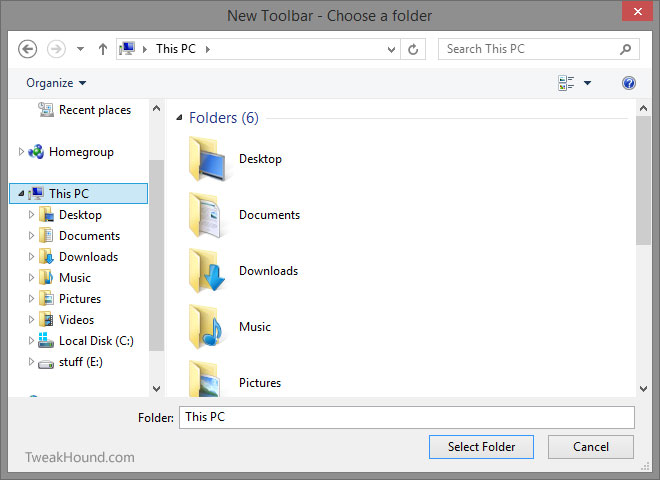
Right-click on an empty area of the taskbar > Choose Toolbars > New Toolbar…
It should open to This PC. Click the Select Folder button. Done
– – – – – – – – – –
Folders
How about a folder?
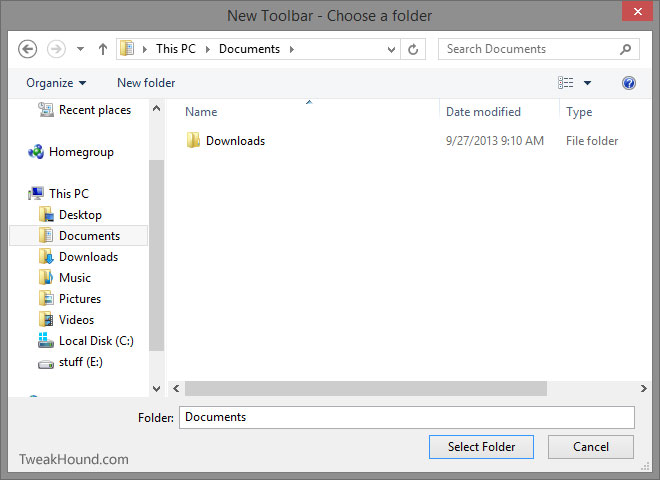
Right-click on an empty area of the taskbar > Choose Toolbars > New Toolbar…
Navigate to the folder of your choice. I choose Documents. Click the Select Folder button. Done
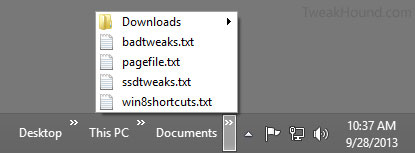
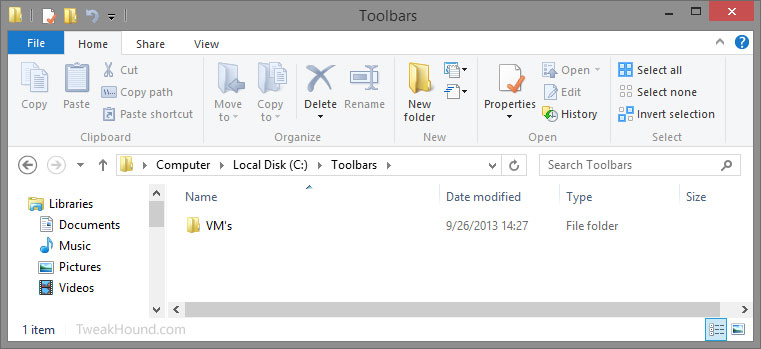
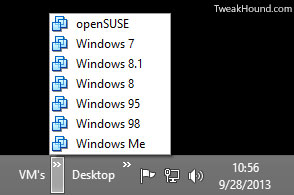
You can do this with any folder. In the example below I created a folder to allow one-click access my Virtual Machines.
First I created a folder in my C: partition called Toolbars and a sub-folder called VM’s.
Next I went to all of my Virtual Machines and created a shortcut on the desktop.
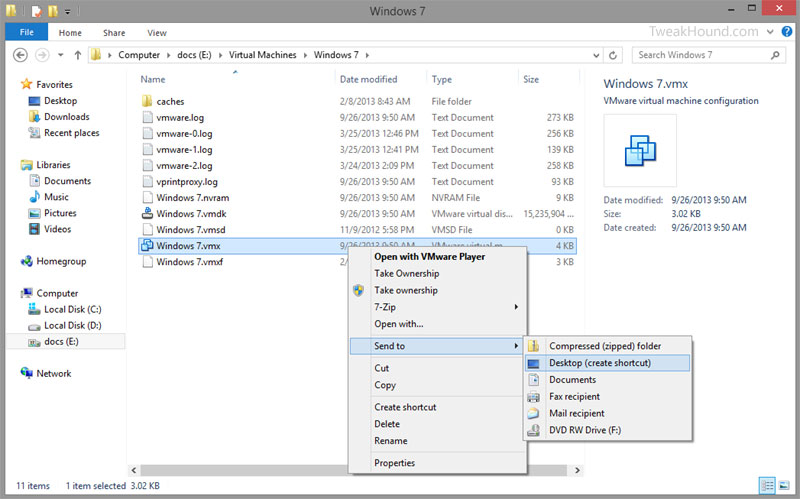
When I finished this for all the Virtual Machines I wanted to include I Cut > Pasted them into the VM’s folder I created.
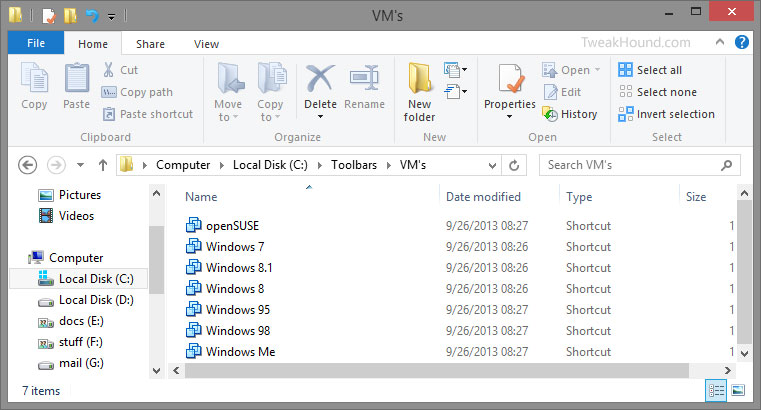
Next we create the Toolbar.
Right-click on an empty area of the taskbar > Choose Toolbars > New Toolbar…
Navigate to the folder you created and click the Select Folder button. Done
– – – – – – – – – –
Recycle Bin
Putting a Recycle Bin is a little convoluted.
First, if you do not have the default icons on your desktop, put them there now (at least the Recycle Bin).
To do so:
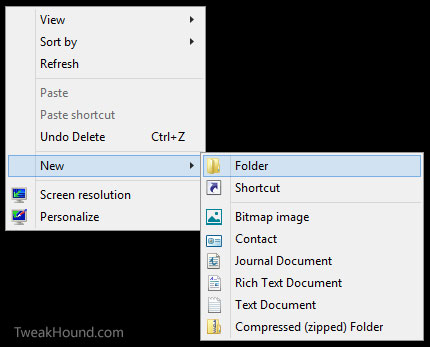
1 – Right-click on an empty area of your desktop and choose Personalize
2 – Click Change desktop icons
3 – Check the ones you want, click Apply and OK.
Next, right-click on a empty area of your desktop and choose New > Folder
Name it Recycle Bin

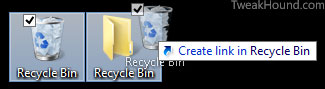
Now, Click > Hold > and Drag the Recycle Bin icon over the Recycle Bin folder then release.
You will see Create link in Recycle Bin displayed as you do this.
Next, Cut > Paste the Recycle Bin folder somewhere else like your Documents folder.
I created a folder in my C: partition called Toolbars and put it there.
Next we create the Toolbar.
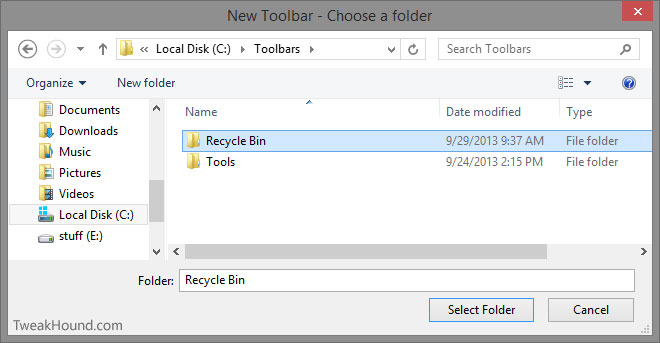
Right-click on an empty area of the taskbar > Choose Toolbars > New Toolbar…
Navigate to the Recycle Bin folder you created and click the Select Folder button. Done
![]()
If you want the toolbar to display an icon instead of text.
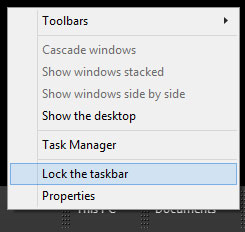
Right-click on an empty area of the taskbar and uncheck Lock the taskbar.
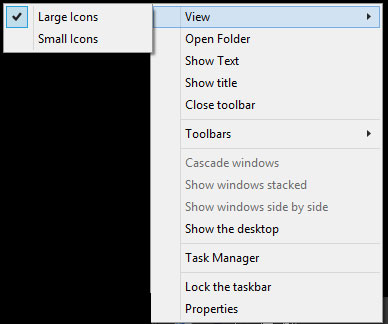
Put your cursor over the Toolbar text Recycle Bin > right-click on it and:
– uncheck Show Text and Show title
– choose View > and check Large Icons
Now, right-click on an empty area of the taskbar and check Lock the taskbar.

Left-clicking on the icon will give you the Empty Recycle Bin option.

– – – – – – – – – –
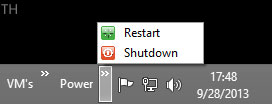
Power
How about Shutdown, Restart, etc?
Right-click on an empty area of the desktop and choose New > Shortcut
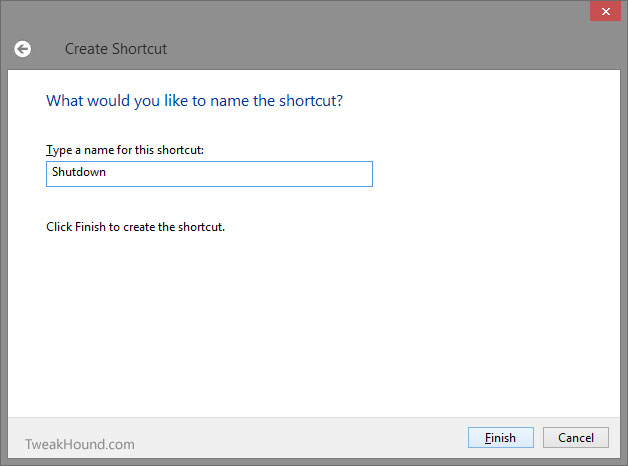
In the resulting screen type shutdown -s -t 00 and click Next

Name it and click Finish
Repeat this for all the options you desire. Here is a full list of commands:
Shutdown – shutdown -s -t 00
Restart – shutdown -r -t 00
Hibernate – rundll32.exe powpprof.dll,setsuspendstate hibernate
Lock – rundll32.exe user32.dllllockworkstation
Sleep – rundll32.exe powrprof.dll,setsuspendstate 0,1,0
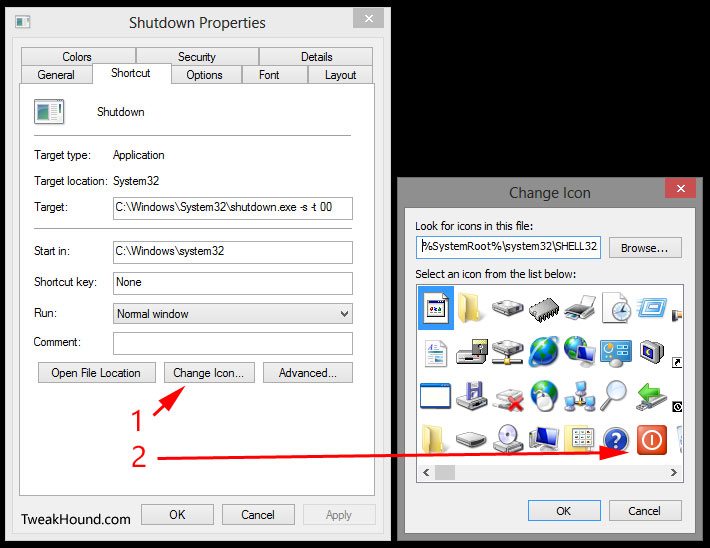
To change the icon right-click on it > choose Properties > Change Icon… > Pick an icon or Browse… to one you’ve downloaded.
(The old power icons are gone from Windows 8. I found ones I wanted via Google image search.)
Once you’ve created and edited all the power icons you want we are going to move them to a new folder.
First I created a folder in my C: partition called Toolbars and a sub-folder called Power.
Now Cut > Paste your icons there.
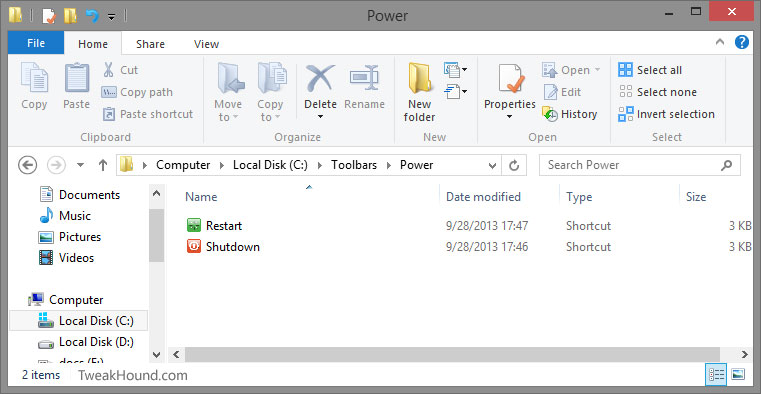
Next we create the Toolbar.
Right-click on an empty area of the taskbar > Choose Toolbars > New Toolbar…
Navigate to the folder you created and click the Select Folder button. Done
– – – – – – – – – –
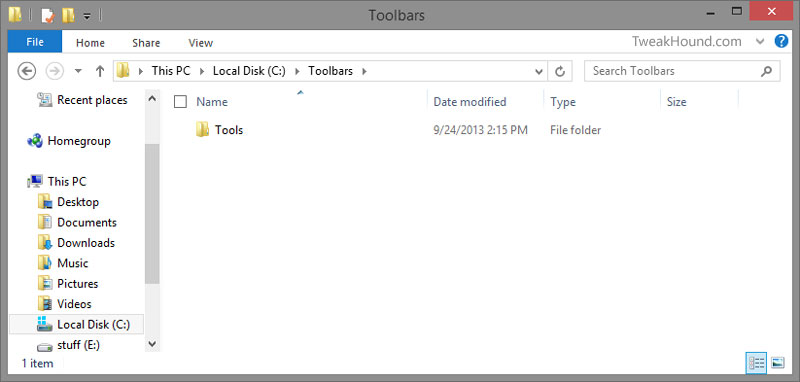
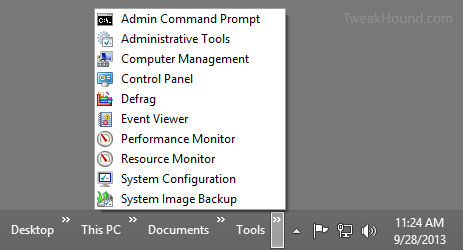
Tools & Utilities
A handy Toolbar with shortcuts to tools and utilities can be useful too.
First I created a folder in my C: partition called Toolbars and a sub-folder called Tools.
Then I created shortcuts on the desktop either using
1 – Right-click > Send to > Desktop (create shortcut) in the case of .exe files , .cpl files, and Administrative Tools.
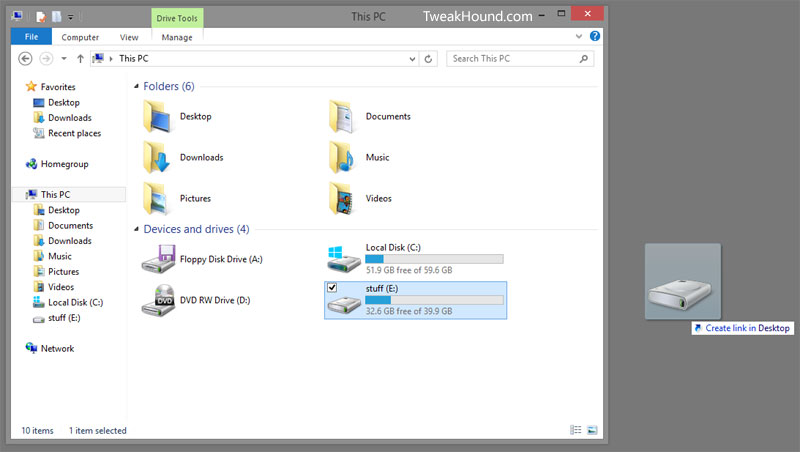
2 – Click > Hold >Drag to desktop in the case of Drives/Partitions and Control Panel Items
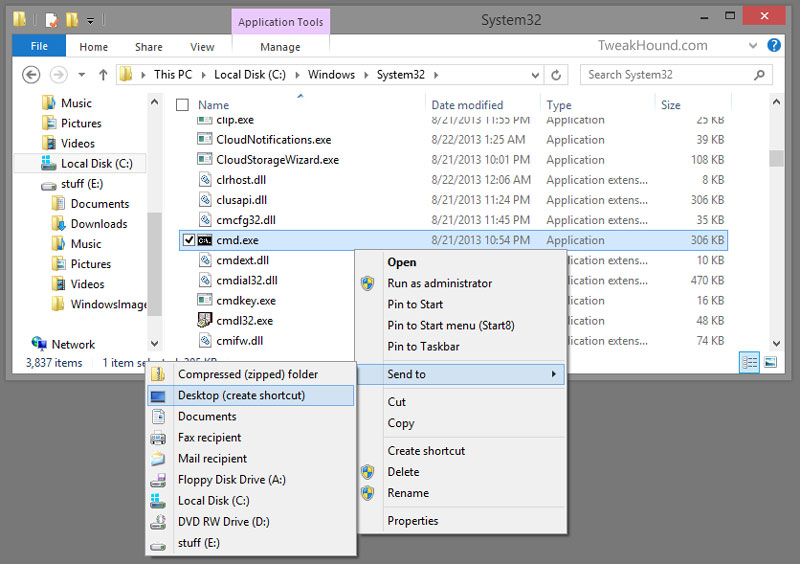
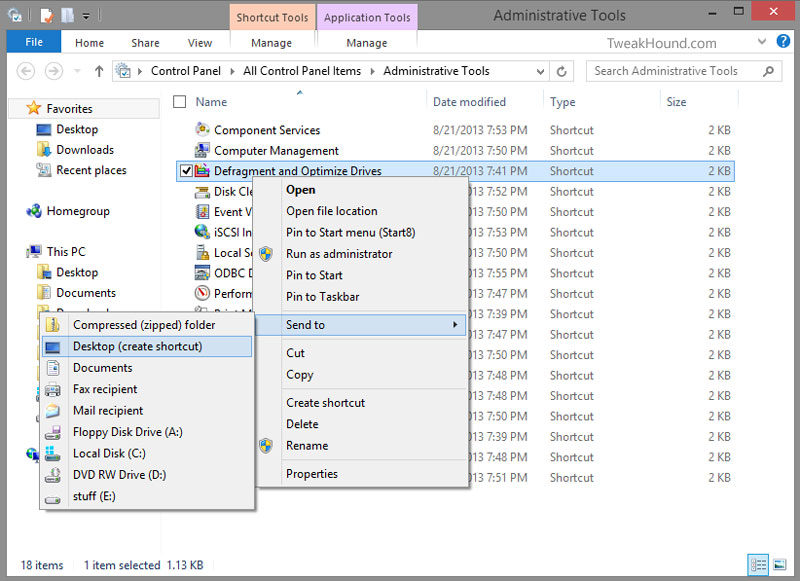

Then I Cut > Pasted these shortcuts to the Tools folder I created.
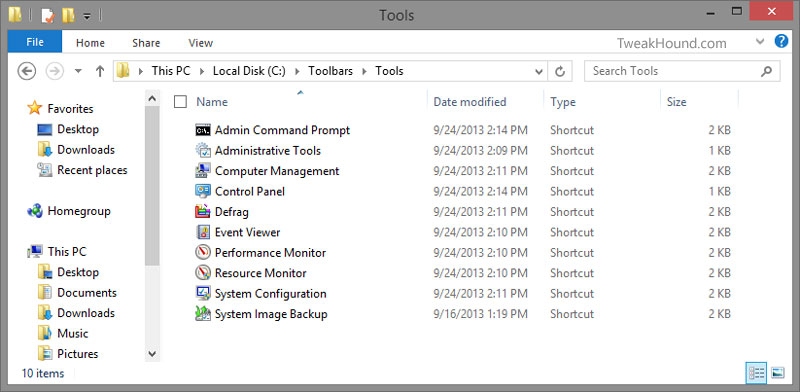
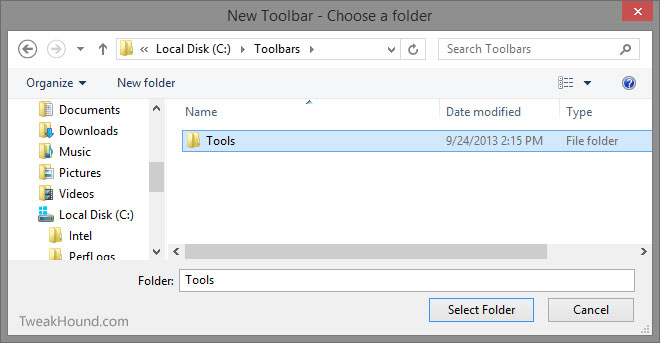
Now, Right-click on an empty area of the taskbar > Choose Toolbars > New Toolbar…
Navigate to the Tools folder you created and click the Select Folder button. Done.
List of program locations and shortcut commands I find useful:
(These help manually create shortcuts)
Administrative Tools – control /name Microsoft.AdministrativeTools
Command Window – C:\Windows\System32\cmd.exe (for Admin change Properties > Shortcut > Advanced > Run as administrator)
Computer Management – C:\Windows\system32\compmgmt.msc /s
Control Panel – C:\Windows\System32\control.exe
Defrag – C:\Windows\System32\dfrgui.exe
Disk Cleanup – C:\Windows\System32\cleanmgr.exe
Event Viewer – C:\Windows\system32\eventvwr.msc /s
Explorer – C:\Windows\explorer.exe
File History – control /name Microsoft.FileHistory
God Mode – C:\Windows\explorer.exe shell:::{F90C627B-7280-45db-BC26-CCE7BDD620A4}
MSconfig – C:\Windows\System32\msconfig.exe
Network and Sharing Center – control /name Microsoft.NetworkAndSharingCenter
Notepad – C:\Windows\notepad.exe
Performance Monitor – C:\Windows\system32\perfmon.msc /s
Power Options – C:\Windows\System32\powercfg.cpl
Programs and Features – control Microsoft.ProgramsAndFeatures
Regedit – C:\Windows\regedit.exe
Resource Monitor – C:\Windows\system32\perfmon.exe /res
System – control /name Microsoft.System
System Image Backup – C:\Windows\System32\sdclt.exe
System Properties – C:\Windows\System32\sysdm.cpl
User Account Control Settings – C:\Windows\System32\UserAccountControlSettings.exe
User Accounts – control /name Microsoft.UserAccounts
Windows Mobility Center – control /name Microsoft.MobilityCenter
Windows PowerShell – C:\Windows\System32\WindowsPowerShell\v1.0\powershell.exe
Windows Update – control /name Microsoft.WindowsUpdate
Wordpad – C:\Windows\write.exe
– – – – – – – – – –
Shutdown – shutdown -s -t 00
Restart – shutdown -r -t 00
Hibernate – rundll32.exe powpprof.dll,setsuspendstate hibernate
Lock – rundll32.exe user32.dllllockworkstation
Sleep – rundll32.exe powrprof.dll,setsuspendstate 0,1,0
*Note – You can replace C: with %windir% if you like, or if Windows is installed to another drive/partition.
– – – – – – – – – –
I hope you find this article useful.
Got any tips? Please post them!
-END-