• Skip to primary navigation
  • Skip to main content
  • Skip to primary sidebar

TweakHound

Computer stuff...

  • Home
  • Windows XP
  • Windows Vista
  • Windows 7
  • Windows 8
  • Windows 10
  • Windows 11
  • Linux
  • Tweak Guides
  • Site Info
    • About
    • About Me
    • TweakHound’s World
    • Contact
    • My Computers
    • Old Articles
    • Privacy Policy
    • Old Index
    • Advanced Search

Tweaking Windows Vista

July 27, 2011, 18:08(EDT) By Eric (a.k.a. TweakHound)

windows

This is a reformated version of Tweaking Windows Vista (previously found here)


Tweaking Windows Vista


A guide to Tweak & Optimize Vista.

Version 3.0, last updated June, 2009

tweak – to change slightly, esp. in order to make something more effective or correct.
optimize – get the most out of, make optimal
– modify to achieve maximum efficiency in storage capacity or time or cost

Welcome to the SP2 Edition of Tweaking Windows Vista. This is version 3.0 and includes several additions and clarifications. Tweaking your computer is about more than just speed tweaks. It is also about proper configuration, customizing, and maintenance. Like the XP tweak guide before it I’ve done my best to explain the tweaks without going overboard. I hope this guide will help you to make your Vista experience a little better.

I’ve set up a place for comments and feedback here.

Important Notes On Tweaking & This Guide

1 – Tweaking is best done on a fresh install.

2 – Get as much memory (RAM) as you can afford. RAM is fast and Vista will take advantage of it.

You’ll hear people whine that Vista hogs RAM…Yep it does, and it’s a GOOD THING (RAM is faster than a hard drive).

3 – Use 2 (or more) hard drives. This will speed up access to files and provide a good backup location. (more on this later)

4 – “If you’re gonna tweak you gotta be a Geek.” (didn’t know I was a poet did ya?!) This means:

-You know how to recover from problems. Backup, Backup, Backup, Backup

-You should understand the effect a tweak will have before you do it. (Google)

-The “G” in Geek stands for “Grownup”. You take responsibility for your actions, don’t whine at me when you ignore the above two points.

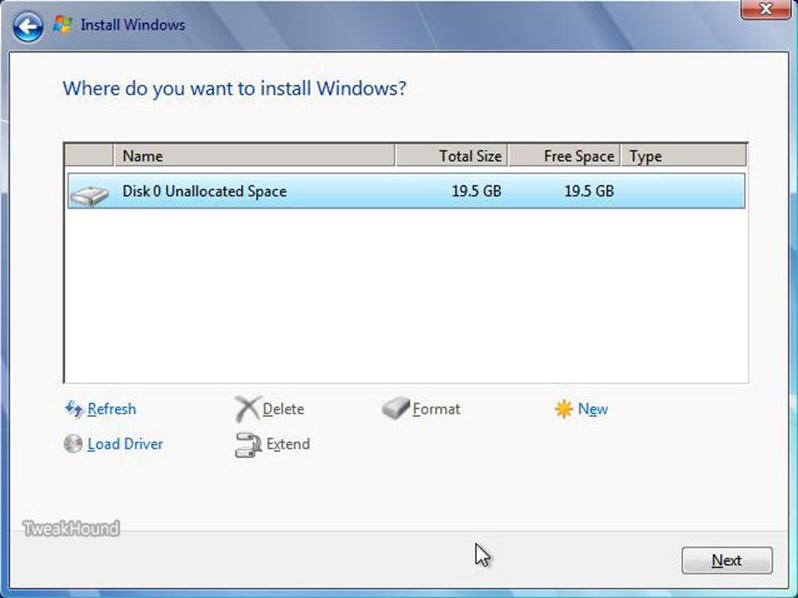
5 – Proper Hard Drive Configuration

Properly setting up your hard drive(s) allows for both increased performance and reliable backups.

To better understand what I mean, see how I do it: How My Drives Are Setup (I use Acronis Disk Director for partitioning.)

I’ll guarantee you that if you didn’t build your own computer or completely wiped the drive then your hard drive isn’t properly partitioned.

Partitions – A quick example of a proper partition strategy for Vista:

Single Drive – Vista / Docs, or Vista / Docs / Other

Dual Drives – First Disk, Vista /Other

– Second Disk, Page File / Docs

If you have a Desktop:

-Add a second or even a third hard drive.

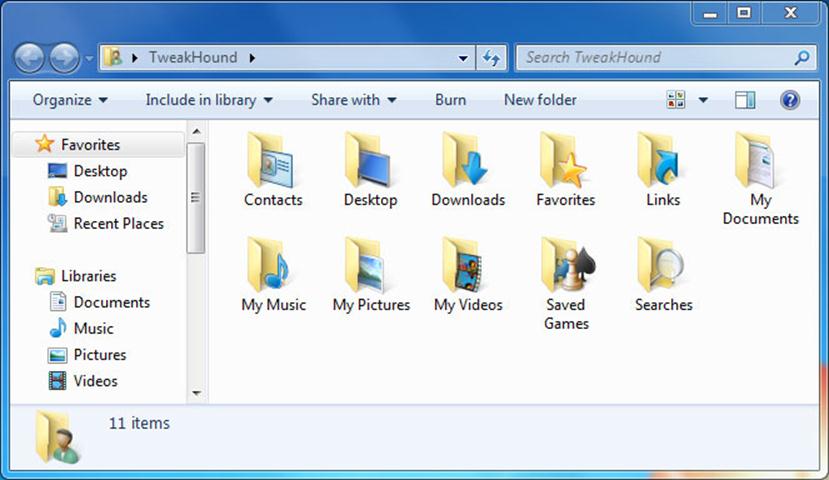
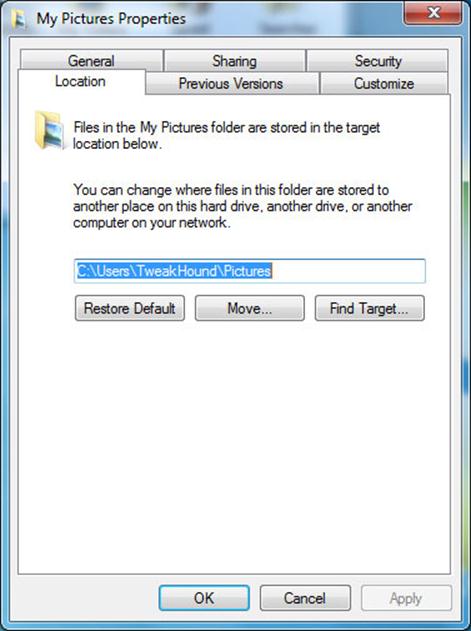
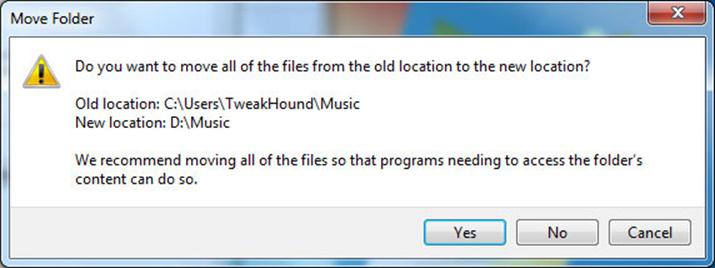
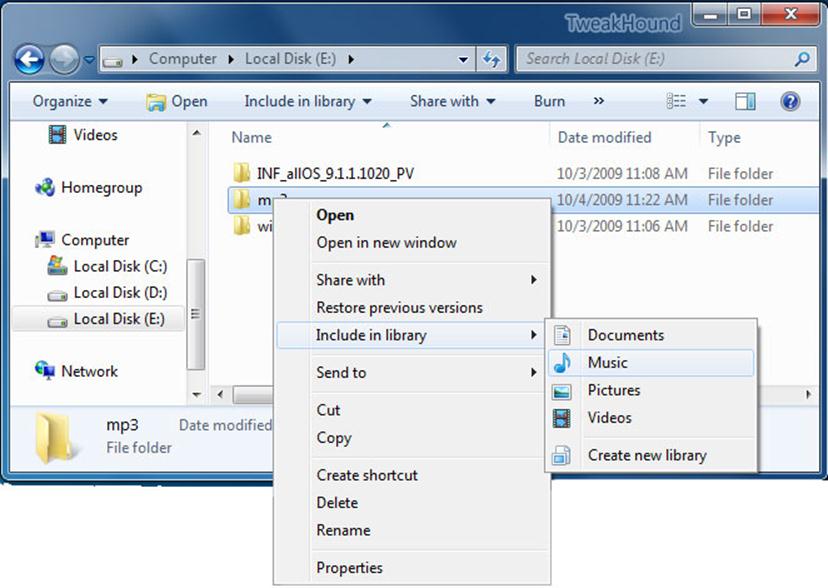
-Move your Page File and your Documents (and any other non-installed stuff) off the OS drive (I’ll show you how later in this guide).

-Partition / Repartition your disks.

If you have a Laptop:

-Partition / Repartition your disks.

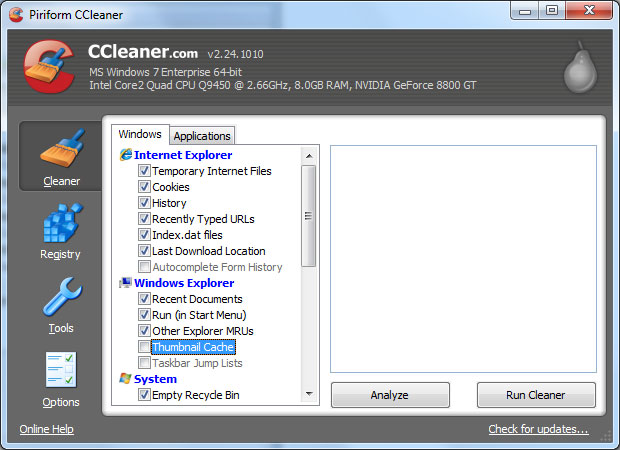
6 – Maintain Your Computer. Disk cleanup and defrag is the fastest and easiest way to speed up your computer.

7 – In this guide I show you a few keyboard shortcuts. Learning these can save you an incredible amount of time, you could call it self-tweaking.

– For a list of these you don’t need to look anywhere but your own computer.

Go to Start > Help & Support > in the Search help box type keyboard shortcut. It’ll even show you how to create your own shortcuts.

8 – In no way is any of this intended for any computer that is in or connects to a domain or corporate network.

9 – ***Please see: Bad Tweaks (most of this applies to Vista too)

10 – For my fellow geeky Geeks. I’ve provided as many registry settings as I can. For the most part they are written in grey.

11 – Read through this entire guide before doing anything.

12 – I’ve worked my butt off on this guide (hours and hours and hours and…). Please don’t rip-off my work.

13 – You can purchase a printable PDF for $5. Details here.

You get a 3 PDF’s totaling 143 pages. The money helps me keep this site going.


Pages: Page 1 Page 2 Page 3 Page 4 Page 5 Page 6 Page 7 Page 8 Page 9 Page 10 Page 11 Page 12 Page 13

Tagged With: How-To's, Windows Vista

Update on PerfectCache

July 27, 2011, 17:10(EDT) By Eric (a.k.a. TweakHound)

cooltools

Previously discussed in this post, I’ve got some more info on PerfectCache.

1 – Raxco now has a product page up here: PerfectCache 5.0

2 – There is anew video and blog post over at their blog: PerfectCache in action — automatic disk caching demo

3 – Reader Redseujac was right about the price. It is $79.99 USD (on sale, regular $99.99).

4 – According to Joe Abusamra at Racxo the program is powered by the SuperSpeed engine. ( I am assuming it is this programcooltools)

My thoughts so far.

I haven’t had time to do any real benchmarking on this program (for whatever they are worth) nor any real world testing. Programs seemed a little snappier but other than that I haven’t noticed anything spectacular. Eventually I will get around to testing it out more (but not any time soon).

For me the price is prohibitive, even at the $80 sale price.

Tagged With: Cool Tools

TweakHound.com Mobile Version

July 27, 2011, 16:24(EDT) By Eric (a.k.a. TweakHound)

th

thI’ve started using WPtouch to give readers the option of using a version of the site for mobile devices. According to the plugin author, WPtouch supports the following devices:

Currently the Apple iPhone, iPod touch and iPad, Google Android mobile devices, Blackberry OS6 devices like the Torch and new Bold, most Samsung touch devices, and Palm Pre/Pixi. The vast majority of smartphone web-browsing traffic will see your WPtouch Pro theme.

How does it look on your device? (click on thumbnail below to see how it looks on my phone)

Tagged With: This Site

AMD / ATI Catalyst 11.7 Drivers Are Out

July 27, 2011, 15:54(EDT) By Eric (a.k.a. TweakHound)

rad

AMD / ATI Catalyst 11.7 drivers are available for XP, Vista, and Windows 7. Linux 11.7′s available here. (Release Notes)

Tagged With: Computer Hardware

Installing Windows 7

July 27, 2011, 15:33(EDT) By Eric (a.k.a. TweakHound)

windows

windowsThis is an updated and reformated version of Installing Windows 7 (previously found here)

Installing Windows 7

A start-to-finish, step-by-step guide to properly installing Windows 7.
created 15 October, 2009

Please read through this entire guide before doing anything.

If you do not have Windows 7 Service Pack One on your install DVD you can get it here:
Windows 7 SP1

If you want to download refreshed Windows 7 SP1 ISOs you can get them here:
Download Windows 7 Disc Images (ISO Files)

1 – Download all your drivers.
To find out all the specifics of your computer and its hardware download Speccy and run it (I just use the portable version).
You can get the drivers from the website of the manufacturer of you computer and/or hardware (Google is your friend).
If you cannot find a specific Windows 7 driver for your hardware then download the latest one for Vista (it is possible it may work).
Once you’ve got them all, burn them to a CD and/or a USB drive.

2 – Backup any and everything you may want that is currently installed on the computer. This means to a location other than the computer that 7 is to be installed on. For a few suggestions on how look here for Windows Vista, and here for Windows XP.

3 – Optional but highly recommended, Wipe the target installation drive. No self-respecting Geek would ever do an upgrade install to a new OS (previous to Win10). If you insist on doing an upgrade then skip this step. I usually use an Acronis Disk Director boot disk for this but there are other tools available. Please note, I do not recommend using any method other than the installation disk to format the drive. I’ve heard scattered reports of problems using other methods. For UEFI systems I prefer to wipe the drive and then let Windows do its thing on install.
This is for non-UEFI systems:
My preferred method is to backup all my files to an external hard drive (this is what I have). Then boot computer with either an Acronis Disk Director boot disk or UBCD4Win disk. Once I boot these up I delete and wipe the partitions, then create new ones (ensure the partition you install 7 on is an active partition). I format the partitions again from the Windows 7 disk during the install.
Advanced users who aren’t afraid of the command line see Windows 7 Installation Advanced Drive Formatting below.
*Avoiding the 200MB partition: Folks have discovered that on an unpartitioned drive Windows 7 will create a 200MB system partition. This is easily avoided by creating a partition before attempting to install Windows 7 (see above). (for some this partition will be 100MB)

*Bitlocker requires this partition. (thanks to eaglewind for the tip!)
TrueCrypt is a better alternative.

**Exception for SSD drives to avoid the 200MB partition and partition / format the drive.
Partitioning is a little different for SSD (Solid State Drives). This is because of something called NTFS partition alignment. Basically this refers to where on the drive the partition starts. Vista and 7 will create a single partition optimally for SSD’s. XP and most program boot disks will not. If possible you should partition the disk under an already installed Windows 7 or Windows Vista machine and then proceed with the usual installation steps. If not then this is the way to do it:

Windows 7 Installation Advanced Drive Formatting
1 – Boot up from the Windows 7 installation disc.
2 – Choose Repair your computer.
3 – In the System Recovery Options screen, choose Use recovery tools… and click Next.
4 – Open the Command Prompt.
5 – Type diskpart and hit Enter.
6 – Type list disk . Find the disk you wish to install Windows 7 on. If you only have one disk then it will show as disk 0. If you have multiple disks find the drive you wish to install 7 on.
7 – Type select disk 0 (or use the number of the disk you wish to install Windows 7 on)(note – that is a zero)
8 – Type list partition. There shouldn’t be any.
9 – Type create partition primary.
10- Type select partition 1.
11- Type active.
12- Type format quick.
13- When finished reboot and begin your installation.
( DiskPart Command-Line Options )

*The above section must have really been good. It has been ripped off around the web.

Example of diskpart (click on thumbnail for a larger image)

Please note: This is for a single partition setup. If you need multiple partitions on the SSD then you can shrink the Windows 7 partition after you install.

More info on Windows 7 and SSD’s:
Engineering Windows 7 – Support and Q&A for Solid-State Drives
Windows 7 Enhancements for Solid-State Drives (ppt slides viewed thru Google cache)

MUST READ! Anandtech SSD article #1 and article #2.

3a – How I Partiton My Hard Drives

BIOS (non-UEFI) System
Single disk system – Operating System on first partition – Docs (libraries) on the second partition made from the remaining space.
Multi-disk system – OS on first drive – Docs (libraries) on second – Other drives for storage.
Multi-disk system (advanced) – OS on first drive – Second drive, a second Page File on the first partition (only if it is as fast as the OS drive), Docs (libraries) on second partition – Other drives for storage.

UEFI System
Single disk system – Recovery on 1st partition, EFI on 2nd partition, Operating System on  3rd partition – Docs (libraries) on the second partition made from the remaining space.
The rest as above.

4 – Consider hardware upgrades.
– Memory – Get +2GB for Windows 7 32-bit, 8GB (of more) for 64-bit. Speccy (linked to above) can tell you what kind of memory your system has, look under the Hardware > Memory section.

– Video Card – A 1GB (or more) card would put you in excellent position to enjoy Windows 7. A good place to start looking for which card to buy would be AnandTech. Check their Guides / System Buyers Guides and pick your price range. For the more high end minded folks, you can check [H]ardOCP and AnandTech for those reviews and recommendations (good computer hardware advice can also be found in their forums).

– Hard Drive – Get rid of it. At least for the OS drive. SSDs are wicked fast and are cheap. As of this writing I prefer Samsung and Crucial SSD’s.

*You can do the above upgrades yourself. They are not complicated, can be done in a few minutes, and usually involve little more than a screwdriver. Take your time and read the guides that come with the hardware (we Geeks call that RTFM). If that guide leaves you confused simply do a Google search, i.e. “how to install a hard drive”.

5 – Clean The Inside Of Your Computer. As anyone who works on others computers can tell you, the inside of a computer can get quite nasty. I’ve worked of computers that have left me sneezing and longing for a shower. Cleaning your computer can reduce heat inside the box allowing it to last longer (heat is the enemy of a computer). Bleepingcomputer has a good guide.

6 – Download the following Windows Update:
KB3102810 Installing and searching for updates is slow and high CPU usage occurs in Windows 7 and Windows Server 2008 R2
I want you to install this after you install your drivers and BEFORE you run Windows Update.


Installing Windows Seven

Installing Seven is almost idiot proof. I will show just a few select screenshots. Pop in the DVD and let’er rip. The few questions you have to answer are straight forward.

Partition Sizes: Officially listed as 16 GB available hard disk space (32-bit) or 20 GB (64-bit). I would recommend 30 GB as a good size for a partition, more if you have the space. Remember once multiple partitions are set up, it is easier to make the partition larger than you think you need at the beginning and shrink it than it is to make a minimum size partition and have to enlarge it later. (please see How I Partiton My Hard Drives above for how I do my partitioning)

Clean Install ( I recommend using these steps regardless to whether or not you have a full or upgrade disk)
You cannot do a clean install from an upgrade disk.
There are several workarounds. See: Paul Thurrott – Clean Install Windows 7 with Upgrade Media

I would recommend doing it as he describes in Method #1:
1 – Wipe drive/partition (see above for partitioning recommendations)
2 – Install Seven. If using an upgrade disk, DO NOT ENTER YOUR KEY
3 – If using an upgrade disk. On first boot,install your drivers then run Windows Update until there are no more updates.
4 – In the start menu search box type activate , enter your key and then activate Windows.

Choose Upgrade or Clean Install.
To do a clean install click on Custom (advanced).
As stated above I highly suggest a clean install. See the backup warnings???


Click on Drive options (advanced) to be able to format your partition.
Got RAID or is your disk not showing up? Click Load Driver.


Here are your drive options.
See above for partition recommendations (I’ve got 19.5 here because the screenshots were taken from a virtual machine).
You should at least format the partition.


First Boot

If you are going to disable UAC the do so now (see below for how).

Uninstall stuff you aren’t going to use.
Open the Control Panel:
– From the default screen – Go to Start > Control Panel > Programs > Uninstall a program > Turn Windows Features on or off
– Better option, switch view to Large Icons (look on the upper right of the Control Panel window for “View by:” Then go to Programs and Features > Turn Windows Features on or off.
– Fastest way – Press the Windows + R keys and type appwiz.cpl > Turn Windows Features on or off.

Deselect (uncheck) things you don’t want. What is available depends on the edition of 7 you have. If you see something listed here that isn’t in your list don’t worry, you don’t have it. I choose to uninstall:

-Games (all)
-Print and Document Services (all) (careful, check out the individual parts)
-Remote Differential Compression
-Tablet PC Components
-Windows Search (only if you aren’t going to use indexing)
Click OK and then reboot if prompted

Install Drivers

tip #1 – To quickly access Device Manager, hit the Windows + R keys and type devmgmt.msc

tip #2 – In Device Manager, if an item has an exclamation icon then it needs a driver.

The order I use to install drivers is:
-Chipset
-RAID and/or other drivers involving storage
-Graphics
-Sound
-LAN

Setup Advanced Cleanup

Press the Windows + R keys, type cleanmgr /sageset:50 .
Select the options you desire, I choose them all. Click OK and close out the window.
Press the Windows + R keys, type cleanmgr /sagerun:50 .
(note – there is a space between the r and the /)
See HERE and HERE for more on this.

* You can use this command at any time for regular disk cleanups. I use the number 50 because it is easy to remember, you can use any number you want.
*tip – this works in Safe Mode too.

Windows Update
Above I said to download the following Windows Update:
KB3102810 Installing and searching for updates is slow and high CPU usage occurs in Windows 7 and Windows Server 2008 R2
Install it now and reboot.
Now Run Windows Update. Deselect everything and install Internet Explorer 11 there and reboot.

Block Windows 10 upgrade (GWX) related nonsense by using GWX Control Panel. Run it now and reboot.

Now run Windows Update and keep running it until all Critical Updates are installed and any Optional Updates you want are installed. Updated drivers may be available too.

Optional – After all critical updates are installed Run Windows Update but do not install anything. Close Windows update then run my script here:
https://www.tweakhound.com/2015/11/01/remove-and-block-gwx-in-windows-7-2/

Then Run Windows Update again and install any/all optional updates

Backup – Make An Image (I used an Acronis TI Boot Disk)
(please note I did not say install a backup program (yet). Both Acronis True Image and Norton Ghost have the ability to make boot disks)

Install Your Programs

***Very important.
If you intend to disable User Access Control (UAC) as I have then you should do this BEFORE YOU INSTALL ANY PROGRAM. Not doing so can lead to problems later.
To Disable UAC:
– Type or copy and paste UserAccountControlSettings.exe into the Start menu search box.
– In the resulting window, move the slider all the way to the bottom.
– Reboot

PAY ATTENTION to what you are installing (in other words, don’t keep clicking Next). Don’t install more than you need. Don’t install toolbars or let it change your home page either. Decide what apps you want to do what. For instance:
I use Winamp Lite (and I use a very basic install for that) as the Default for playing .wav and .mp3 files because it opens faster and with a smaller footprint than say Windows Media Player or iTunes. Also, I have no application launching when I insert a music CD or DVD either.

Major Applications
I recommend you install the major applications first (i.e. anti-virus, software firewalls, Office, and the applications that come with your hardware). Always use the custom or advanced installation method and pay attention to the options screens. I install all the applications to the same drive as the OS. That is because I use backup program, and use it often! Pick and choose the parts you install carefully. If you don’t install it. Avoid allowing anything that isn’t necessary to “load at startup.” As you install each application, download (if you haven’t already) and install all updates and patches before you move on to the next application. I prefer to load my backup program first and make an image before I go further. The very next thing I install is anti-vrus software.

Minor Applications
Next install the minor applications (Sound, graphics, utilities, etc.) Check for the most recent versions first. Before you install them, decide which applications you want to perform what. If you have multiple applications that can do or play the same thing, decide which you prefer. For example; I have Windows Media Player, Winamp, MediaMonkey, and iTunes all wanting to be the default player for many of the same files. If not configured properly, they will fight for dominance. Giving each player it’s own default settings doesn’t mean you can’t ever play it in another application. After you install each application, open them and double check configuration settings, some applications don’t play nice!

Use cleanmgr /sagerun:50 again!

Move Your Libraries
This is a critical step in the way I set up computers. A problem free backup / restore process depends on you having your docs, music, pics, etc. on a drive or partition other than the one Windows 7 is on. Using this method you do not have to worry that some issue (virus, crash, hardware failure, etc) will mean losing your data.

How To Move Windows 7 Libraries
Decide where you want to move these to.
A second disk is your best option but in a single disk system a second partition will do.
Right-click on your User Name in the Start Menu and choose Open.
Select the libraries you wish to move and copy / paste them to the new location.
Pick the stuff you wish to be safe from any problems.
I would do at least: Contacts, Downloads, My Documents, My Music, My Pictures, My Videos.

Once you have finished copying the files. Go back to the original Library, right-click on each folder you moved.
Choose Properties from the menu. In the resulting window, click on the Location tab, and then the Move… button.
Browse the the location you copied the files to.
Click once on the folder you want it moved to and then click the Select Folder button (bottom right of the screen).

This screen will pop up. Click Yes.
Repeat this step for all the folders you copied.

Add new folders to your Library

All your files do not have to be in the actual library folder. Windows 7 lets you add folders from other locations to your library without actually moving them into the actual library location.

To add a folder to a library. Right-click on that folder and choose Include in library > and choose the appropriate library.


Configure Your Email
If your ISP software didn’t do it, configure your email now.

Configure Programs That Start With Windows 7
Get everything you possibly can out of the System Tray (by the clock in the lower right hand of the screen). The best way to do this is in the applications options. If that fails, use Autoruns.

Autoruns
Download Autoruns.
Extract the folder to your root drive (usually C). Open the Autoruns folder and double-click autoruns.exe. Click on the Logon tab, Uncheck anything you do not want to start with Vista. The fewer things the better. If you don’t know what it is, leave it alone. Advanced users may want to go to the SERVICES tab and make modifications there.

Autoruns (click on image for a larger picture)


CCleaner
Download and install CCleaner Slim.
Configure it – Poke around and choose your options (I enable Run CCleaner when the computer starts).
Run it.

CCleaner (click on image for a larger picture)

Final Cleanup & Defrag
– Start up in Safe Mode and use cleanmgr /sagerun:50 again!
– Run CCleaner.

Next, go to START > ALL PROGRAMS > ACCESSORIES > SYSTEM TOOLS > DISK DEFRAGMENTER. Highlight the drive you installed Windows 7 on, click the DEFRAGMENT button. This will take a while. When finished shut down and restart.
Get there faster: type dfrgui in the Start Menu search box.

Backup
Whatever backup method you prefer, make a backup.

You’re done!

Tagged With: How-To's, Windows 7

TweakHound’s Super XP Tweaking Guide – SP3 Final

July 26, 2011, 16:54(EDT) By Eric (a.k.a. TweakHound)

This is a reformatted and updated version of TweakHound’s Super XP Tweaking Guide – SP3 Final (previously here)


TweakHound’s Super XP Tweaking Guide – SP3 Final

A guide to Tweak & Optimize XP.

Last updated: June, 2009

tweak – to change slightly, esp. in order to make something more effective or correct.
optimize– get the most out of, make optimal, modify to achieve maximum efficiency in storage capacity or time or cost

   This was the first comprehensive, step-by-step XP tweaking guide on the net. It’s over 7 years old (first version in 2002) and has continued to evolve. I started working with XP during its RC1 stage. After a time I began looking for ways to tweak it. I haven’t “invented” any of these tweaks. They were scattered all over the web, a couple at one site, a few more at another. Some were good and as I discovered over time, some were bad. What I have done here is to investigate/test them, try and organize them in a coherent manner, and present them in a step-by-step guide. This was also the first guide to debunk several myths regarding popular tweaks.

   This will be the final version of this guide. That means there will be no further updates. XP is a good operating system and is still a good choice for older computers but it is time to move on as far as guides go (I will keep XP on my P4 computer until it dies). XP was released in 2001 and although it will receive security updates until 2014 no new features will be added. That means there is nothing more to add to this guide.

   This guide wouldn’t be here without the input I’ve received from others and the hundreds of thousands of people who have stopped by. To all of you, THANK YOU!
PLEASE SEE – eXPired – The Last Windows XP Guide You’ll Ever Need

Tweaking Levels

Most guides just provide the tweaks and leave you on your own to figure out which to use. For every step in this guide I provide my recommendation on who should use that particular tweak. I do this by assigning a “level #” to the tweak. Again, these are just recommendations. I’ve tried to provide a good explanation as to what every tweak does so that you can decide for yourself what you do/don’t want to do. The levels provided in this guide are as follows:
*All Levels – Safe for everyone. The safest settings but not tweaked much.

Level 1 – It keeps XP pretty, but faster and a little more secure. Full functionality is maintained.

Level 2 – Faster still and a tad more secure. Not quite Level 3. Still pretty. Keeps the useful features around.

Level 3 – Very close to the settings I use. Tweaked hard. All the pretty and annoying stuff is gone. It’s much faster and much more secure. Aimed at those who want to run Windows their way.

Level 4 – For Gamers only. Level 3 with a few more tweaks aimed at gamers.
Tweaking is best done on a new installation of XP. See, The Right Way To Install Windows XP.


Ed Bott’s Windows Expertise, October 4, 2005
“The Web is littered with Windows tips and tweaks, may of dubious quality and accuracy. Eric Vaughan’s TweakHound is one of the few sites that actually tests and rejects the bogus tweaks. If you’re thinking about making some changes to your registry because some random site told you it would speed things up, I suggest visiting the Bad Tweaks page first. Nicely done, Eric.”

—

Guide Contents

Introduction

1 – Before You Begin Tweaking XP…

2 – Windows Built-In Tweaks

3 – Windows Built-In Tweaks Part 2

4 – The Page File

5 – Services

6 – Registry Hacks

7 – Tweaking Apps

8 – Creating Your Own Registry Files

9 – Broadband Tweaks

9a- Internet Explorer 8 & Firefox Tweaks

10 – Make your own free Tweaking Toolbox

10a- The Look

11 – Bad Tweaks

12 – Clean, Defrag, Optimize

13 – XP Tweaking Guide Notes & FAQ’s

My Thoughts On Tweaking And This Guide

You can get a printable version of this guide for $5 (U.S.) See here for more info.

Have You Found This Guide Useful?
Please help me keep helping you!
Help me keep helping you!

Pages: Page 1 Page 2 Page 3 Page 4 Page 5 Page 6 Page 7 Page 8 Page 9 Page 10 Page 11 Page 12 Page 13 Page 14 Page 15 Page 16 Page 17

Tagged With: How-To's, Windows XP

Ditch Those CD’s! A Guide To Using USB Flash Drives

July 26, 2011, 15:16(EDT) By Eric (a.k.a. TweakHound)

Ditch Those CD’s! A Guide To Using USB Flash Drives

This guide is intended to show the average PC user how to create bootable USB Flash Drives as a replacement for rescue disks and “Live” CD’s.

Article Index – Ditch Those CD’s! A Guide To Using USB Flash Drives
Page 1 – Article Intro, Flash Drive Booting, Advanced USB Drive Formatting
Page 2 – Install Windows 7 or Windows Vista From A USB Flash Drive
Page 3 – Install Windows XP From A USB Flash Drive
Page 4 – Install a Linux Operating From A USB Flash Drive
or           Boot from one or more Linux Live CD’s on a USB Flash Drive
Page 5 – Utility And Rescue Bootable USB Flash Drive
Page 6 – Portable Apps And USB Flash Drive PC Toolbox
Page 7 – What I Use & Other USB Info

Many utilities exist that can help you manage PC’s. This can be operating system installation, virus removal, data recovery, disk management, etc.
In addition, there are Windows and Linux “live” CD’s that allow you to boot into Windows or Linux to perform the aforementioned, try Linux distros, or to simply have a portable Operating System.

Why use USB flash drives (aka: thumb drives) instead of CD’s? Speed, size, and portability.
1 – USB flash drives are far faster than CD’s and DVD’s.
2 – USB flash drives range in sizes and currently max out at 256 gigabytes.
3 – USB flash drives are small and thus highly portable. Many Geeks carry them on their key chains.

There are literally dozens of ways to create a bootable USB flash drive. I’m only going to cover the ones I use.
This guide is aimed at the home user, Geeks or Geek Wanna-Be, and folks like me who are your family and friends “computer guy”.
All the tools listed are free, at least for home users.

*Note – The research and testing that went into this guide has taken several weeks. I have used every program listed (and then some) and tested them as best I could. I’ve formatted and flashed and booted up, formatted and flash………………

Tips On Buying USB Flash Drives
1 – Quality and reliability. Stick with name brands or at least well reviewed drives. Check the reviews for the drives. Using a site like Newegg has reviews built-in.
2 – USB flash drives range in speed and faster ones come on the market all the time. Do a search on the product and check the manufacturers site.

Tools Used:
Please note that all tools listed are all FREE.
RMPrepUSB
Windows 7 USBDVD Download Tool
WinToFlash
YUMI
Winbuilder Win7PE
Unetbootin
nLite
RT7Lite
UBCD4Win
LiveUSB Install
SARDU
XBOOT
EasyBCD
Katana
plus a few others listed elsewhere.

Your BIOS
You must be able to boot from a USB Flash Drive. The options for that are in your BIOS or in some cases by hitting a key at boot.
You’ll have to consult your computer manual or do a search for your particular computer on exactly how.
Below is an example from one of my computers. Click on the pic for a larger image.
usb boot xyz

Advanced USB Drive Formatting
This method allows you to delete the partition on the flash drive, make it an active partition (bootable), and format it.
I always use this method when creating bootable flash drives.
We will use the built-n Windows tool called diskpart. It’s free and fast.
-Insert your flash drive.
-Open a command prompt. ( press the Windows + R keys and type cmd).
– Here are the commands in order.
1 – diskpart
2 – list disk   (find the number of your flash drive)
3 – select disk X   (where X is the number of your flash drive. Make absolutely sure you have the right number!)
4 – clean
5 – create partition primary
6 – select partition 1
7 – active
8 – format fs=fat32 quick
9 – assign

usbdiskpart

Pages: Page 1 Page 2 Page 3 Page 4 Page 5 Page 6 Page 7

About Me

July 23, 2011, 15:40(EDT) By Eric (a.k.a. TweakHound)

FAQ’s about me…
Name: Eric Vaughan
Location:Virginia, USA
Education: BS Computer Networking
Certifications:
Microsoft Certified Systems Engineer (MCSE)
Microsoft Certified Professional (MCP)
CompTIA Linux+
CompTIA A+ Certified Technician

Highlights: – Mentioned in a few magazines including Computer Power User and PC World.
– Article featured in Linux World Magazine.
– Featured in the book, How To Do Everything With Windows XP.
– Quoted in an NSA doc.
Computing experience: I’ve built too many to count. My first personal computer was a 386 the first month they hit the shelves. The first one I built was a Pentium.
Number of computers: Varies, I’ve got 6 running right now.
See My Computers, etc.

My Music
My CD Collection
My Vinyl Album Collection SOLD
My Digital Music Collection

Contact

July 23, 2011, 15:22(EDT) By Eric (a.k.a. TweakHound)

Advertisers, Product Reviews, Etc..
I get a lot of contact regarding these topics.

Sponsored Posts
Under no circumstances will I allow a sponsored post. It’s is unethical and beneath contempt.

Advertisers
Unless you are a major hardware or software company I’m not interested.
Don’t bother contacting me. This includes “guest posts”.

Software Giveaways
I will review your product (see below).
If I think it doesn’t suck then I will gladly offer it up for a giveaway.

Product Reviews
– For software please provide a link and license / key to full version of the software. I do not evaluate time-limited, trial, or otherwise crippled software.
– For hardware contact me at the address below.

Others
If you contact me with tech support questions:
1 – Know that I do not have time to respond to all of them. Please do not take offense.
2 – There is a chance that the content of your email will be published. Names and other personal detail will be left out.

I will not allow return receipts or “click on a link to be approved” or “added” to your email. This practice is quite rude.
Remember to fill in the subject line. Emails without a subject line go straight to the trash via the spam filter.

I get a lot of email. I can’t promise I will respond to every email I receive.

Eric
Contact: tweakblog1@gmail.com

About

July 23, 2011, 12:13(EDT) By Eric (a.k.a. TweakHound)

Site Info
This site has been around since May, 2002.
To contact me, see the Contact Page.
If you want to know more about me, see my page.

Where did you get the name for the site?
When I began searching for a name for this site I wanted a “.com” address. I started thinking of things and nothing seemed to fit. Then I came up with the name “TweakHound”

What exactly is a TweakHound?
Since I made it up, I get to define it.
tweak – to change slightly, esp. in order to make something more effective or correct
hound – One who eagerly pursues something.
So we get…
TweakHound – n , English-American (twi:k-haund)
1 – A subspecies of homo sapien caught frequently using and tweaking computers. Often sighted banging head against wall after conversations with other humans.
2 – One who is never satisfied with the efficiency of a computer.
syn. geek, nerd

Chances are, if you made your way here, you’re a TweakHound too!

What this site is:
A computer enthusiast site.
This site is just a hobby of mine and I’ve managed to help some people along the way. I’ve no dreams of becoming the next big tech portal. I do this because it’s fun. When it ceases to be, I’ll shut the doors. When an idea strikes me I write about something. If I buy a computer part that I feel someone may be interested in, or that I have a different take on, I write about it. When I see a news item of interest, I post it. Pretty simple really.

What this site isn’t:
A “hardware” site. A “review” site. A free tech support service. By using the links on this site, search engines, and forums, you can find the answers to just about everything.

To the hundreds of thousands of different people who have found their way here, thanks for stopping by!
To those who don’t like the site…goodbye!

Privacy Policy
See here: https://www.tweakhound.com/about/privacy-policy/

Disclaimer
You assume total responsibility for using this site and its content. I am not responsible for loss of or damage to equipment, person, profits, information or anything else. All material in this site belongs to that materials owner. You may use material created by me for personal use only.

« Previous Page
Next Page »

Primary Sidebar

Popular Posts

Tweaking Windows 10

Software I Use – 2021 Edition

Timer Tweaks Benchmarked

Win10 – Get Auto-Login Back

Recent Posts

  • Patch Tuesday
  • Wednesday News
  • Patch Tuesday
  • Monday News
  • Patch Tuesday
  • Weekend News
  • Weekend News
  • Patch Tuesday
  • Friday News
  • Patch Tuesday
buywin10th2

Tags

  • Android
  • Backup
  • Beer
  • Computer Hardware
  • Computer News
  • Cool Tools
  • Freeware
  • How-To's
  • Linux
  • Off Topic
  • openSUSE
  • Playlists
  • Privacy
  • Security
  • Software
  • This Site
  • vacation
  • Veterans
  • Windows 10
  • Windows 11
  • Windows 7
  • Windows 8
  • Windows Vista
  • Windows XP

Catagories

  • Android
  • Backup
  • Beer
  • Computer Hardware
  • Computer News
  • Cool Tools
  • Freeware
  • Freeware Machines
  • How-To's
  • Linux
  • News From The Web
  • Off Topic
  • openSUSE
  • Privacy
  • Security
  • Software
  • Tweak Guides
  • Veterans
  • Windows
  • Windows 10
  • Windows 11
  • Windows 7
  • Windows 8
  • Windows Vista
  • Windows XP

TweakHound - Optimize Your Computing Experience! TweakHound - Optimize Your Computing Experience!

Copyright 2002-2025 by Eric Vaughan All material contain here is the property of the materials owner. Windows, Windows XP, Windows Vista, Windows Seven, Windows 8, Windows 10, Windows 11, Microsoft, and all associated logos are trademarks/property of Microsoft. You may not use or copy any material from tweakhound.com without expressed written permission. Hotlinking to any material within this site is forbidden. Privacy Policy