• Skip to primary navigation
  • Skip to main content
  • Skip to primary sidebar

TweakHound

Computer stuff...

  • Home
  • Windows XP
  • Windows Vista
  • Windows 7
  • Windows 8
  • Windows 10
  • Windows 11
  • Linux
  • Tweak Guides
  • Site Info
    • About
    • About Me
    • TweakHound’s World
    • Contact
    • My Computers
    • Old Articles
    • Privacy Policy
    • Old Index
    • Advanced Search

How To Resize Your Windows 8 Partition

win8logo

January 2, 2013, 11:20(EST) By Eric (a.k.a. TweakHound)

Windows 8 has the ability to resize the partition it is installed on.
This can come in handy since most computer manufactures completely hose the drive partition structure.
In addition I always recommend moving Libraries off the OS partition. For single disk system this step is required to do that.

*Author’s Note: I’ve prepared this article in preparation for the Windows 8 tweak guide.

disksaw_1
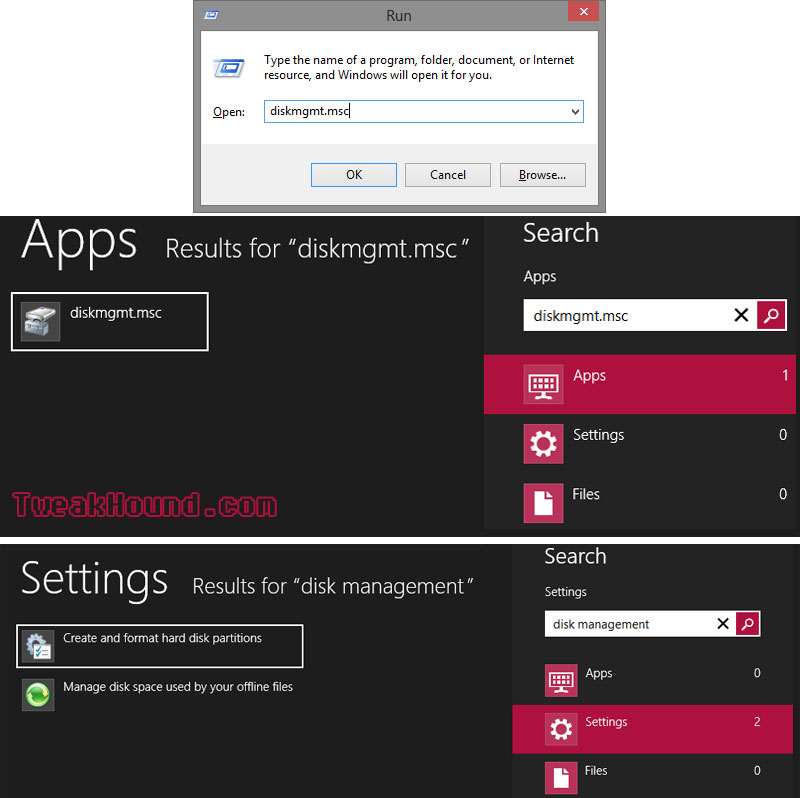
Open Disk Management
It is located at Control Panel > Administrative Tools > Computer Management > Disk Management.
Get there by:
1 – Press the Windows + R keys and type diskmgmt.msc (or enter that command in the Search charm).
or
2 – Type disk management in the Search Charm > Settings > Create and format hard disk partitions.
shrink_diskmgmt


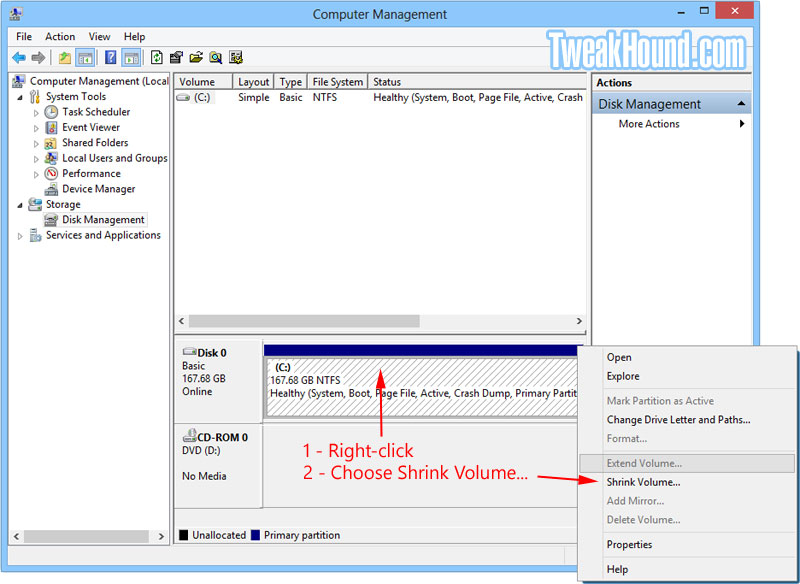
Choose the disk / partition you wish to edit, right-click on it, choose Shrink Volume…
shrink_1


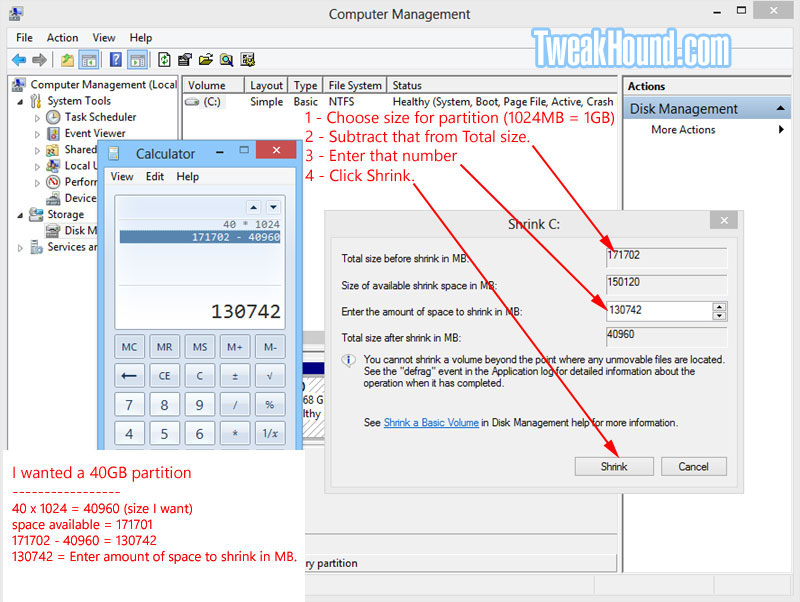
1 – Choose a size for your partition. Size is in MB and 1024MB = 1GB. I’ve been using 40GB (40960MB) which may be overkill but is future proof.

(Windows + R keys and type calc to get to calculator)

2 – Subtract the size you came up with in step one from the number in the box Total size before shrink in MB.

(In this example 171702 – 40960 = 130742)

3 – Enter that number in the box Enter the amount of space to shrink in MB.

4 – Click the Shrink button.
shrink_2


That is it for shrinking the OS partition. Read on to add a partition in the empty space.
We are still in Disk Management (if you left see the beginning of this article on how to get there).

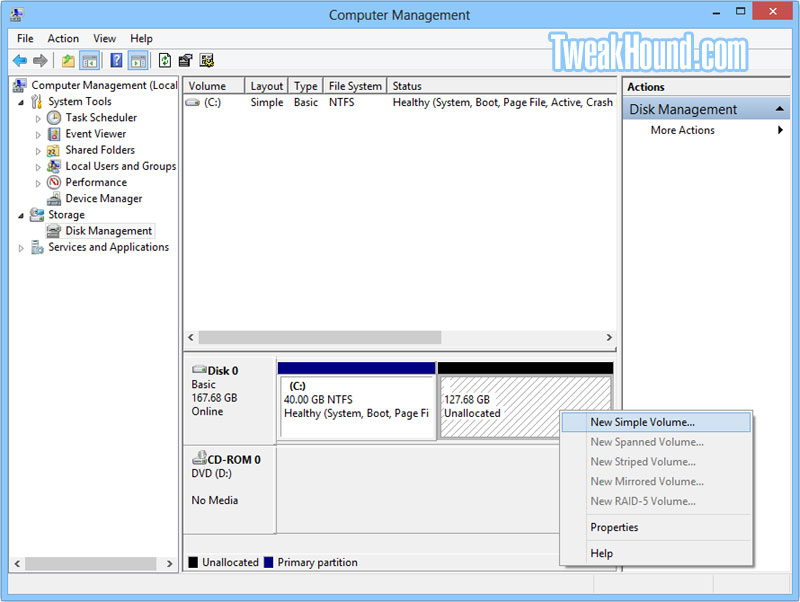
You’ll see empty space of your disk marked in black for unallocated space.

Right-click on it and choose New Simple Volume…
shrink_3


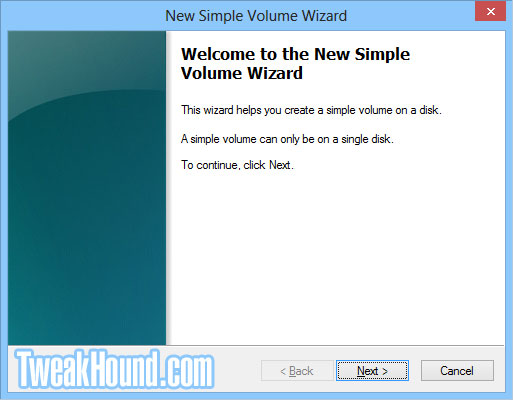
And “We’re off to see the Wizard”!

Click Next
shrink_4


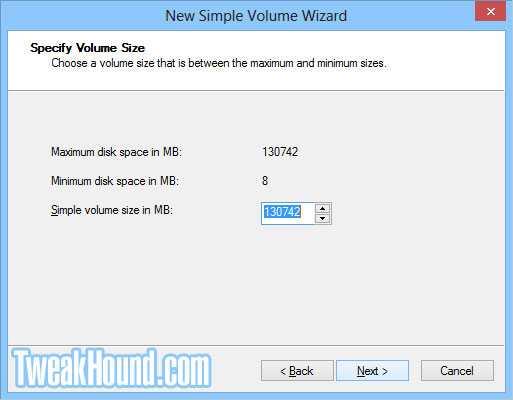
Use all the space or you can use less if desired. Click Next.
shrink_5


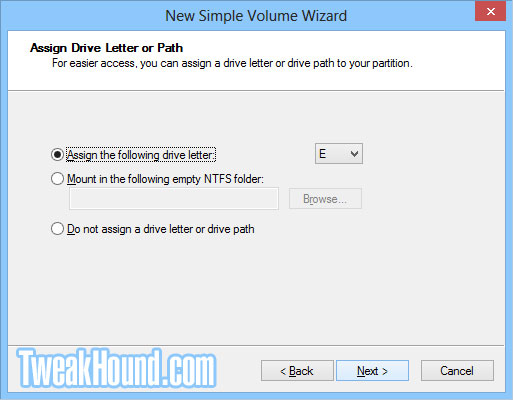
You can change the drive letter if you like but it isn’t necessary. Click Next
shrink_6


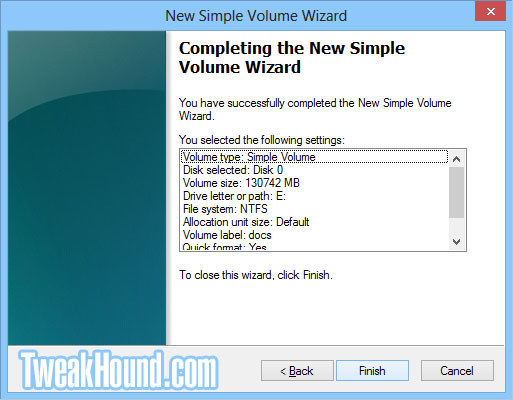
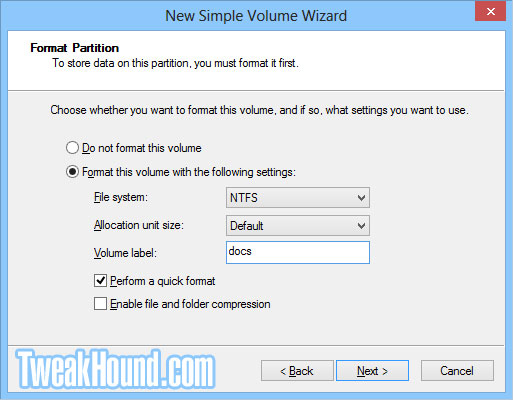
Name it. Since this is usually where I am going to move Libraries (once called My Documents) I name it docs.

You shouldn’t need to mess with any other settings here. Click Next.
shrink_7


All done!

shrink_8


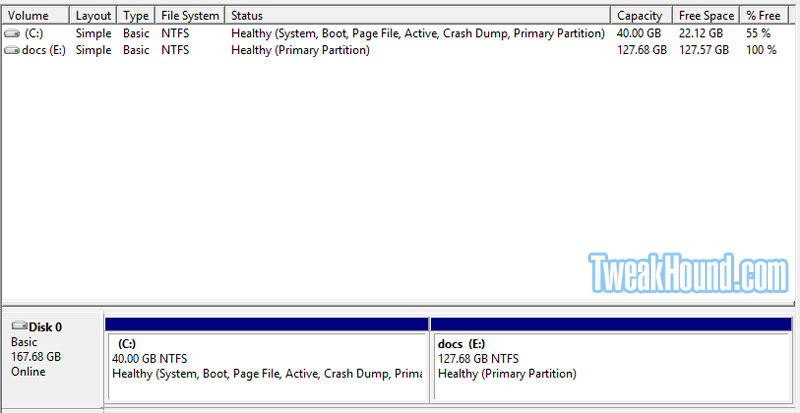
This is what it looks like on my laptop.
shrink_9


-END-

Have You Found This Guide Useful?
Please help me keep helping you!

Help me keep helping you!

Tagged With: How-To's, This Site, Windows 8

Primary Sidebar

Popular Articles

Windows 10

Tweaking Windows 10

My Windows 10 Tweaks

Windows 10 Privacy Settings

Win10 Diagnostics Tracking Service Gone?

Windows 10 Advanced Disk Cleanup

Win10 Customize Installation Options

Windows 10 Dark Theme

Win10 Wallpapers, Graphics, etc.

All Windows 10 Articles

Windows 8

Tweaking Windows 8.1

Advice On Installing Windows 8.1

Clean Install Windows 8.1

Cleanup After Windows 8.1 Upgrade

Create Shutdown, Restart, Logoff Tiles For Windows 8

Tweaking Windows 8

Install Windows 8 – Clean Install With Upgrade Media

Install Windows 8 – Upgrade

Windows 8 – Cleaning Up After You’ve Upgraded

Windows 8 Freeware Machine

Windows 8 SSD Settings, Etc.

How To Resize Your Windows 8 Partition

Create Windows 8 Recovery Media

Windows 8 – Elevated Command Prompt

How To Fix The Windows Bootloader

Windows 7

Installing Windows 7

Tweaking Windows 7

Windows 7 Diagnostics Tracking Service

The Windows 7 Freeware Machine

The Windows 7 Pagefile And Running Without One

Bad Tweaks

SSD Tweak Guide (sort of)

The noguiboot (no GUI Boot) Tweak

NtfsMemoryUsage=2 Tweak

More Windows 7 articles here.

Windows Vista

Installing Windows Vista

Tweaking Windows Vista

More Windows Vista articles here.

Windows XP

eXPired - The Last Windows XP Guide You'll Ever Need

The Right Way To Install Windows XP

Super XP Tweaking Guide

The Freeware XP Machine

Bad Tweaks

More XP Articles here and here.

Backup

Backup Article Greatest Hits – Vol. 1

Other

Cataloging Your Music Collection

Finding Good Album Art

Converting Vinyl Records To Digital Music – A Non-Audiophiles Guide

Windows All-In-One Recovery Flash Drive

SSD Tweak Guide (sort of)

Raidmax Blackstorm Case Review

Disk Partitioning

Ditch Those CD's! A Guide To Using USB Flash Drives

Checking Your Disks For Problems

Bad Tweaks

More articles here

Tags

Android Backup Beer Computer Hardware Computer News Cool Tools Freeware How-To's Linux Off Topic openSUSE Playlists Privacy Security Software This Site vacation Veterans Windows 7 Windows 8 Windows 10 Windows 11 Windows Vista Windows XP

TweakHound - Optimize Your Computing Experience! TweakHound - Optimize Your Computing Experience!

Copyright 2002-2025 by Eric Vaughan All material contain here is the property of the materials owner. Windows, Windows XP, Windows Vista, Windows Seven, Windows 8, Windows 10, Windows 11, Microsoft, and all associated logos are trademarks/property of Microsoft. You may not use or copy any material from tweakhound.com without expressed written permission. Hotlinking to any material within this site is forbidden. Privacy Policy