
Customize The Notification Area
Customize The Notification Area
Why: User preference, quicker access to the things you use and removal of the things you don’t.
Why not: Removing some items such as the Action Center or Anti-Virus icon can lead to you not being informed of important issues.
The Notification Area is the section of your taskbar at the bottom-right of your screen.

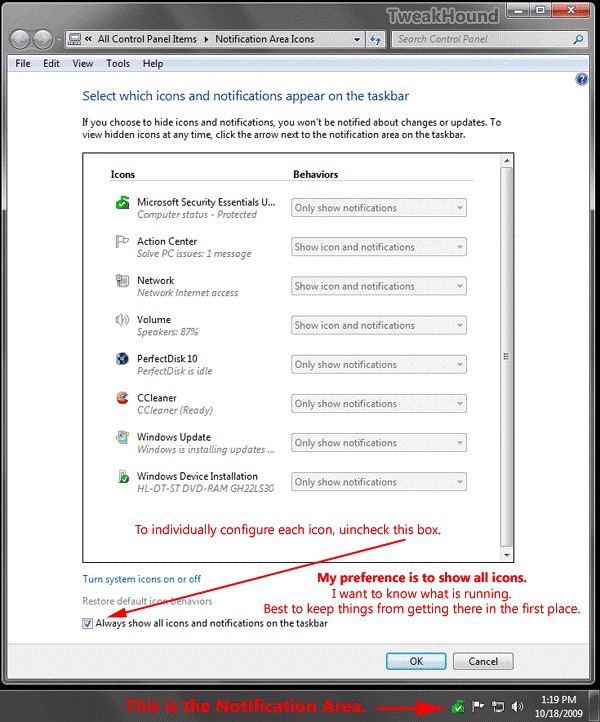
Right-click in an empty area of the Taskbar and choose Properties > You should be under the Taskbar tab > In the Notification area section click the Customize button.
(Also available by going to: Control Panel >Notification Area Icons)
You can either handle all icons the same by checking the box next to:
Always show all icons and notifications on the taskbar.
or
Uncheck that box and configure each item individually.
note – Not everything you see in the window below shows all the time. Some only appear when that program is open.
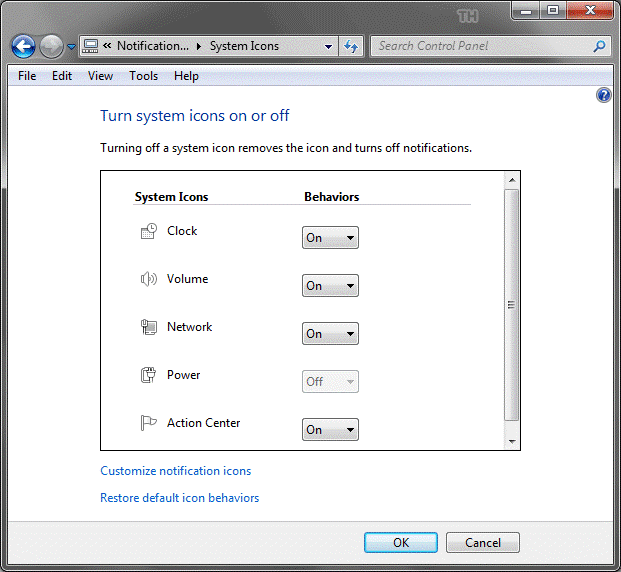
Click on Turn system icons on or off to configure those.
Action Center
Why: User preference, quicker access to the things you use and removal of the things you don’t.
Why not: Removing some items can lead to you not being informed of important issues.
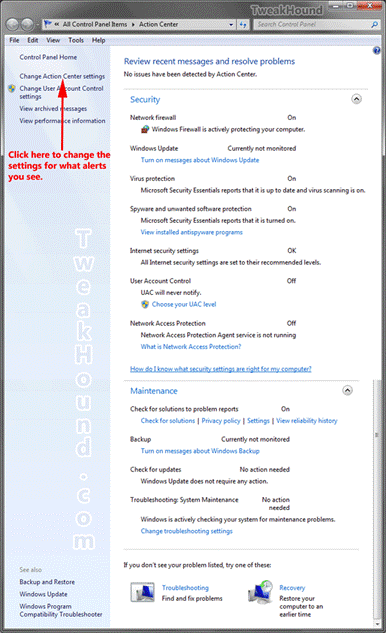
Get there by right-clicking on the flag icon in the Notification area and choose Open Action Center.
Configure what sections you get messages about by clicking Change Action Center settings.
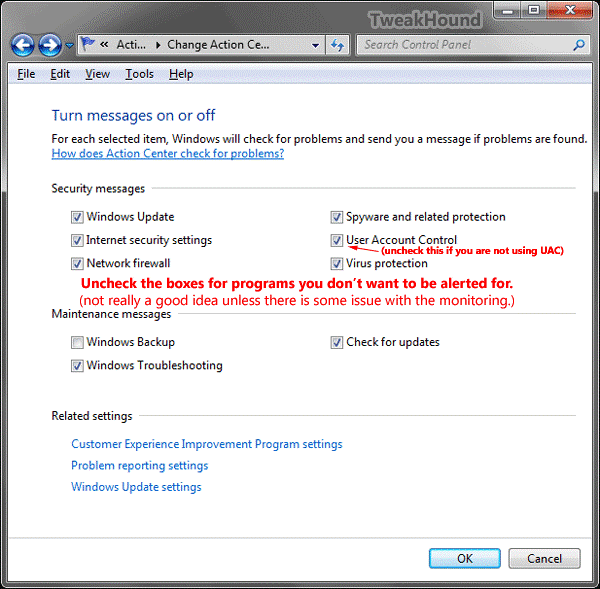
Uncheck unwanted sections.
To remove the Action Center icon see the previous section Customize The Notification Area.
Customize The Clock
Why: User preference.
Why not: Can’t think of a reason not to!

Basic Settings
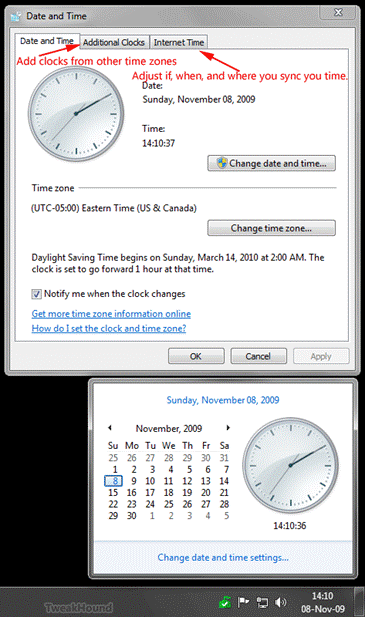
To get there click once on the time and then click Change date and time settings…
Advanced Clock Settings
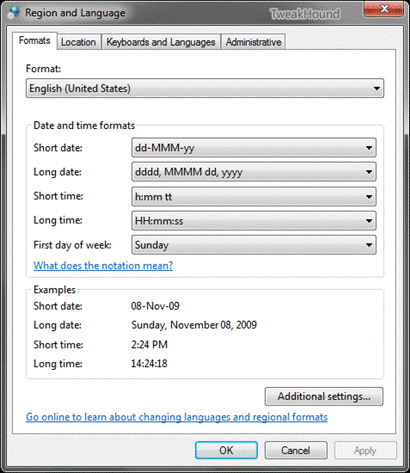
To get there go to Control Panel > Region and Language (can’t see that section? In Control Panel choose View by > Large Icons)
These options switch settings system wide as well as the clock area. Click on the arrows to see your options.
While other options can change the taskbar clock options, I recommend using the Short date and Long time sections.
For time little h is 12 hour clock, big H is 24 hour clock. Play with the options until you see a format you like.
If you do not understand date / time settings and formats see here: Change the display of dates, times, currency, and measurements
Click Apply to see your changes.
Customize Folder Options
Why: User preference.
Why not: Can’t think of a reason not to!
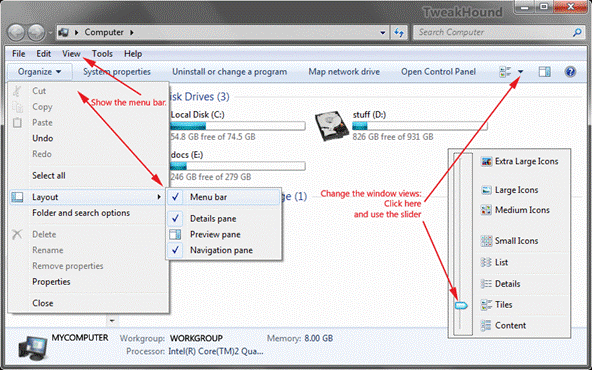
Show the Menu bar – with Explorer opened go to Organize > Layout > check Menu bar.
Change Folder Views – see picture below.
Other Folder Options (unhide files and folders, show file extensions, unhide empty drives)
Why: User preference.
Why not: Can’t think of a reason not to!
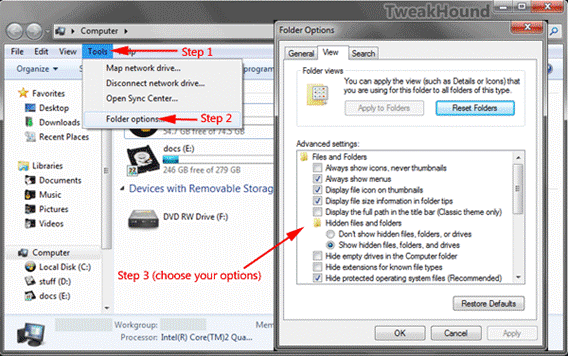
While in Explorer and with the Menu bar shown (see previous section) go to Tools > Folder options > choose your options.
Disable Gadgets
Why: User preference.
Why not: You may find some Gadgets useful. Gadgets do not use resources if unused.
Option #1: Uninstall it.
Press the Windows + R keys > type control.exe appwiz.cpl > click Turn Windows features on or off > uncheck Windows Gadget Platform and click OK.
Option #2: Via regedit.
Open notepad. Paste the following text and save as DisableSidebar.reg (type = All files). Double-click on that file to apply it and reboot.
Navigate to that key and delete it to restore Gadgets.
Windows Registry Editor Version 5.00
[HKEY_CURRENT_USER\Software\Microsoft\Windows\CurrentVersion\Policies\Windows\Sidebar]
“TurnOffSidebar”=dword:00000001
God Mode
A while back a tweak to add a shortcut to all control panel items (actually All Tasks) surfaced. It soon began to spread around the web as God Mode. People who fancy themselves as “Windows Experts” immediately scoffed at this tweak. Although the name given to it was a little silly the tweak is pretty handy and I like it.
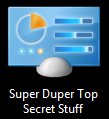
You can make a God Mode shortcut for this by right-clicking on the Desktop, within a partition, or in a folder > choose New > Folder > enter God Mode.{ED7BA470-8E54-465E-825C-99712043E01C} where it says New Folder. You can replace the name God Mode with anything you like. I used Super Duper Top Secret Stuff just to amuse myself. You can also Pin this.
