
Windows Built-In Tweaks
Action: Turn Off The XP Security Center
Levels 2 , 3, 4
Purpose: Free up system resources.
Open the Services MMC: Press the Windows and R keys > in the resulting window type services.msc > in the resulting window scroll down to Security Center and double-click on it > In the “Startup type:” box use the arrow to scroll down to choose “Disabled” click Apply and reboot, or, click Apply and click the button that says Stop.
For a more in-depth guide and more options, see my article The Windows XP Security Center.
Tweaking System Properties
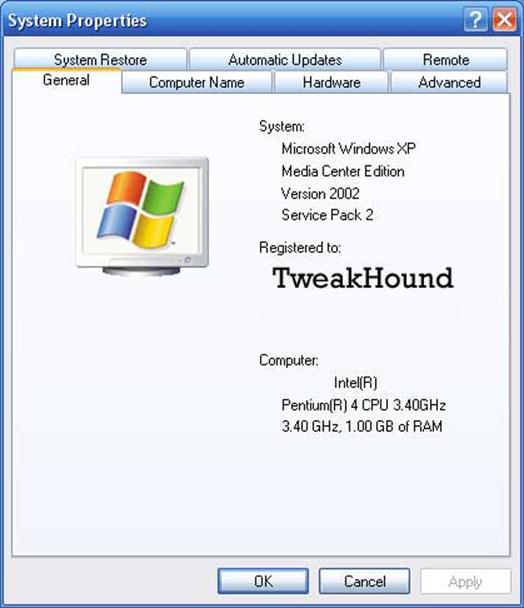
Action:
Adjust Visual Effects
Purpose: Free up system resource
Press the Windows & Pause Break keys > click the Advanced tab > under Performance click the Settings button >
Level 1 & 2
– uncheck all except “Use drop shadows for icon labels on the desktop” , “Smooth edges of screen fonts” , and “Use visual styles on windows and buttons” > click Apply and OK.
Level 3 – uncheck all except “Use drop shadows for icon labels on the desktop” , “Smooth edges of screen fonts” > click Apply and OK.
Level 4 – Choose the option Adjust for best performance > click Apply and OK.
Visual Effects Menu Options
Disabling each will eliminate the feature. Many of these effects are hardly noticeable anyway.
•Animate Windows when minimizing and maximizing
“Slides” the window in/out of the task bar.
•Fade or slide menu items into view
“Slides” Start menu options in/out.
•Fade or slide ToolTips into view
“Slides” ToolTips in/out of view.
•Fade out menu items after clicking
The menu item will appear to fade away after you click on it.
•Show shadows under menus
Creates a shadow effect under menu/desktop items.
•Show shadows under mouse pointer
Creates a shadow effect under mouse pointer.
•Show translucent selection rectangle
When you select and object it will have a translucent highlight rather than solid.
•Show window contents while dragging
Why?
•Slide open combo boxes
“Slides” menu options in/out of the menu bar.
•Slide taskbar buttons
What it says
•Smooth edges of screen fonts
Makes screen fonts easier to read.
•Smooth-scroll list boxes
Huh?
•Use background image for each folder type
Kinda pointless unless you have poor vision.
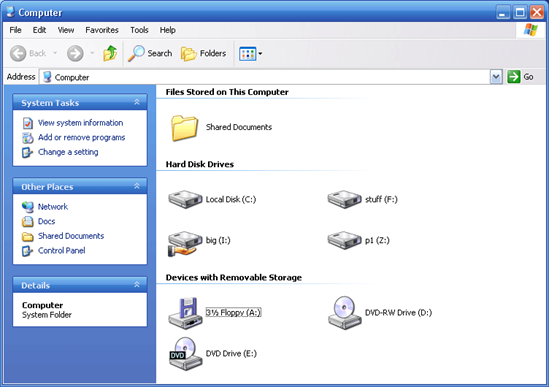
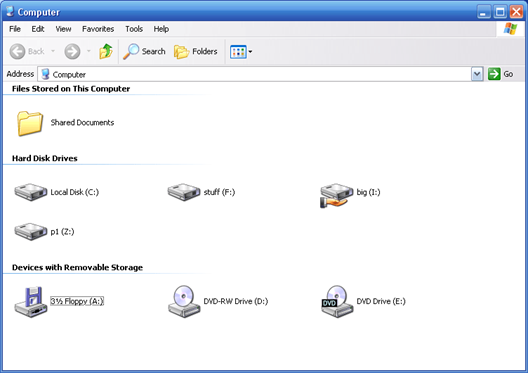
•Use common tasks in folders
Use Common Tasks
Don’t Use Common Tasks
 �
�
•Use drop shadows for icon labels on the desktop
|
Enabled
|
Disabled
|


•Use visual styles on windows and buttons
Use Styles
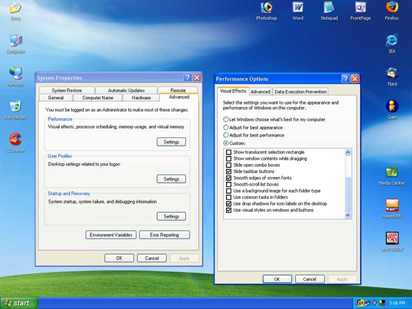
Don’t Use Styles
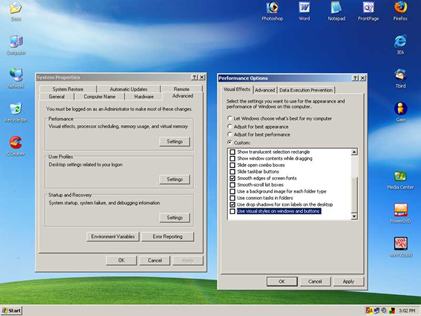
Don’t close the System Properties window yet!
Action: Disable Error Reporting *All Levels
Purpose: Free up system/network resources.
This “feature” calls home to Microsoft and sends info about system errors. Click on the Error Reporting button on the bottom of the window > check the box that says Disable Error Reporting > uncheck the box that says But notify me when critical errors occur. click OK to close the window. Close out of these windows by choosing Apply/OK but leave the System Properties window open.
Action: Turn Off System Restore Levels 3 & 4 only
Purpose: Free up system resources.
Click on the System Restore tab and place a check mark in the Turn off System Restore on all drives box. Click Apply. ***If you do not use a backup program, DO NOT use this tweak!!! System Restore while using resources is a useful feature.
Action:
Remove Old Restore Points
Purpose: Free up disk space.
If you keep System Restore active: To remove old system restore points go to Start > Programs > Accessories > System Tools > Disk Cleanup > select the drive XP is installed on and click OK > click the More Options tab > in the System Restore section, click the Clean up… button and Yes in the resulting screen.
Action: Turn Off Remote Assistance Levels 3 & 4 only
Purpose: Security. Free up system resources.
Click on the Remote tab. Uncheck both check boxes and click Apply and then OK .
Action: Turn Off Automatic Updates (or make a set schedule) Levels 3 & 4 only
Purpose: Free up system/network resources.
Click on the Automatic Updates tab…
Now, before you do anything here you need to consider a few things. Windows Update is an essential step in protecting your machine. Geeks know that MS used to release their updates on Wednesday. This allowed you to schedule Windows Update for late Wed. night or early Thur. morning. Since MS, in its infinite wisdom, decided to change their weekly updates to a monthly semi-schedule, we can’t do that anymore. If you are the type of person who keeps track of techie news, you’ll know the minute updates are released. With this in mind, we’ll disable Automatic Updating…
Click on the Automatic Updates tab > uncheck the box next to “Keep my computer up to date…”
A better option may be to schedule it to check for updates once a week:
Click on the Automatic Updates tab > check the box next to Automatic > pick a day and time. I would recommend sometime Wednesday morning.
Action: Turn Off Indexing *All Levels
Purpose: Free up system resources.
Open My Computer ( press the Windows & E keys) > right click on each drive and choose Properties > under the General tab, uncheck the box that says Allow the Indexing Service to index this disk for fast file searching > a window will pop up, make sure the box is checked that says Apply change to (drive letter):\, subfolders and files and click OK. Windows will apply the changes, click OK. Once you have done all the drives I recommend you reboot.
Action: Open each folder in a separate part of memory (recommended for 512MB memory and higher) Levels 2 , 3, 4 (w/512MB memory or more)
Purpose: System stability.
Open My Computer ( press the Windows & E keys) > go to Tools > Folder Options > View and check the box in “Launch folder windows in a separate process“. Reboot now.
***This IS NOT a performance tweak it is a stability tweak. Quote from Microsoft: “When you open each folder window in a separate part of memory, the stability of Windows can be increased. However, this process uses more memory, and may cause your computer to run more slowly.