
Drive And File System Tweaks
SSD’s
All tweaks, questions, etc. related to SSD’s are here: SSD Tweak Guide (sort of)
Move And Manage Your Libraries
Why: Personal files are safe. Decreases fragmentation of OS drive. Can speed up access to files.
Why not: Can’t think of a reason not to!
Move Your Libraries
This is a critical step in the way I set up computers. A problem free backup / restore process depends on you having your docs, music, pics, etc. on a drive or partition other than the one Windows 7 is on. Using this method you do not have to worry that some issue (virus, crash, hardware failure, etc) will mean losing your data.
How To Move Windows 7 Libraries
Decide where you want to move these to.
A second disk is your best option but in a single disk system a second partition will do.
Right-click on your User Name in the Start Menu and choose Open.
Select the libraries you wish to move and copy / paste them to the new location.
Pick the stuff you wish to be safe from any problems.
I would do at least: Contacts, Downloads, My Documents, My Music, My Pictures, My Videos.
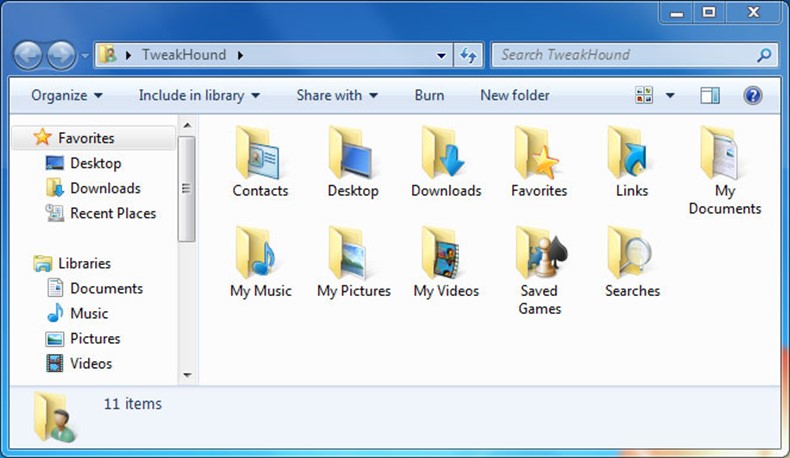
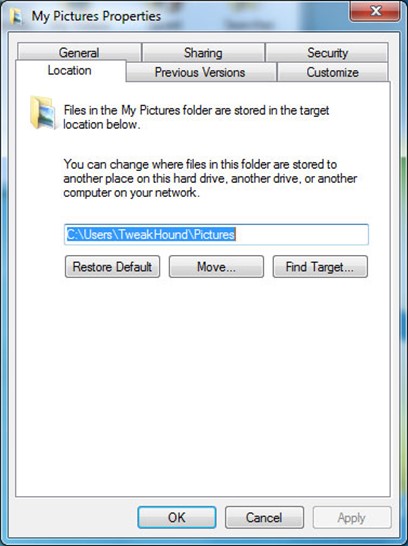
Once you have finished copying the files. Go back to the original Library, right-click on each folder you moved.
Choose Properties from the menu. In the resulting window, click on the Location tab, and then the Move… button.
Browse the location you copied the files to.
Click once on the folder you want it moved to and then click the Select Folder button (bottom right of the screen).
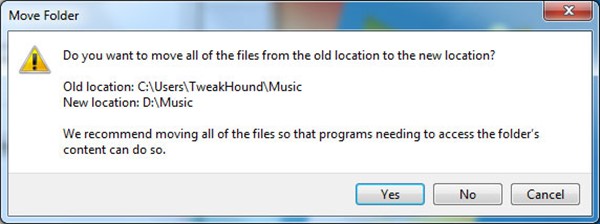
This screen will pop up. Click Yes.
Repeat this step for all the folders you copied.
Add new folders to your Library
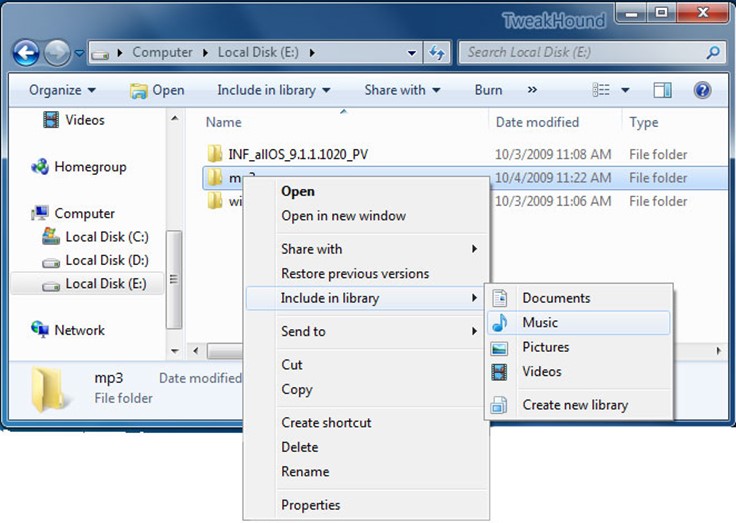
All your files do not have to be in the actual library folder. Windows 7 lets you add folders from other locations to your library without actually moving them into the actual library location.
To add a folder to a library. Right-click on that folder and choose Include in library > and choose the appropriate library.
Make Sure Your SATA Drives Are configured For Max Speed
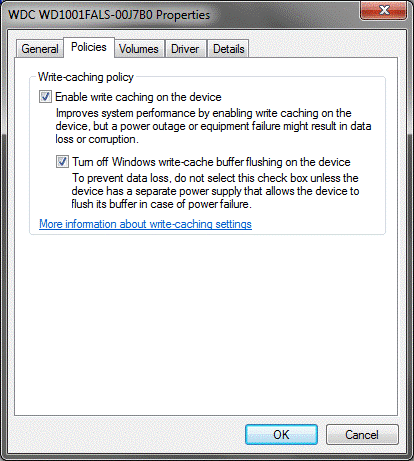
Windows 7 doesn’t always set all the performance options to maximum for your SATA drives.
To set all the options to max, open device manager. Press the Windows + R keys and type devmgmt.msc > expand the Disk drives section by clicking on the plus sign > double-click on the drive you want to configure the click the Policies tab > Check the Optimize for performance button > Check both the Enable write caching on the disk and the Enable advanced performance boxes. See the warnings about power loss? They are there for a reason.
Configure Or Disable Windows Search
Why: User preference. Less disk access (thrashing). Less memory use. (see below)
Why not: Some of Windows 7 new features are tied to this (see below for more info).
Search in Windows 7 is a marked improvement over previous versions. It is less intrusive, uses less resources and what resources it uses it uses them more efficiently. See, Engineering Windows 7 – Windows Desktop Search for an overview of why this is so.
The Search box in the Start Menu is very useful at getting to things quickly. It almost functions as a smart Run command. Even if you do not perform standard searches this feature can come in handy. IMHO the little overhead that Search has is well worth it.
It is my recommendation that you keep Windows Search and configure it to your needs.
To do so type indexing in the Start Menu Search Box and choose Indexing Options (Control Panel > Indexing Options)
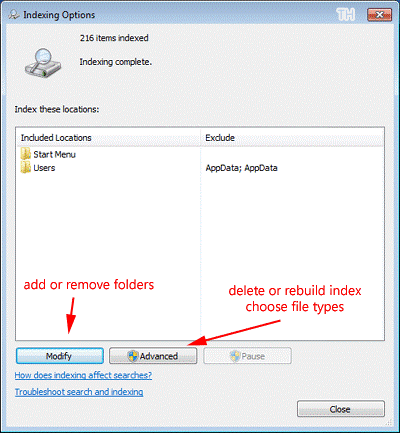
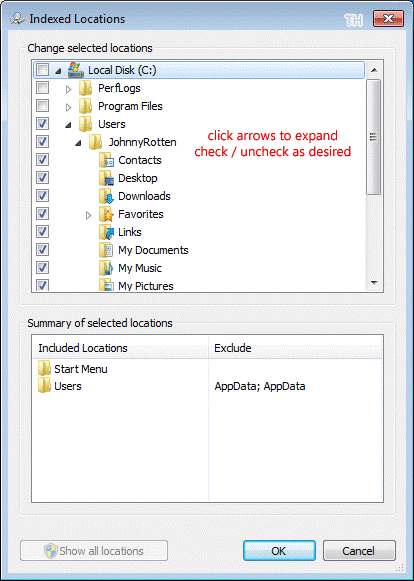
Click the Modify button to add or remove folders. Libraries and therefore folders added to Libraries are included by default.
Disable Indexing
I really, really suggest you don’t do this. For those who just don’t want it…
Option #1 – Disable the Service. Press the Windows + R keys > type services.msc > double-click on the Windows Search service > set Startup type to disabled then Stop the service or reboot.
Option #2 – Uninstall it. Press the Windows + R keys and type appwiz.cpl > Turn Windows Features on or off > uncheck Windows Search, click OK.
Disable or Configure Automatic Disk Defrag
Why: You have a third party defrag program, you wish to modify schedule, or you wish to run manually.
Why not: Defrag is an essential tweak.
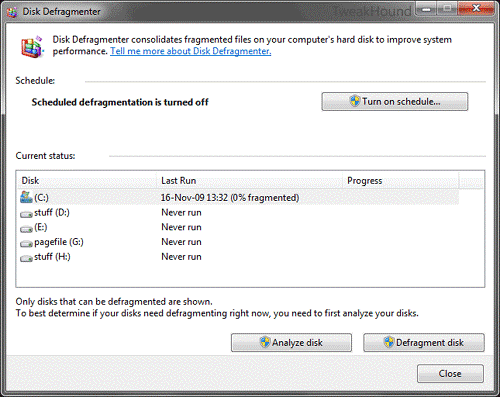
Press the Windows + R keys > type dfrgui.exe (Start Orb > All Programs > Accessories > System Tools > Disk Defragmenter).
Click Configure Schedule button > Change Schedule to fit your needs or Uncheck Run on schedule to disable
Solid State Disk Tweaks
Lots more information (new and updated) in my article: SSD Tweak Guide (sort of)
Microsoft claims that Windows 7 does all the following tweaks by default on a clean install to an SSD. I have found this not necessarily to be the case. If you did a clean install to an SSD then double check these tweaks. If you transferred your install to an SSD then apply these tweaks.
This information comes straight from Engineering Windows 7 – Support and Q&A for Solid-State Drives.
Disable Automatic Disk Defrag
Press the Windows + R keys > type dfrgui.exe (Start Orb > All Programs > Accessories > System Tools > Disk Defragmenter).
Click Configure Schedule button > Uncheck Run on schedule.
Disable Superfetch
Press the Windows + R keys > type services.msc > double-click on the Superfetch service > set Startup type to disabled then Stop the service or reboot.