Clean, Defrag, & Optimize
Disk Cleanup
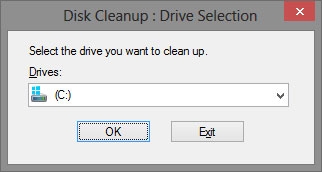
Press the Windows + R keys and type cleanmgr (or type cleanmgr or cleanup in the Search charm).
Choose the drive you wish to clean (usually C: for your OS drive) and click OK.(You can also launch this for any drive from Windows Explorer > drive root > Manage tab > Cleanup button)
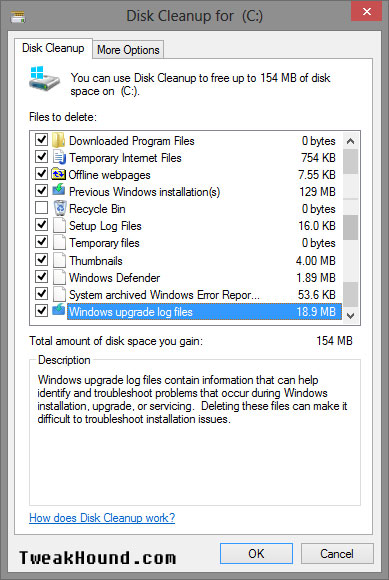
The first screen will give you the standard options. For more advanced options click the Clean up system files button and choose C: again. Check the boxes you wish to clean and click OK. *tip – Clicking on an item will show you a description.
Advanced Disk Cleanup
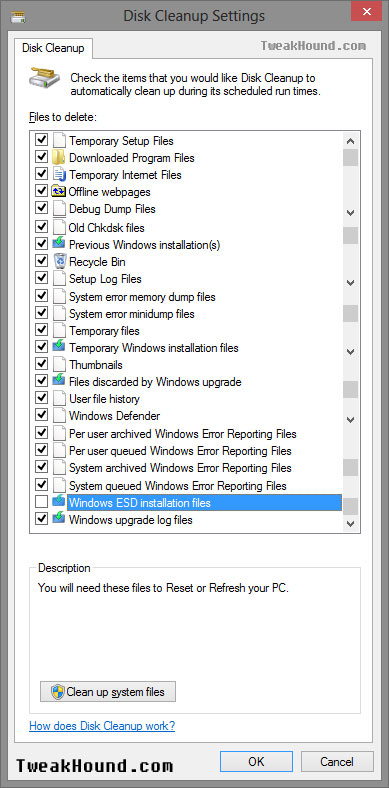
Press the Windows + R keys and type cleanmgr /sageset:50 (it can be any number but make it so you will remember it). It is my recommendation you never check Windows ESD installation files, “You will need these files to Reset or Refresh your PC”. When finished checking the boxes you want, click OK. To run this cleanup: Press the Windows + R keys and type cleanmgr /sagerun:50 (or the number you used before). Please not the command changed to sagerun from sageset. You can now run this whenever you desire.
*tip – Clicking on an item will show you a description
More Advanced Cleanup
See: Cleanup After Windows 8.1 Upgrade & Windows Update Cleanup For Windows 7 And Windows 8
CCleaner
Formally known as Crap Cleaner, CCleaner cleans all the crud and privacy issues from your PC. The screens below show the settings I use. To avoid adding unwanted Google stuff via the installer I recommend downloading the Slim version here. Deleting files should not be done without understanding what you are deleting. If in doubt, Google it. I use CCleaner every time I shut down my PC. I do not recommend using the Registry section. See the Bad Tweaks section.
Advanced users can add more cleaning features via CCEnhancer. The features added can be mess things up if you aren’t careful. Once again, this for advanced users only.
First you should adjust the settings:
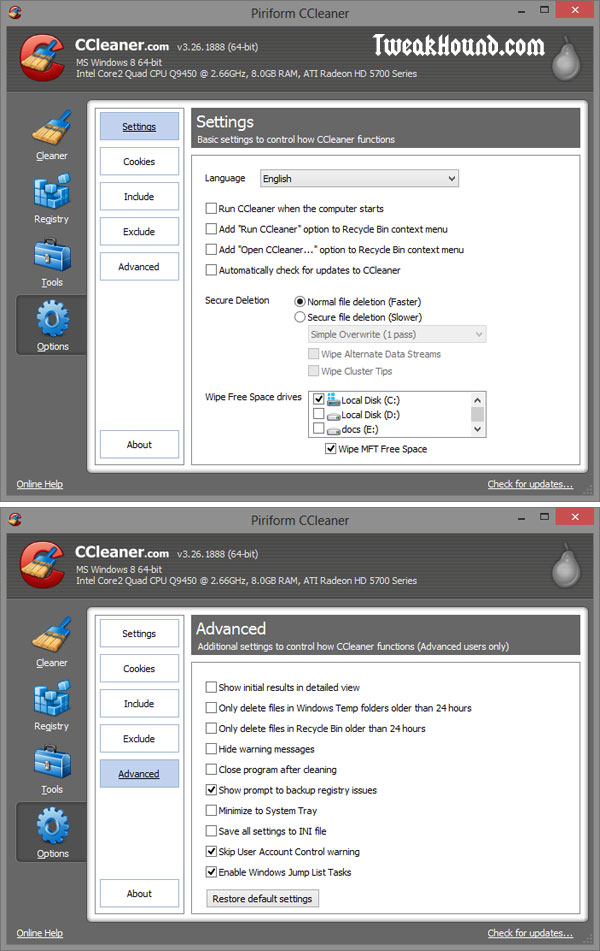
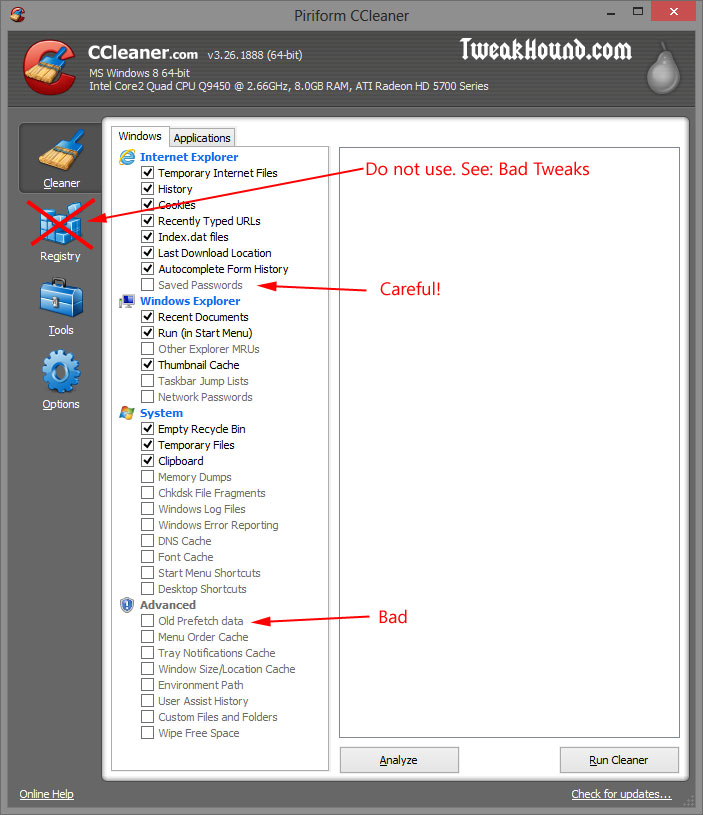
Cleaner > Windows tab
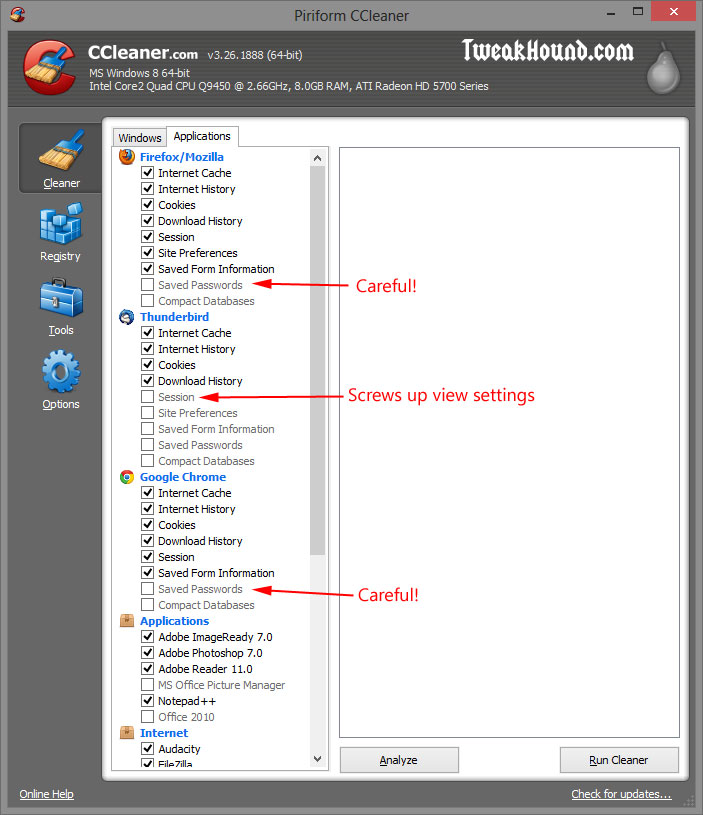
Cleaner > Applications tab
Autoruns
Autoruns has long been one of my favorite programs. For the purposes of this article we will just cover controlling startup items from the Logon tab. I encourage you to explore the program further. Autoruns description from the help file:
This utility, which has the most comprehensive knowledge of auto-starting locations of any startup monitor, shows you what programs are configured to run during system bootup or login, and what extension load into various Windows processes, including Explorer and Internet Explorer. A “Hide Signed Microsoft Entries” option helps you to zoom in on third-party auto-starting images that have been added to your system.
This is the way I use Autoruns. After downloading and extracting Autoruns, copy the folder to the root of your C: drive or your My Documents folder. Now open that folder and right-click on autoruns.exe (not autorunsc.exe) and choose Send to > Desktop (create shortcut). Now go to the shortcut on the desktop, right-click it and choose Properties > Shortcut tab > Advanced… button > check the Run as administrator box. Click OK > Apply > OK. You can now Pin that shortcut or copy / paste it to the Start Menu as I do. You can delete the desktop icon if you wish.
Now click the icon to open it > click the Logon tab > uncheck the things you do not want to start with Windows. You can click File > Save or the changes will be applied when you close the program.

Defrag
Defrag is part of the Windows 8 Maintenance process and was most likely partially configured during initial setup. For some reason Microsoft has decided to ditch the name defrag and call it optimize instead.
First off, you can run defrag any time from Windows Explorer. Just click the Manage tab and the Optimize button.

SSD users you SHOULD NOT disable defrag. See my article Windows 8 SSD Settings, Etc. for why.
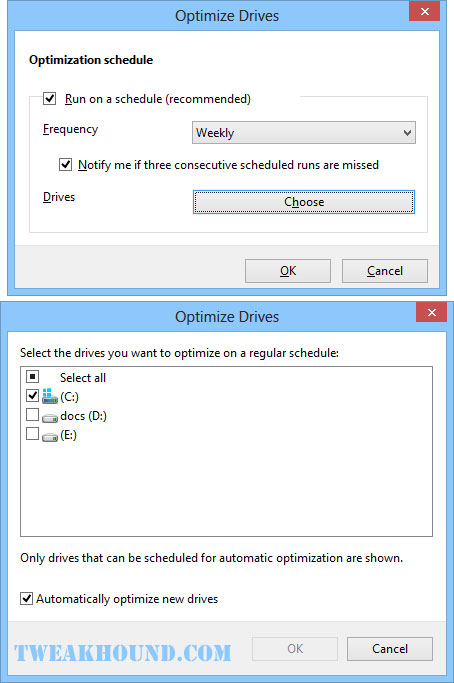
To open defrag: Press the Windows + R keys and type dfrgui (or typr dfrgui or defrag in the Search charm). Click Optimize to defrag now. Click Change settings to configure or turn off defrag.
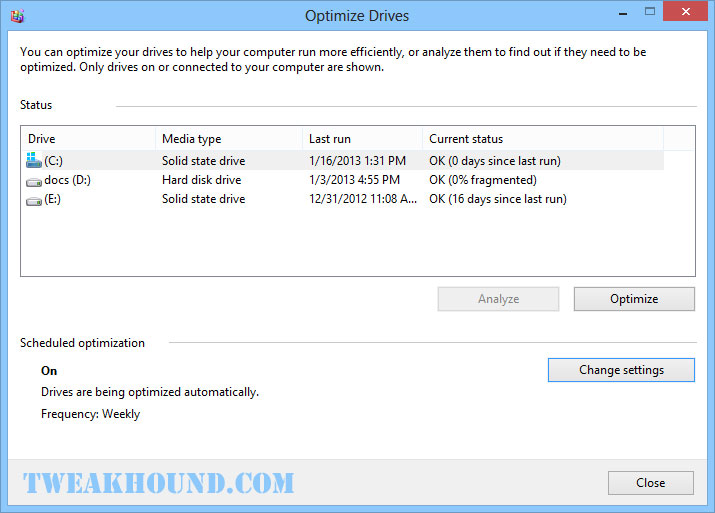
If not checked then check the box next to Run on a schedule and choose weekly or monthly based on your preference (no home user needs daily defrag).
Optionally choose which drives to defrag by clicking the Choose button.