Clean, Defrag, & Optimize
Disk Cleanup
Press the Windows + R keys and type cleanmgr
or type disk cleanup in the Search box
or Start > All apps > Windows Administrative Tools > Disk Cleanup
(You can also launch this for any drive from Windows Explorer > drive root > Manage tab > Cleanup button)
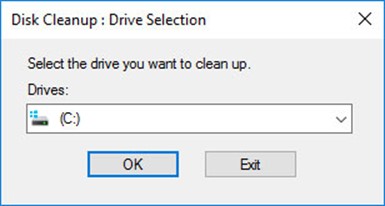
Choose the drive you wish to clean (usually C: for your OS drive) and click OK.
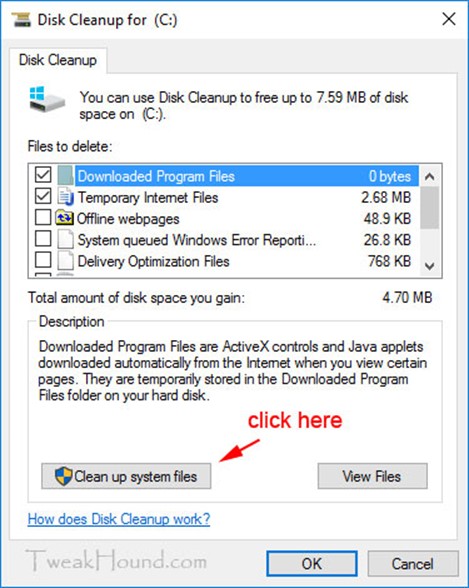
Click Cleanup system files
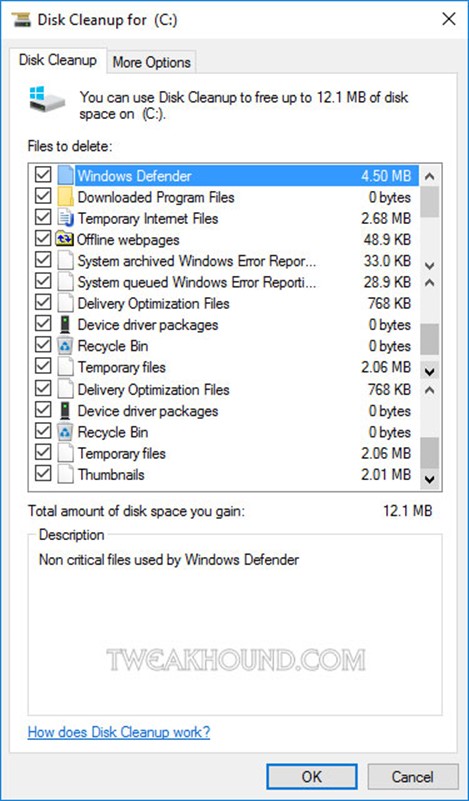
You can check everything > click OK
Advanced Disk Cleanup
This cleanup method will create a cleanup task that you can run whenever you like. It differs from the disk cleanup utility found in your menu or search (cleanmgr) in that it has more options.
1 – Press the Windows + R keys.
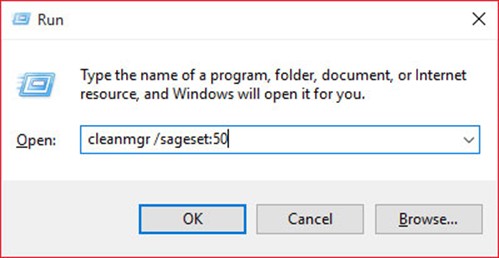
In the resulting window type cleanmgr /sageset:50 and press Enter (or click OK).
(you don’t have to use the number 50, any number will do. I use it because I always have and it is easy to remember.)
2 – Click Clean up system files
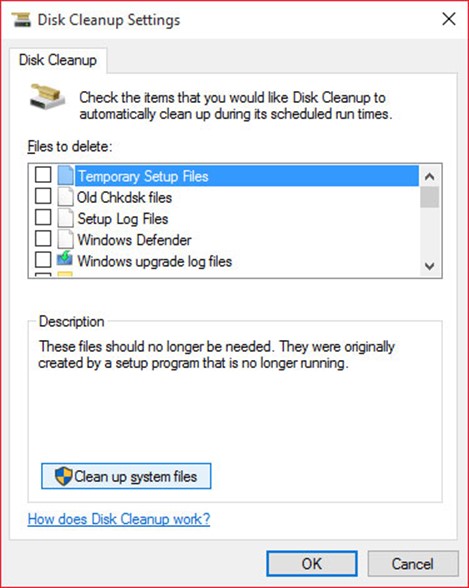
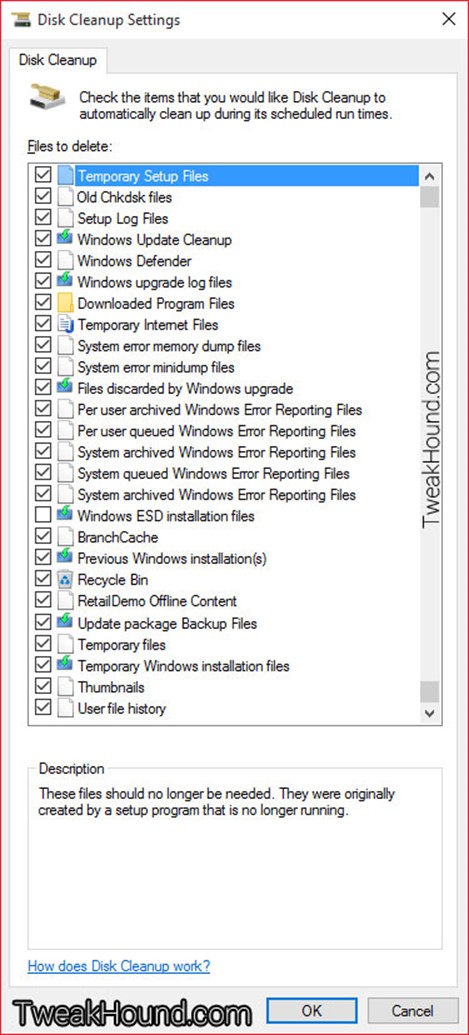
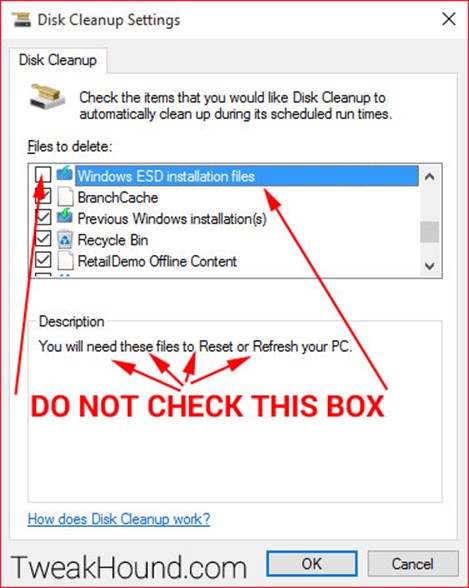
3 – Start checking boxes. You can highlight a line and it will tell you what it does. I check all boxes EXCEPT Windows ESD installation files. They aren’t just vital to refresh and reset, these files ARE refresh and reset. The Previous Windows installation(s) line is exactly what it says. No takebacks! Click OK when done.
4 – Press the Windows + R keys.
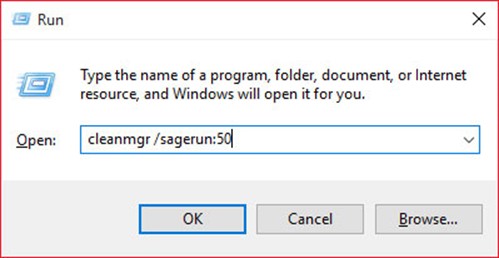
In the resulting window type cleanmgr /sagerun:50 and press Enter (or click OK).
Remember this command, you can use this whenever you like.
(Notice we changed sageSET to sageRUN.) (The number has to be the same as you used above.)
5 – Your new task will do its thing. This can take a while if you’ve got a lot of stuff to clean.
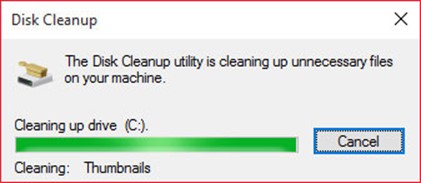
REBOOT when finished!
Disk Cleanup Freeware
There are 2 cleanup tools I use on all my PCs. Because these programs change often (like monthly) I do not install them. I use the portable versions. If you want to install them that’s fine.
All these tools have the ability to delete passwords. Be very, very careful you don’t delete them by mistake.
On all my machines I use 2 cleaners:
Wise Disk Cleaner – Daily cleanup. Home page (w/installer), Download page w/Portable Version. In the name of all that is Geeky, DO NOT download the registry cleaner by mistake.
Cleanmgr+ – Every so often cleanup. Weekly, or monthly, or before I make system images.
Wise Disk Cleaner
Wise Disk Cleaner is my favorite free disk cleaner. I set it aggressively and use it every few weeks or before I make backup images. You can download it here.
I choose everything EXCEPT anything that says password. Start checking or unchecking boxes.
When you are finished selecting boxes double check your selections. I’m not kidding, I’ll wait …
…………………………………………………………………………………………………………………………………………………………………………………….. OK. Now click the Scan button.
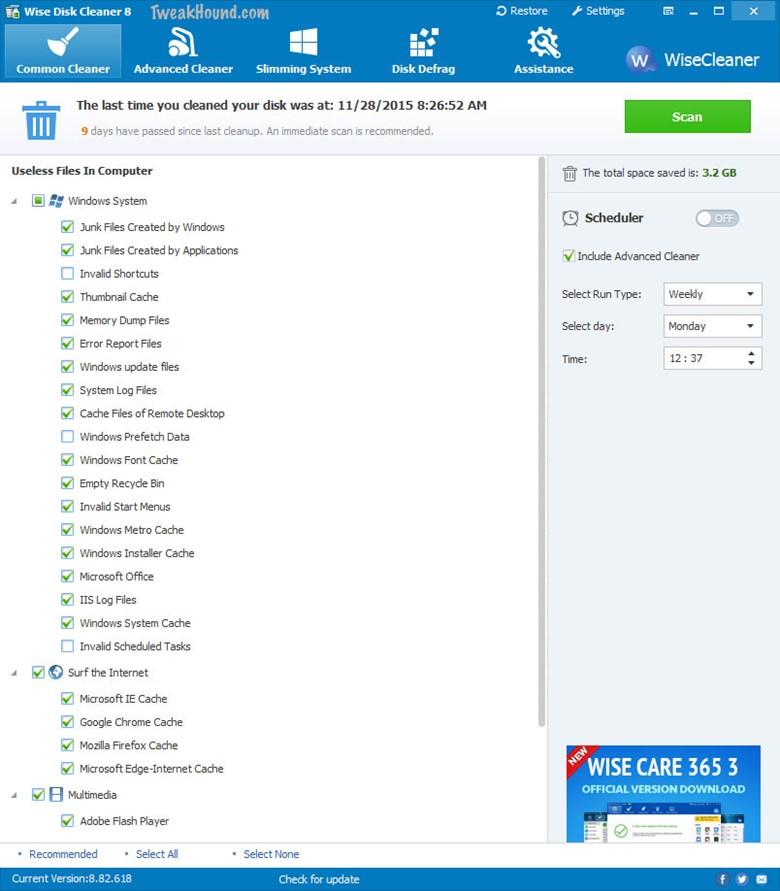
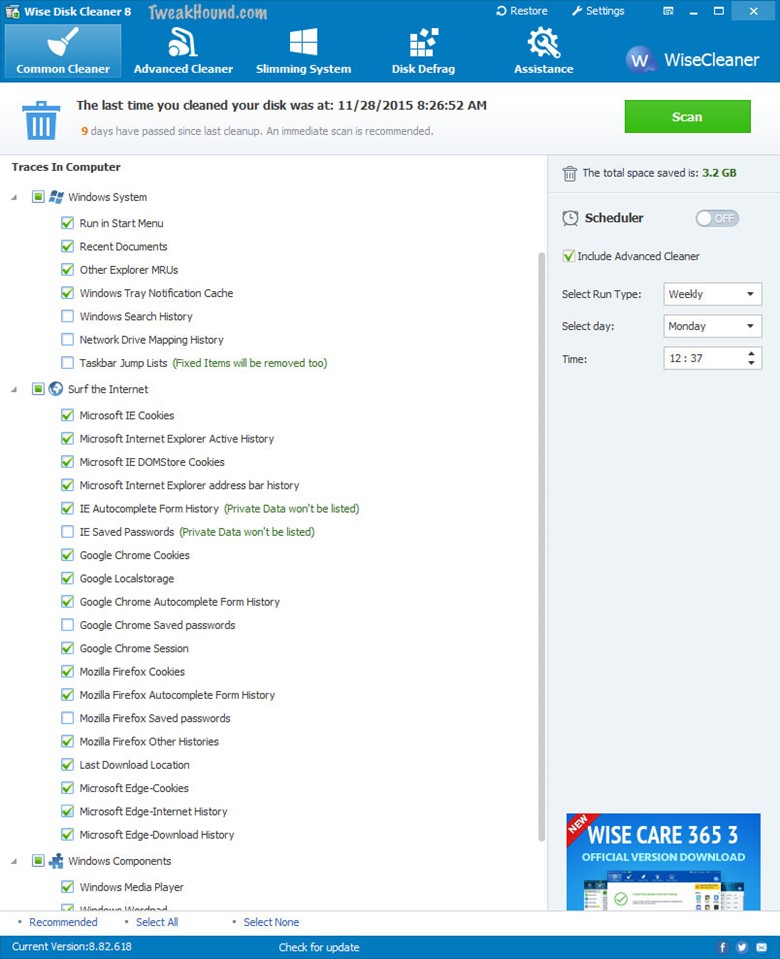
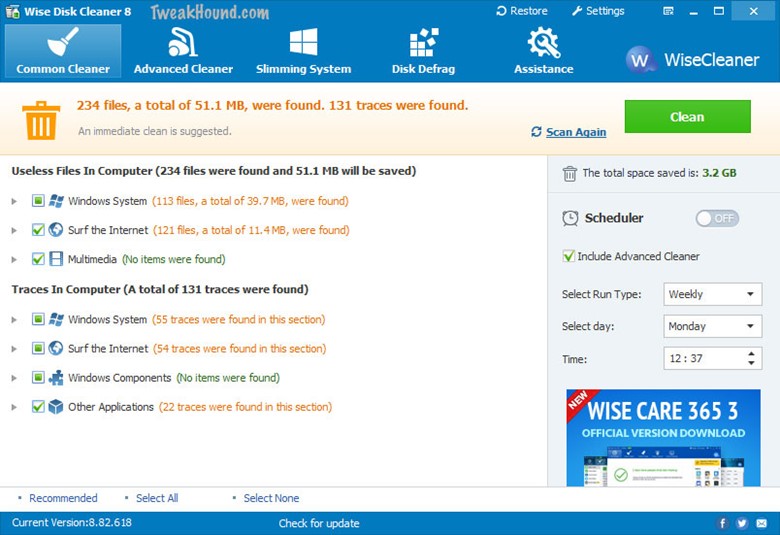
When the scan is complete you can click the Clean button. This is not reversible! Reboot when finished.
Cleanmgr+
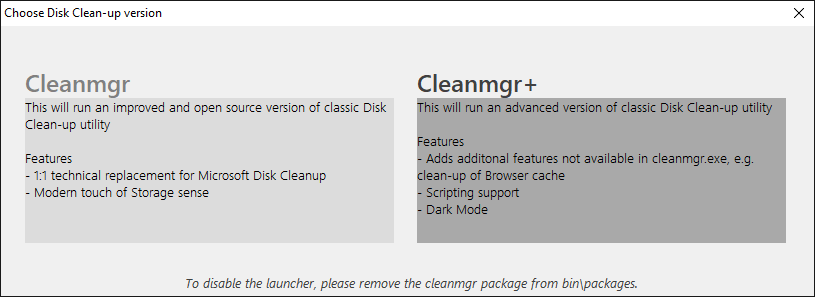
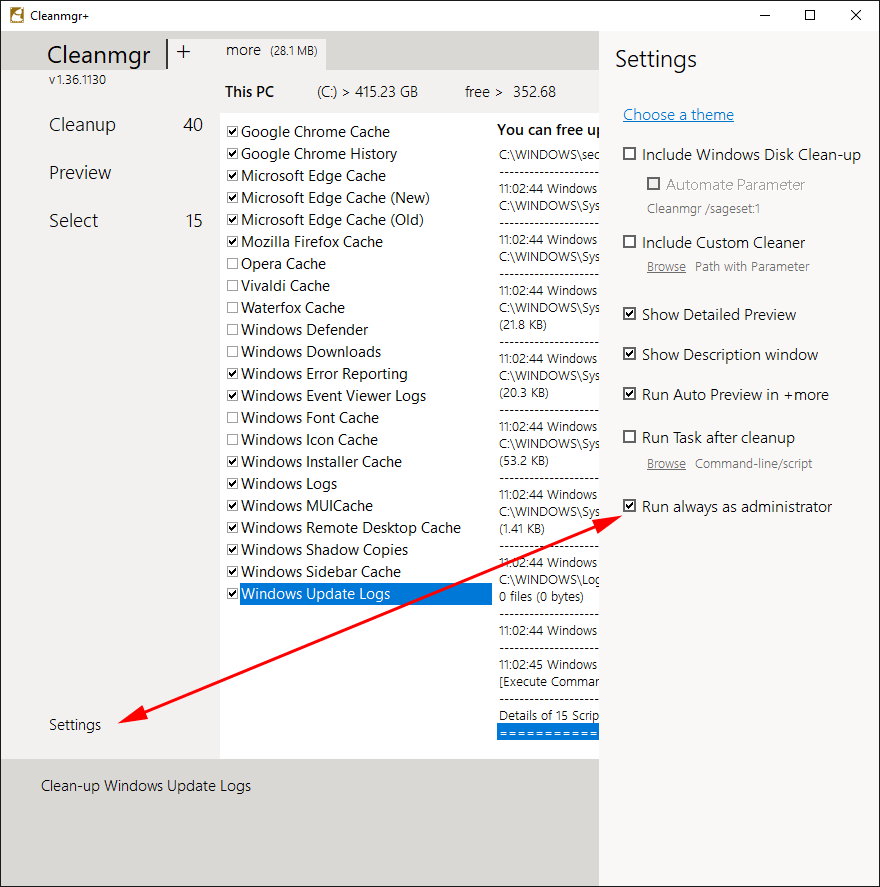
I only use the Cleanmgr+ app on the right. Below are the options I choose (Note – there are 2 tabs/sections).
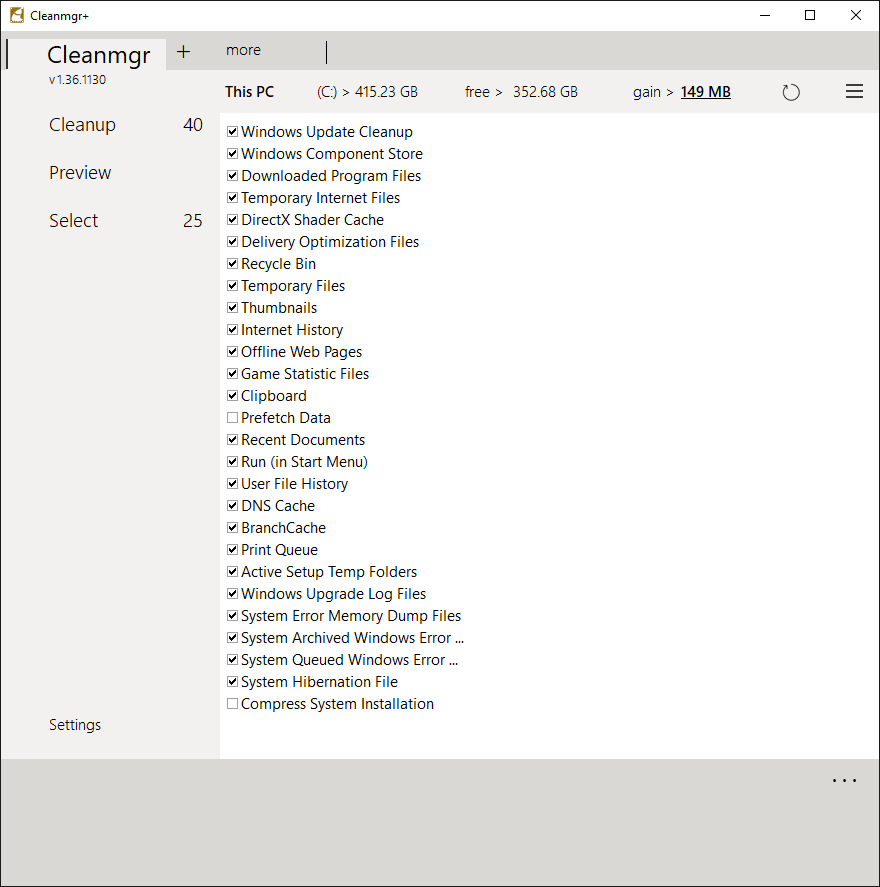
Some items require you to run this app as Admin.
I don’t have Opera/Vivaldi/Waterfox installed…
I would prefer this app not show programs I don’t have installed, but what ya gonna do?
Manage Startup Items with Autoruns
note – I am aware that Win 10 Task Manager has a section to supposedly manage Startup items.
IMHO as of this writing it is broken: Win 10 – Boot Performance Monitoring Event Gone
Autoruns has long been one of my favorite programs. For the purposes of this article, we will just cover controlling startup items from the Logon tab. I encourage you to explore the program further. Autoruns description from the help file:
This utility, which has the most comprehensive knowledge of auto-starting locations of any startup monitor, shows you what programs are configured to run during system bootup or login, and what extension load into various Windows processes, including Explorer and Internet Explorer. A “Hide Signed Microsoft Entries” option helps you to zoom in on third-party auto-starting images that have been added to your system.
This is the way I use Autoruns. After downloading and extracting Autoruns, copy the folder to the root of your C: drive or your My Documents folder. Now open that folder and right-click on autoruns.exe (not autorunsc.exe) and choose Send to > Desktop (create shortcut). Now go to the shortcut on the desktop, right-click it and choose Properties > Shortcut tab > Advanced… button > check the Run as administrator box. Click OK > Apply > OK. You can now Pin that shortcut or copy / paste it to the Start Menu as I do. You can delete the desktop icon if you wish.
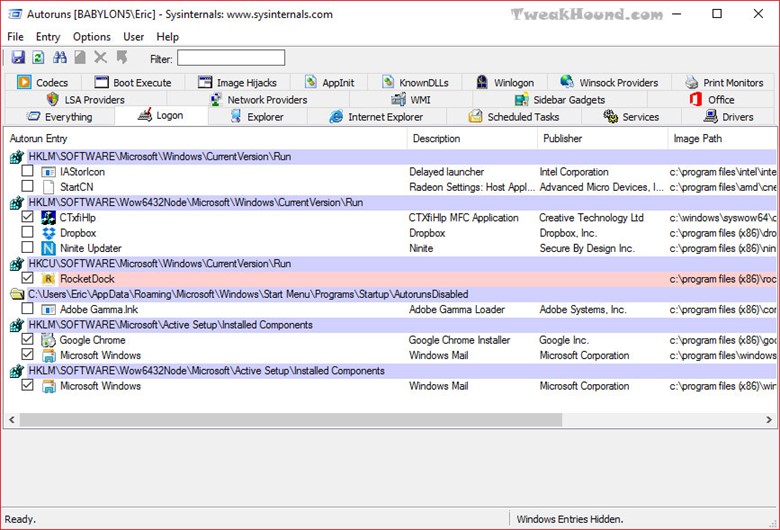
Now click the icon to open it > click the Logon tab > uncheck the things you do not want to start with Windows. You can click File > Save or the changes will be applied when you close the program.
Defrag & Optimize
Defrag
Defrag is part of the Windows 10 Maintenance process and was most likely partially configured during initial setup. For some reason Microsoft has decided to ditch the name defrag and call it optimize instead.
You can run defrag any time from Windows Explorer. Just click the Manage tab and the Optimize button.
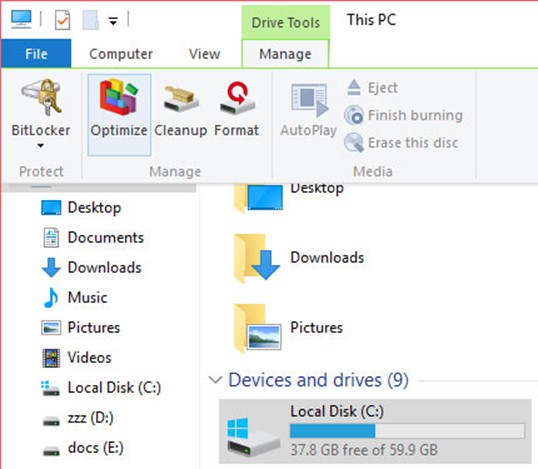
SSD users you SHOULD NOT disable defrag. For SSDs, Windows 10 will run trim and not defrag.
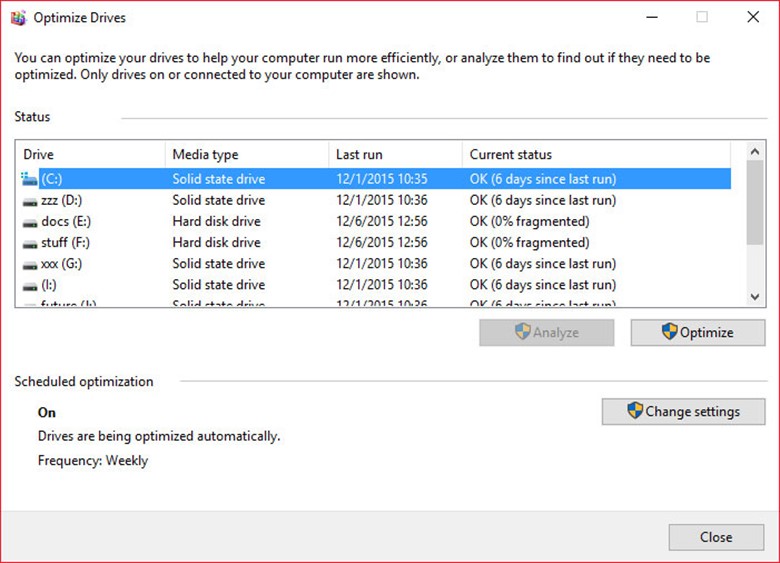
To open defrag: Press the Windows + R keys and type dfrgui (or type dfrgui or defrag in the Search box). Click Optimize to defrag now. Click Change settings to configure or turn off defrag.

Just a quick question regarding the block Cortana registry tweak. Is this still the current working method? I had read that this has changed a few times over the last few releases of Windows, just confirming it still works.
Thanks for your incredibly thorough guides over the years, it’s always been a great source of education.
Nate
AFAIK. I would advise using O&O Shutup10 to make sure.